Converting Our NV1500 Campervan in 3 Months
Just a Heads up, friends!
Some of the links on this site are affiliate links. That means if you click through and make a purchase, I may earn a small commission at no extra cost to you. It’s like tossing a few coins in my tip jar to help fund my next cup of road trip coffee.
I only recommend products, places, and gear I genuinely love and would take with me on adventures. So, thank you for supporting Tiffany Denae – one caffeinated click at a time!
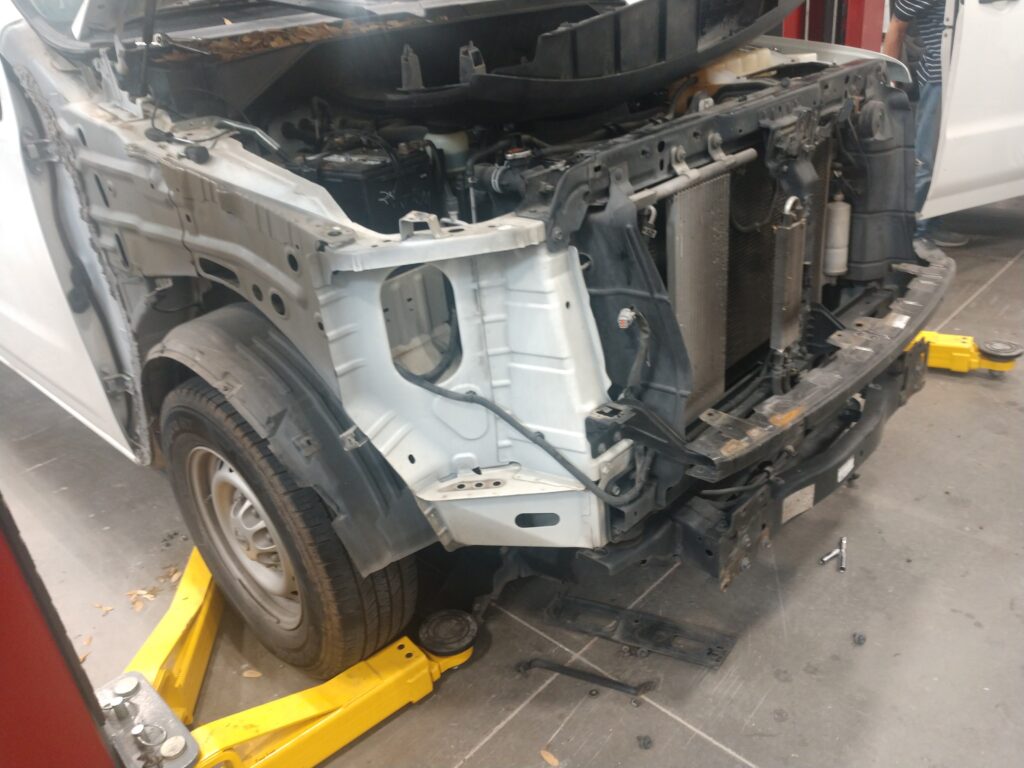
Our NV1500 campervan came into existence by pure coincidence. Here’s a condensed, over-simplified version of the story as told by Brandon and edited by Tiffany.
The company I work for decided to retire it and offered to sell it. After a brief discussion, we settled on a number I couldn’t refuse. It was sent to our maintenance shop for an oil change before I took delivery.

Our NV1500 Campervan History
Of course, the van I am referring to is the 2012 Nissan NV1500. At the time of purchase, it had 175,000 miles on it and had the motor replaced about 50,000 miles prior. This particular van was initially used in our Dallas market before being transferred to Houston for a few years.
Upon arriving back in Dallas, it was placed in service as the company’s mobile wheel and tire van. At work, we sometimes handle wheel and tire theft jobs where the vehicle has been dropped on logs, blocks, bricks, or directly on the ground. This was the rescue vehicle, so to speak. We stopped handling these types of jobs for a while due to a shift to other kinds of work and began to trend towards smaller service vans. At that time, the decision was made to retire this beast from service rather than reassign it to a mobile technician.
For those unfamiliar with the Nissan NV line, the NV is available in several different configurations. Both high and low roof options are available for the 2500 and 3500. The 3500 is also available as a passenger model, featuring rear air conditioning and a full interior with multiple rows of seats. The 3500 is offered only with the V8 engine, while the 2500 is available with either the V8 or V6 engine. This van, being the 1500, is available in only one configuration: Low Roof, Cargo, V6.
Our Original Plan
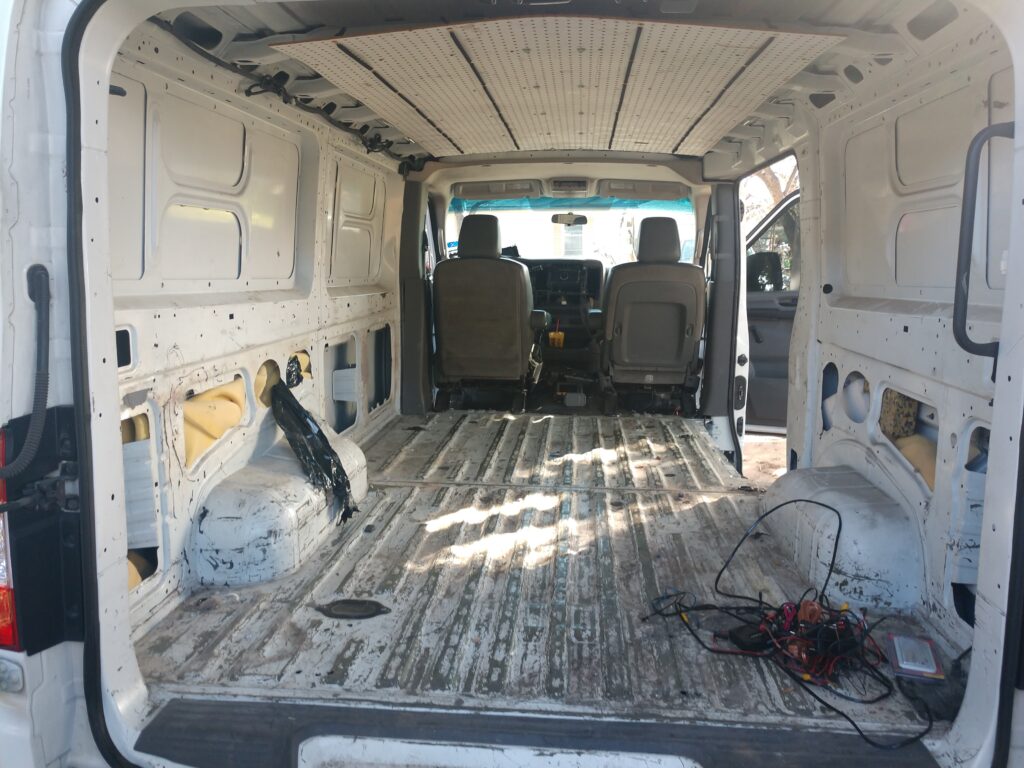
The original plan was to keep this inexpensive vehicle around for running parts, materials, and completed jobs so that I could part ways with my, at the time, 20-year-old F150, which is nearing 300,000 miles. So, we started outfitting the van on the cheap. I assembled a kit of backup sensors and a rearview camera using leftover parts from prior jobs. I purchased the cheapest name-brand double-DIN DVD screen I could find that had Bluetooth and installed some leftover bucket seats from a hot rod project I had bought a few years ago.
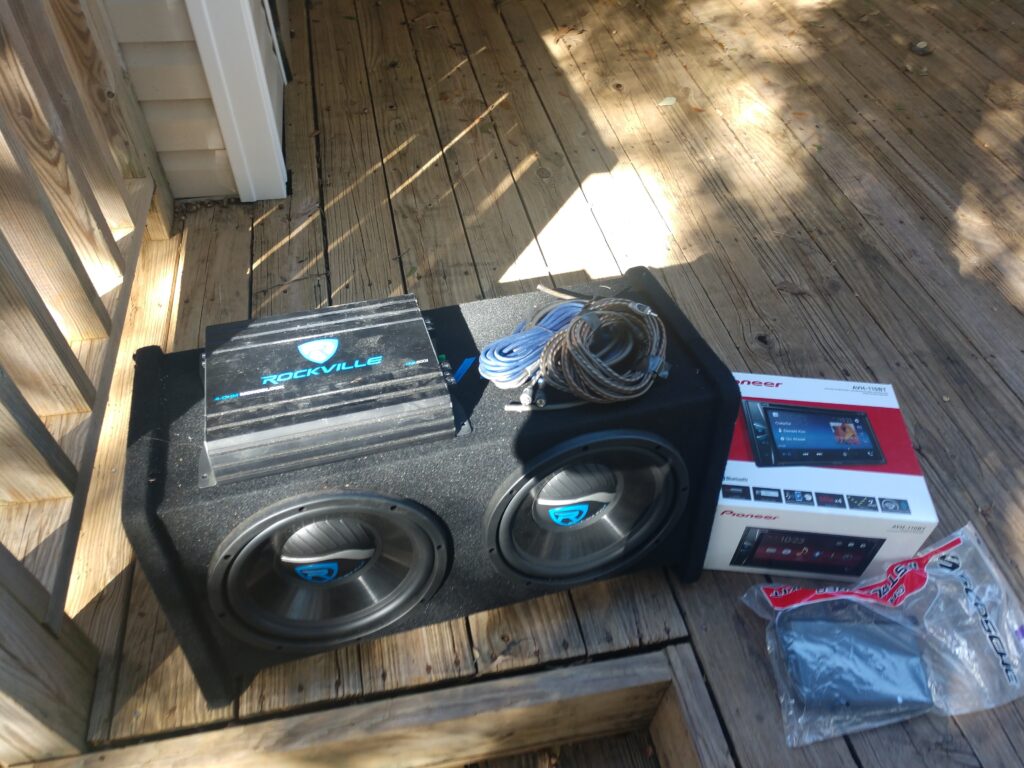
The van stayed in this configuration for about 6 months before a few changes were made. The radio soon got a pair of 10″ subwoofers and an amp that came out of a totaled vehicle headed for the salvage yard, and the decision was made to insulate the floor and roof to quiet things down.
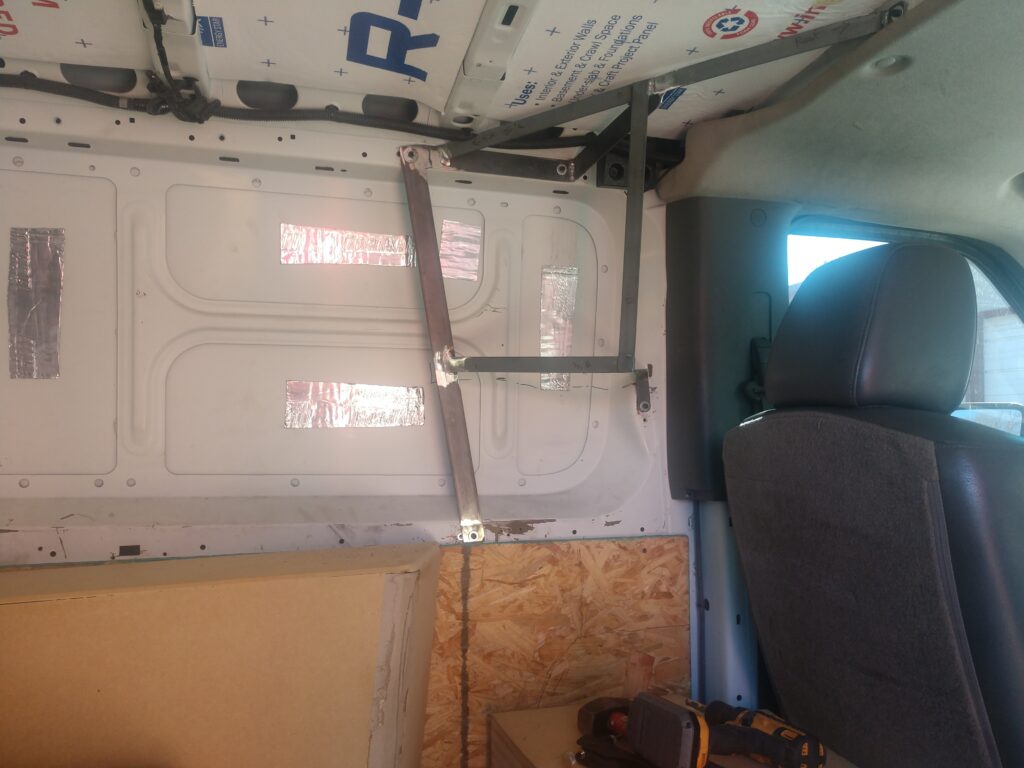
The thin underlayment was added to the floor before 1/2-inch plywood, and the space was finally finished off with leftover carpet from the SEMA display at work the year prior. Did I mention this was all being done as cheaply as possible? Sound deadener was installed on the roof and side panels – yep, you guessed it: leftovers from another job. 1-inch foil-backed foam insulation sheets were cut down and bonded to the roof and side walls. The sides also received a layer of carpet jute. Keeping with the theme, the jute pad was salvaged from leftovers and is still in the van today.
Upgrades from another NV1500
In February 2019, another of the full-size vans came up for review to determine whether it needed to be retired or would be put back on the road. It was another NV1500 with only 135,000 miles, but it had sustained significant damage around the rear bumper and on the quarter panels. Before retiring it, we attempted to bring it back up to serviceable condition. None of the body damage was dealt with, other than a headlight and both bumpers. The van also received new brakes all around and a steering gearbox to eliminate the wandering that it had when driving down the highway.
After all that work, the new steering gear had faulty internal valves that the supplier would not warranty out. Rather than buy another new box for $800, this van was retired in April. This van was offered to me for sale, but for nearly 4 times what I paid for the other. I declined, and it was subsequently auctioned off. Before going to auction, I was allowed to swap out any parts that I wanted for mine. Since my van had sustained damage around the side door handle from an attempted break-in in Houston, and the fender was dented, I replaced these parts. Of course, I couldn’t pass up the brand-new bumpers either. The sliding door was pretty interesting, considering I was on crutches with a broken ankle at the time.
At this point, I estimate that the total investment in the van (excluding the purchase price) was approximately $250-$ 300, with an additional 10 hours of labor. We continued to use the van this way for a while, taking it grocery shopping, hauling side projects back and forth, and even taking a road trip to the Gulf Coast for a few days. This is where my life starts to get a bit complicated…
When the Decision Happened
So, Houston – road trip – complicated… Still following along?
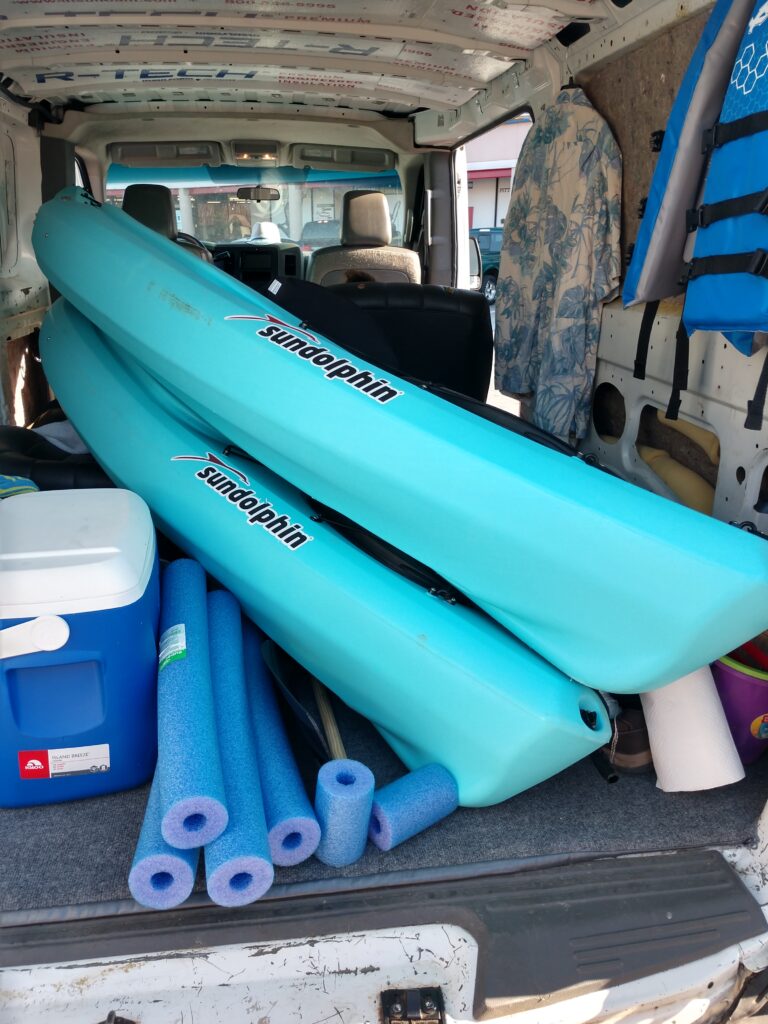
We set a course for Houston with beach and fishing gear in the back and the kids in the sketchy bucket seats: Galveston, Kemah, the whole 9 yards. We looked into renting jet skis, at $100 each for an hour, this would have been a good time, but a terrible investment.
Instead, we decided to pick up a couple of kayaks and get on the water that way. For the short trip from where we bought the kayaks to the bay where we put them in the water, the kids were a little cramped but managed, as the boats took up a lot of interior space. This would not work for the return trip, considering it would take about 4 1/2 hours to get home.
Lightbulb!
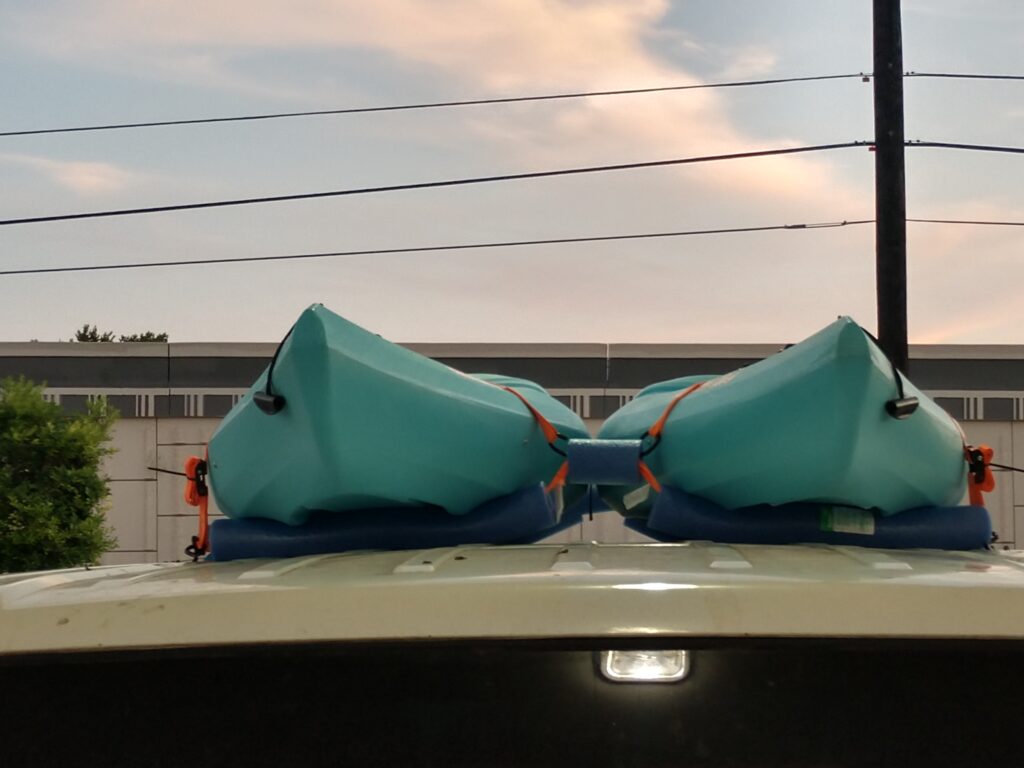
Utilizing my engineering expertise, we set a course for Harbor Freight. Zipties, ratchet straps, and a few other pieces of hardware… Hey, somebody run next door and get me a couple of pool noodles. Now we’ve got it.
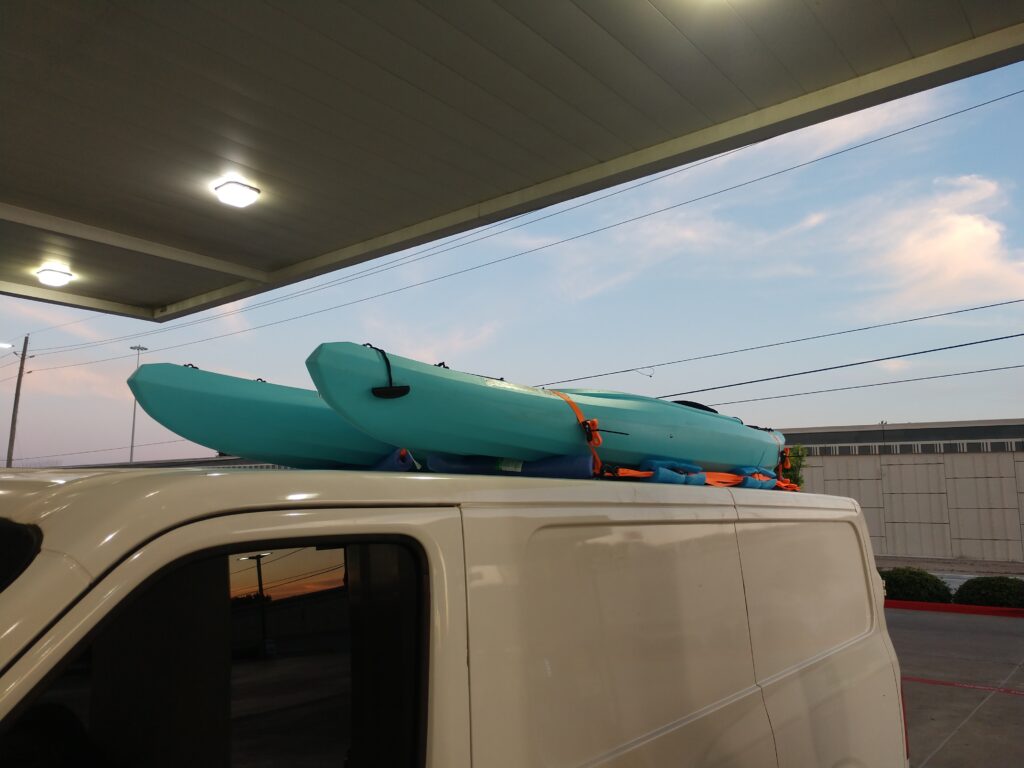
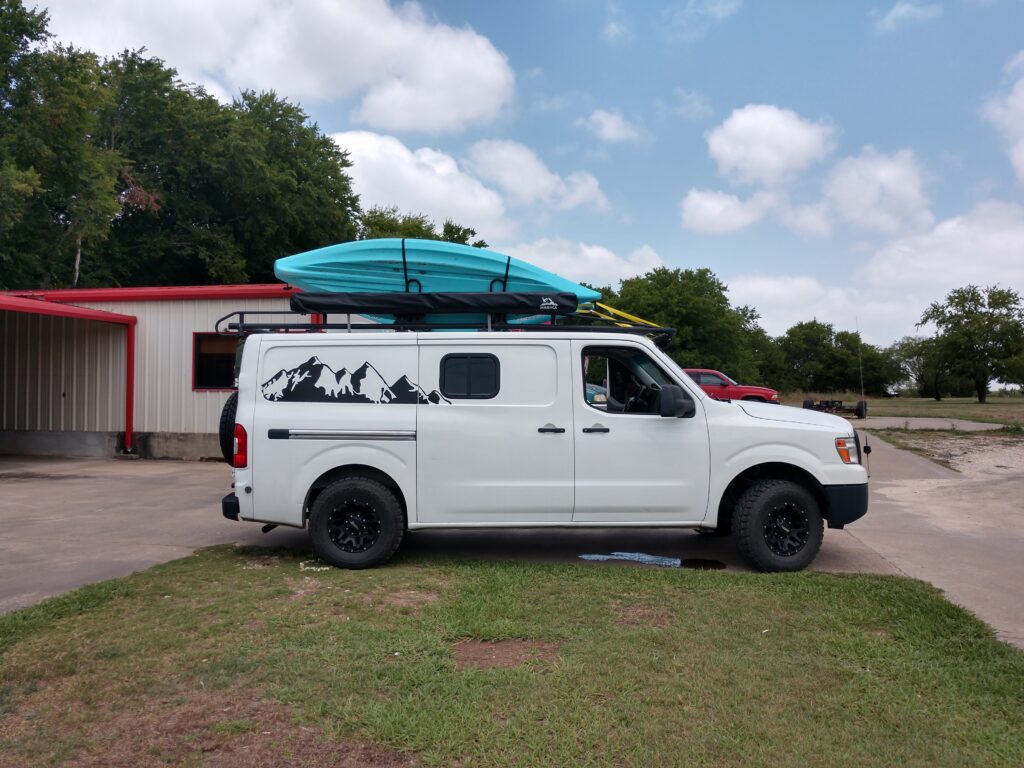
Using the straps and D-rings, I was able to construct a cradle system that held the kayaks off the roof, separate from each other, and securely in place for the entire drive home. The pool noodles helped keep the hardware from rattling against the kayaks and prevent damage to the paint. This system worked very well for our purposes, and we were quickly able to reclaim all of our interior space.
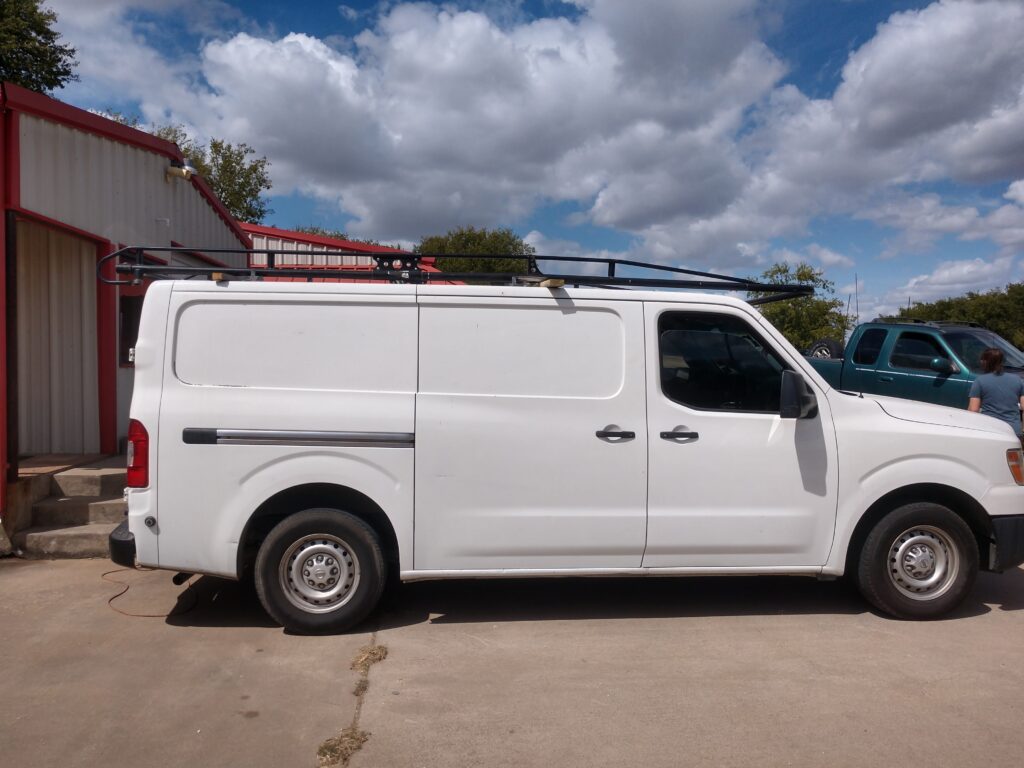
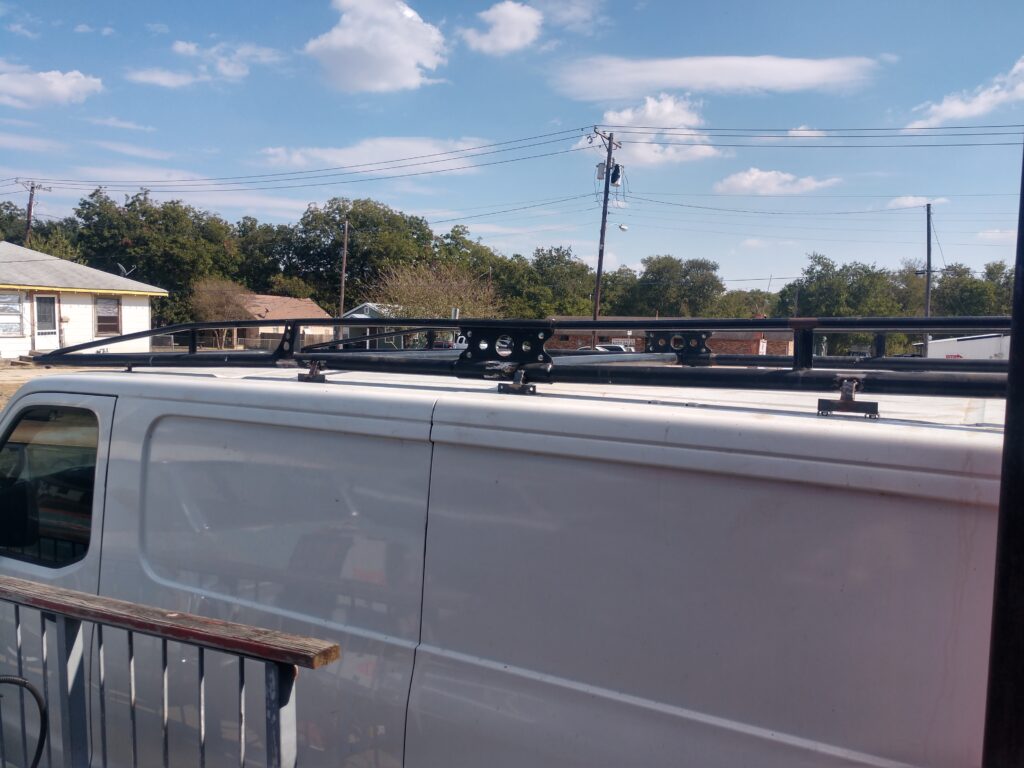
BUT… (there’s always a but, isn’t there?) It was a bit of a pain to have to construct and secure this strange contraption to the roof every time you wanted to get out on the water. Back to the drawing board, or in this case, Craigslist. Roof racks? Too expensive. This is supposed to be cheap, remember? Hmmmm, how about a ladder rack? Sure enough, $100 later and a bit of interesting loading and strapping skills, we’ve got ourselves a ladder rack strapped to the roof, upside down, sticking out front and rear.
After some quick cutting, grinding, and welding, the rack bolted on perfectly. The kayaks fit. We can even install a light bar to help see on the backroads at night.
If you’ve been paying attention, you realize that this is the moment where things went from slightly complicated to a downward spiral.
Tires for the NV1500 Campervan
We now have this awesome road trip machine, which makes hauling our stuff a little easier. This thing really could turn into something. However, it looks a bit dull; that won’t work.
Chances are, you’ve never tried to cram the largest tires you can under a cargo van with a sliding door. I can now say that I have. 34 x 11.50. That’s it; she won’t take any more without cutting or modifying the door. Even finding wheels at this point becomes complicated.
A half-ton rated cargo van with eight lug heavy diesel truck wheels? Sure, I’ll go with that. Let’s keep in mind that most trucks don’t have to worry about that pesky sliding door, though. Finding the right offset becomes a bit of an issue, unless you are willing to just buy some random wheels that fit but don’t really “FIT”. I quickly realized that using used wheels was not going to happen unless I wanted to do away with the side door, which was not going to happen.
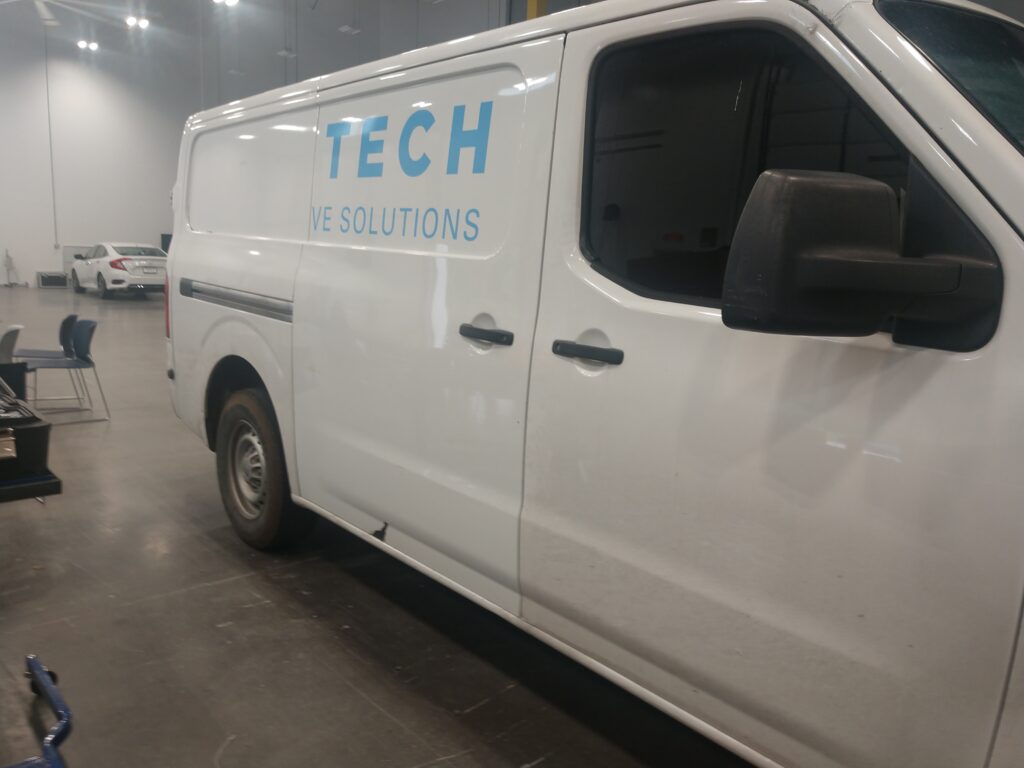
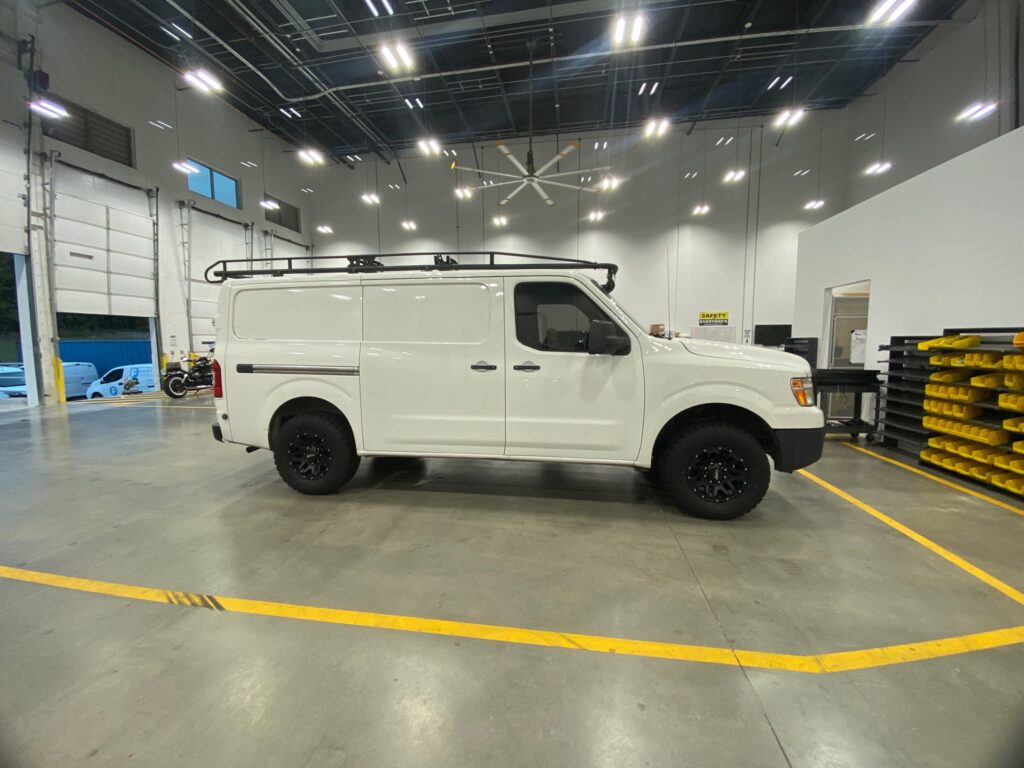
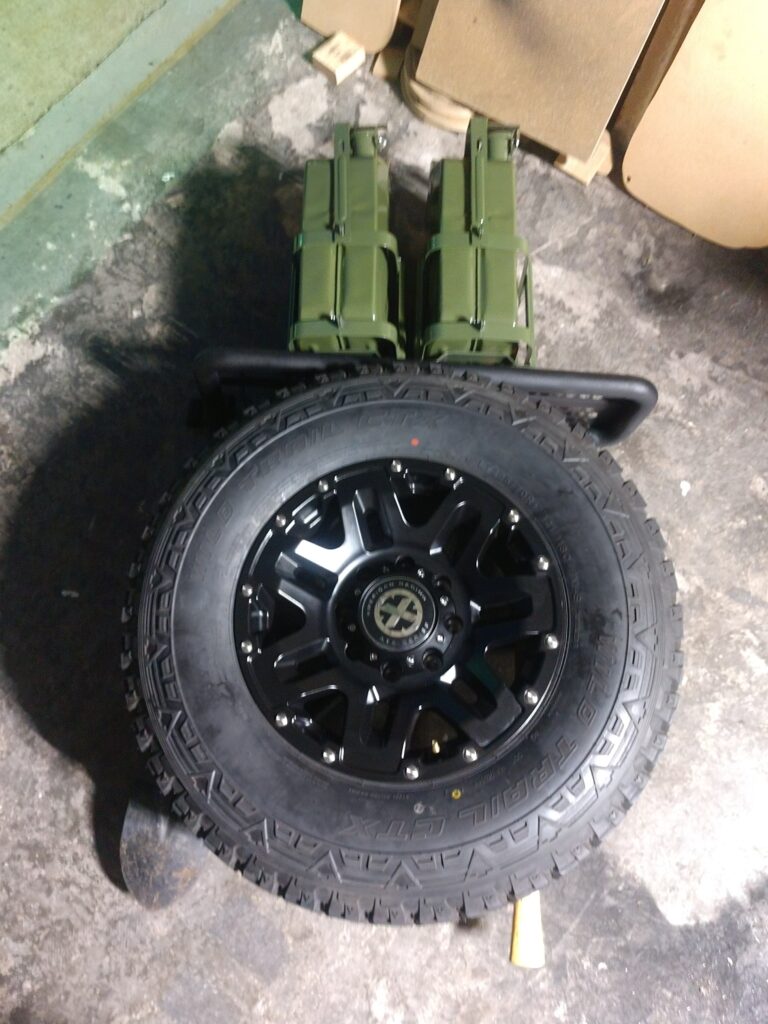
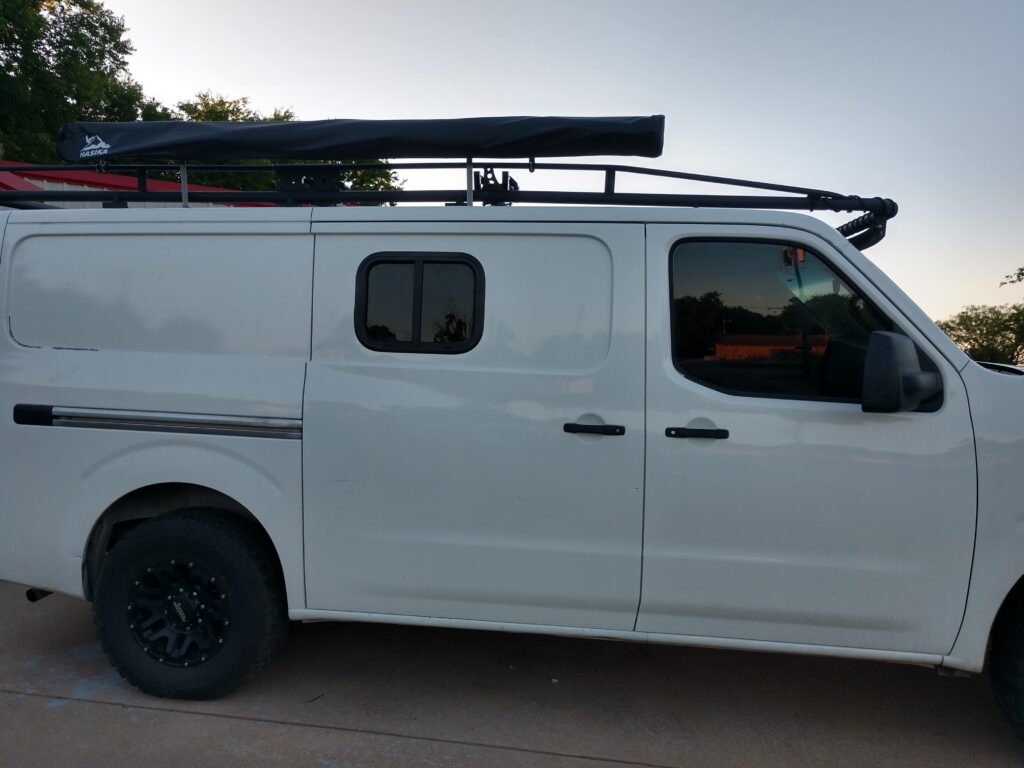
I finally settled on a set of American Racing Yukon AR200s in 17×9 with a +18 offset. For most readers, this information is absolutely useless, but for fellow NV owners, these measurements are gold. Paired with El Dorado Wild Trail CTX tires in 295/70/17 and a 3/2 lift from Supreme Suspension. When installed, this lifted the front end almost 4 inches. We will revisit the suspension later, as I now know some things that I didn’t then. But look at this. Completely transformed the look.
Interior Work on the NV1500 Campervan
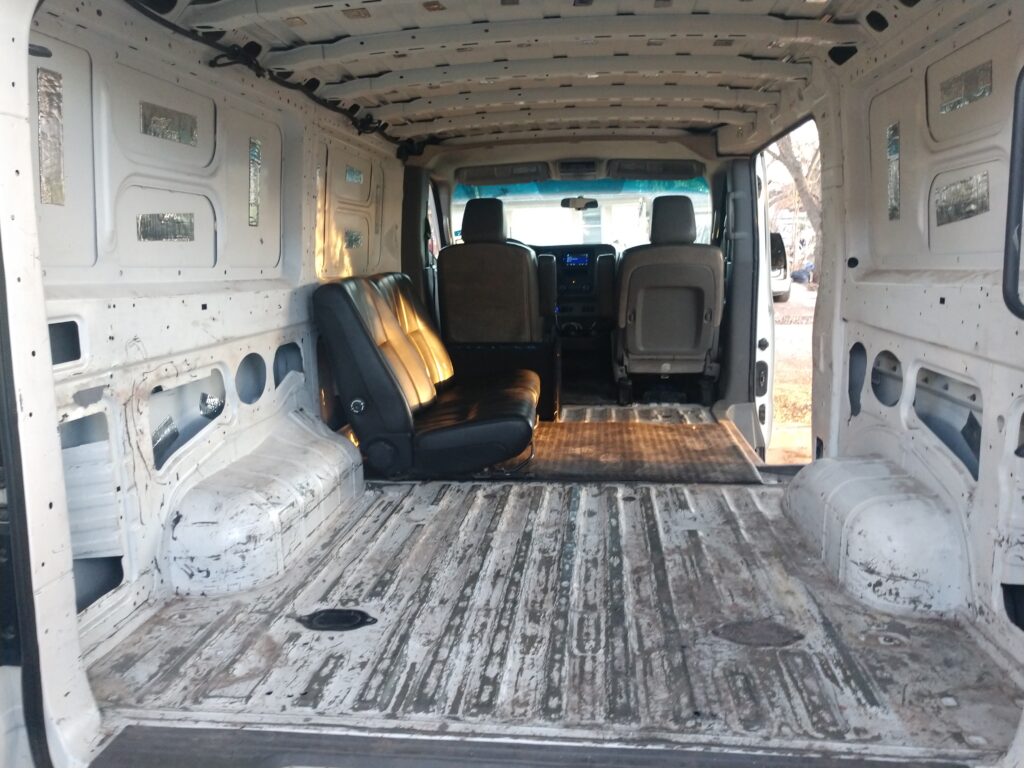
At this point, the NV1500 Campervan look is starting to come together, but the interior still leaves a bit to be desired. The bucket seats are not going to cut it, and there is really no way to organize things. Not to mention, the radio sounds terrible in the back, and there is nothing to look at. Poor kids.
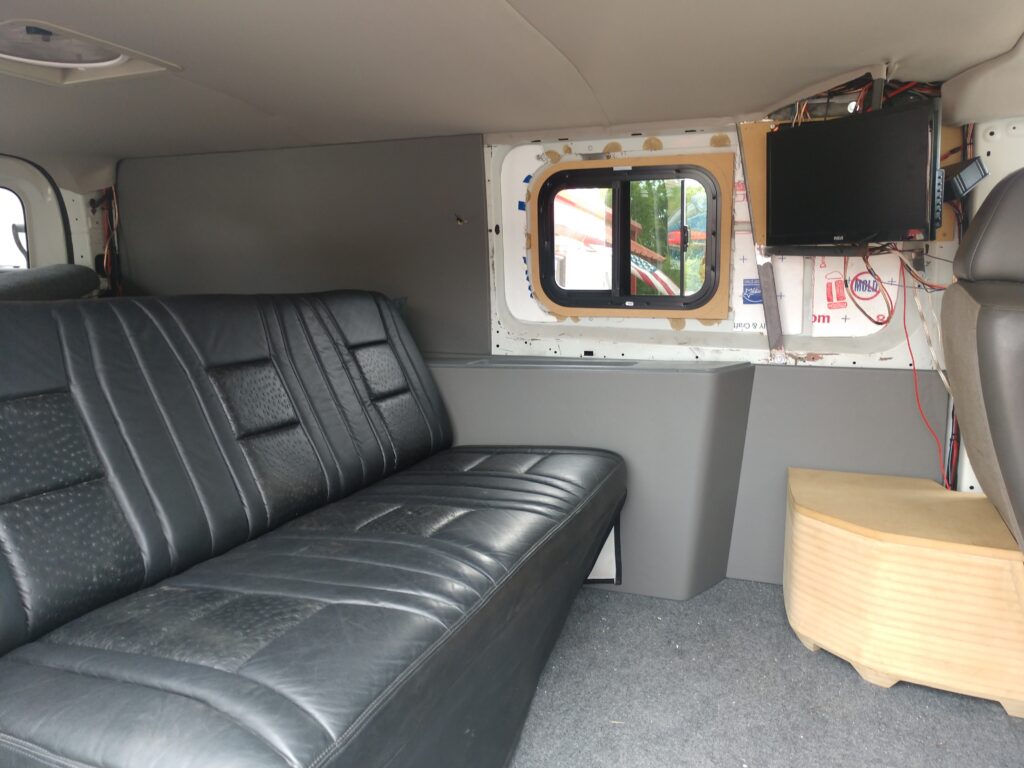
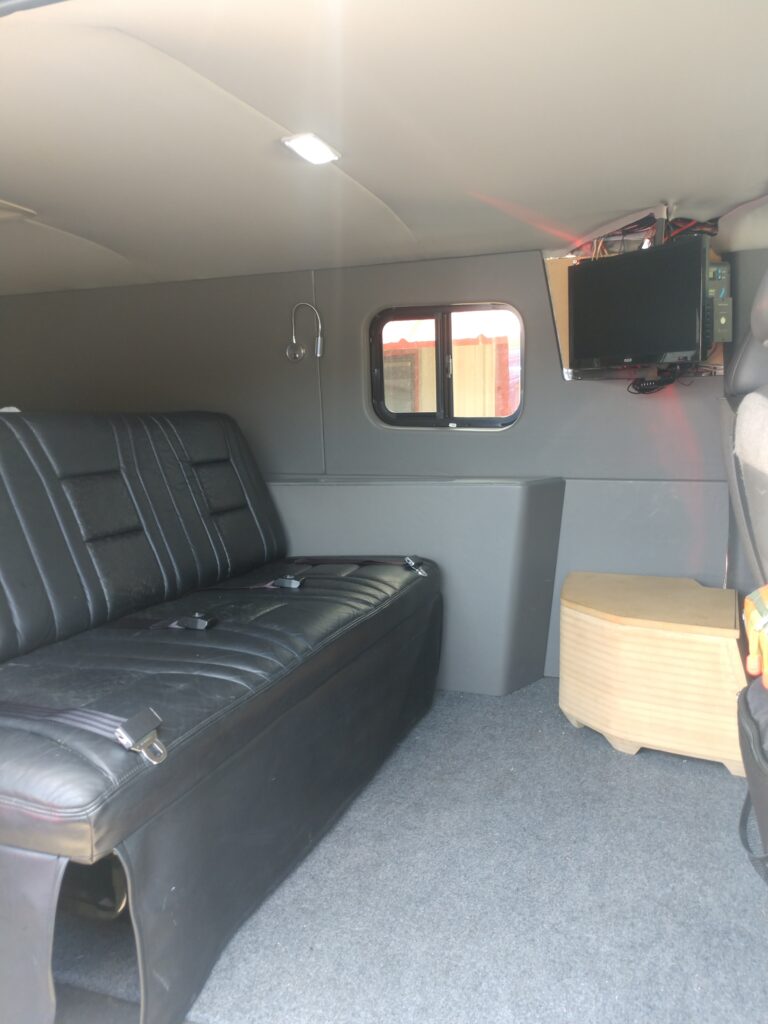
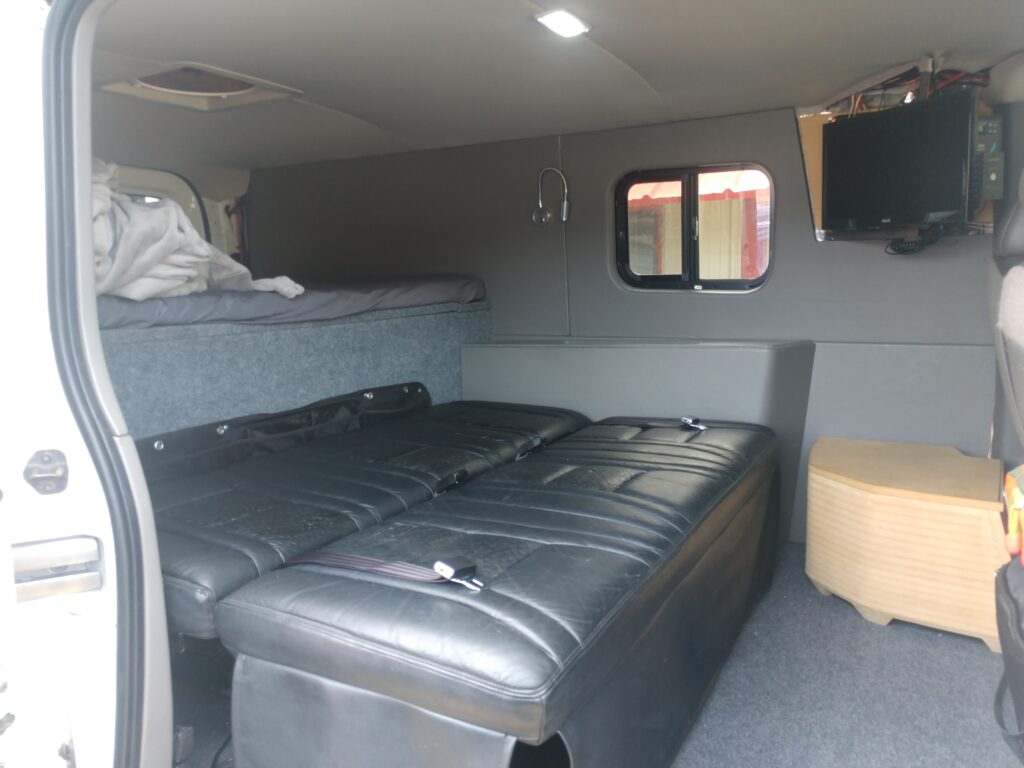
The van will obviously need to be comfortable if it’s going to be the new road warrior. Back to the marketplace, a few searches turned up several crusty velour conversion van seats – not the aesthetic (or smell) we’re going for here. Most of them ended up being either too big when folded down or too wide. I managed to find this wonderful (See: Sarcasm) faux ostrich-covered power-folding seat. It will be recovered eventually, but it isn’t so atrocious that it can’t be used as is for now. Cost – $100. And it works. And it’s decently comfortable.
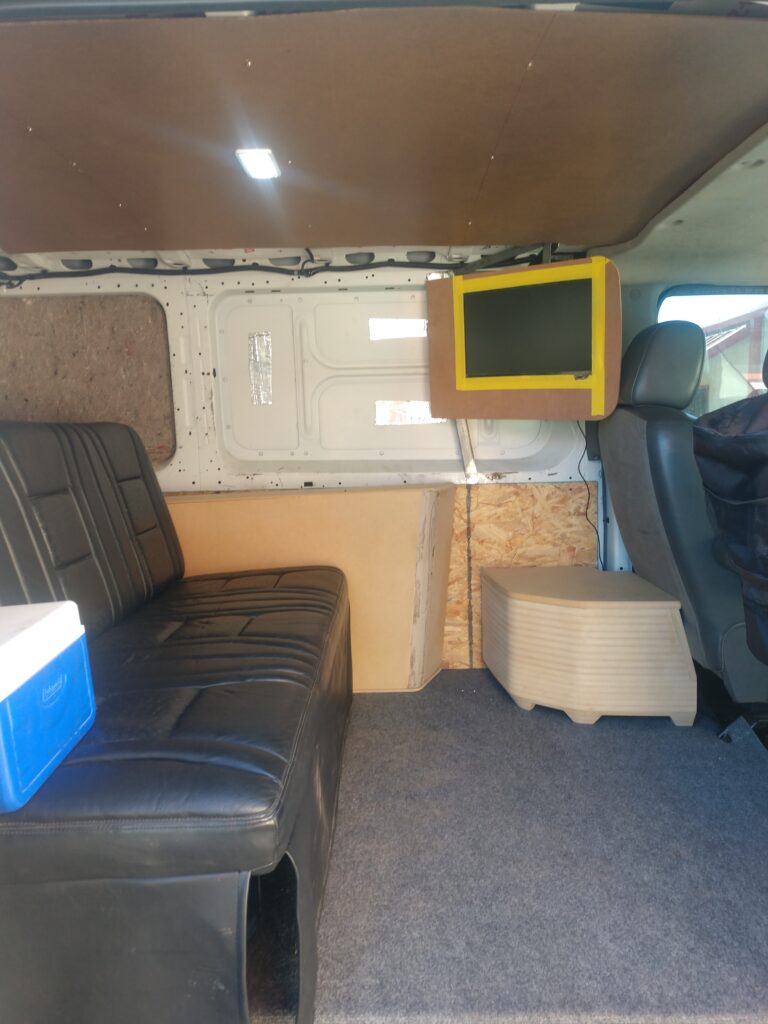
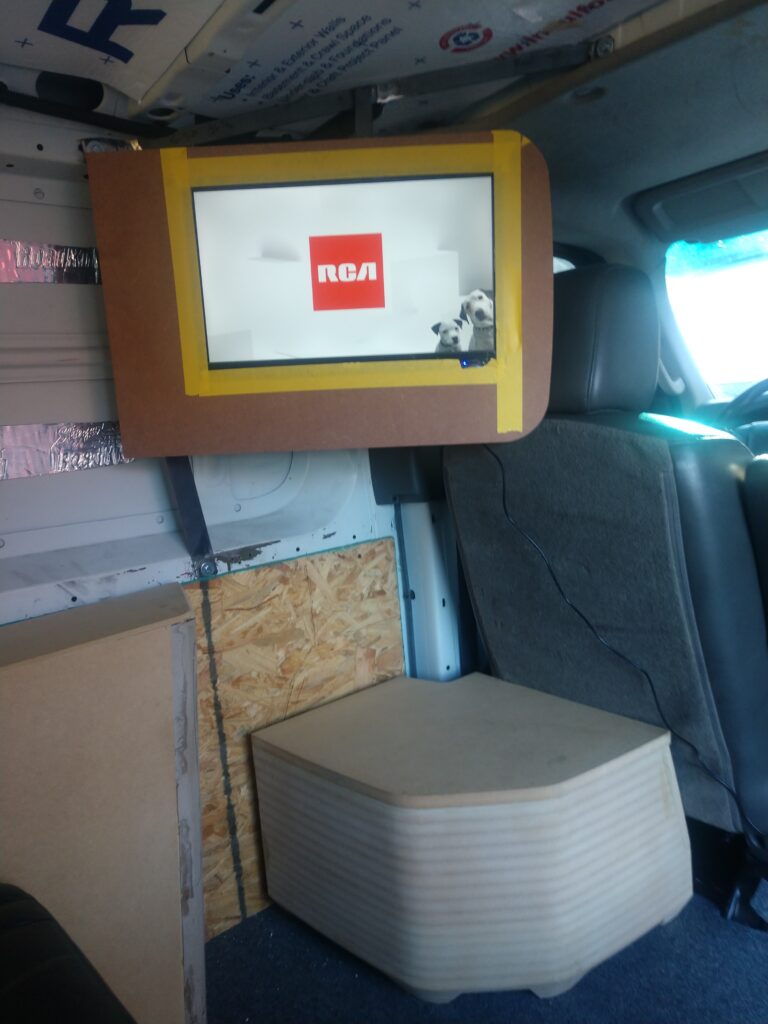
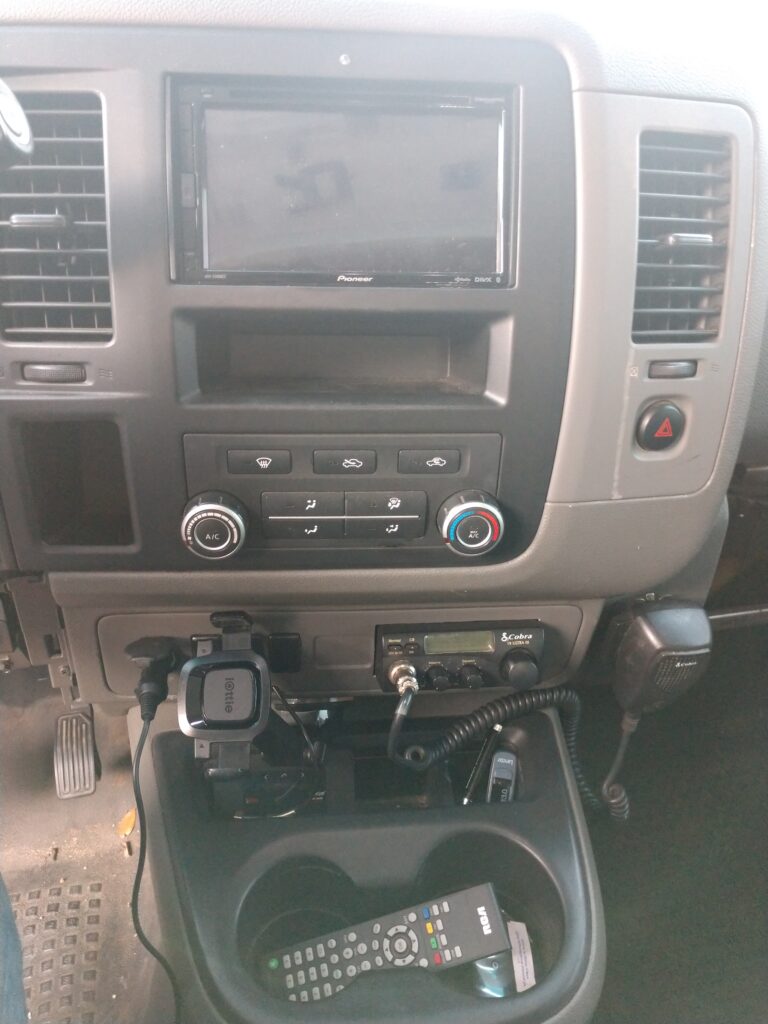
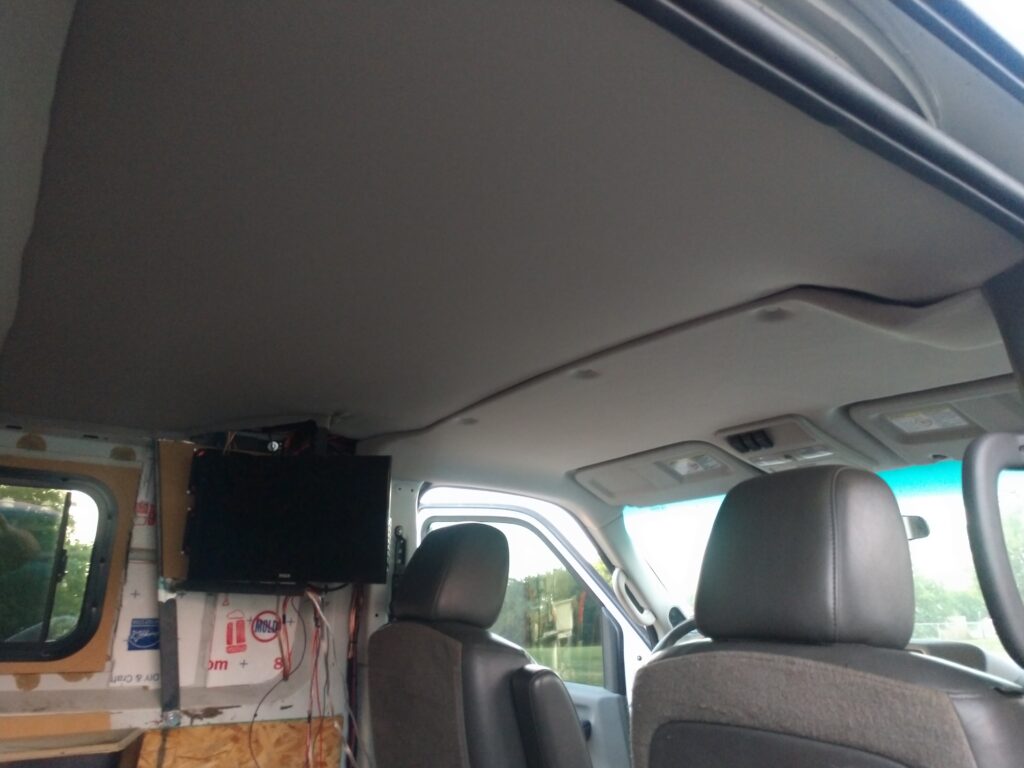
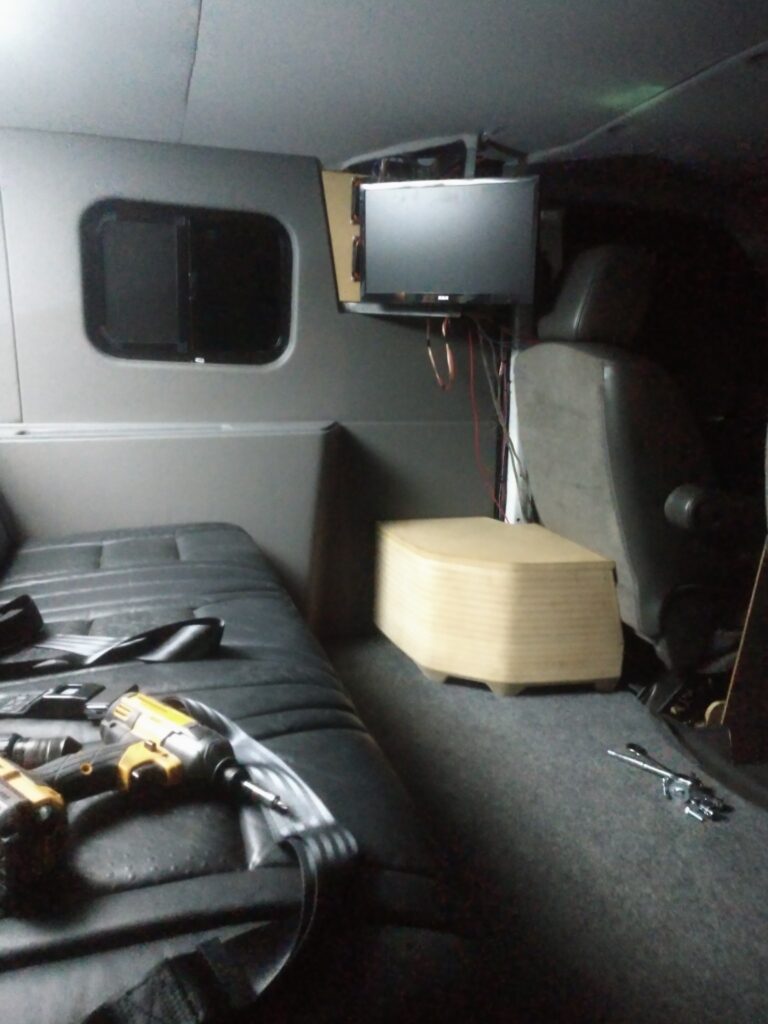
Now that the seat is taken care of, what about the rest of the NV1500 Campervan? There’s more to an interior than just adding flooring and a seat, right? Throw a bit of wood, glue, and fabrication skills into the mix, and it starts to take shape quickly. The addition of a TV for the rear seats means that the current in-dash unit is not going to cut it.
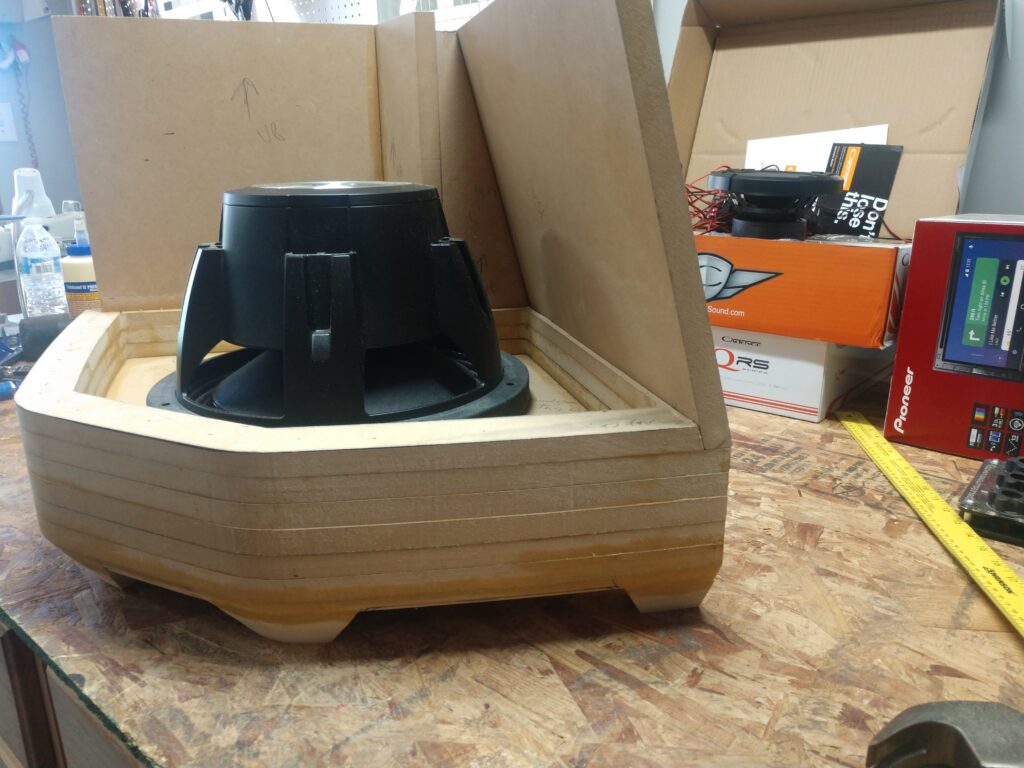
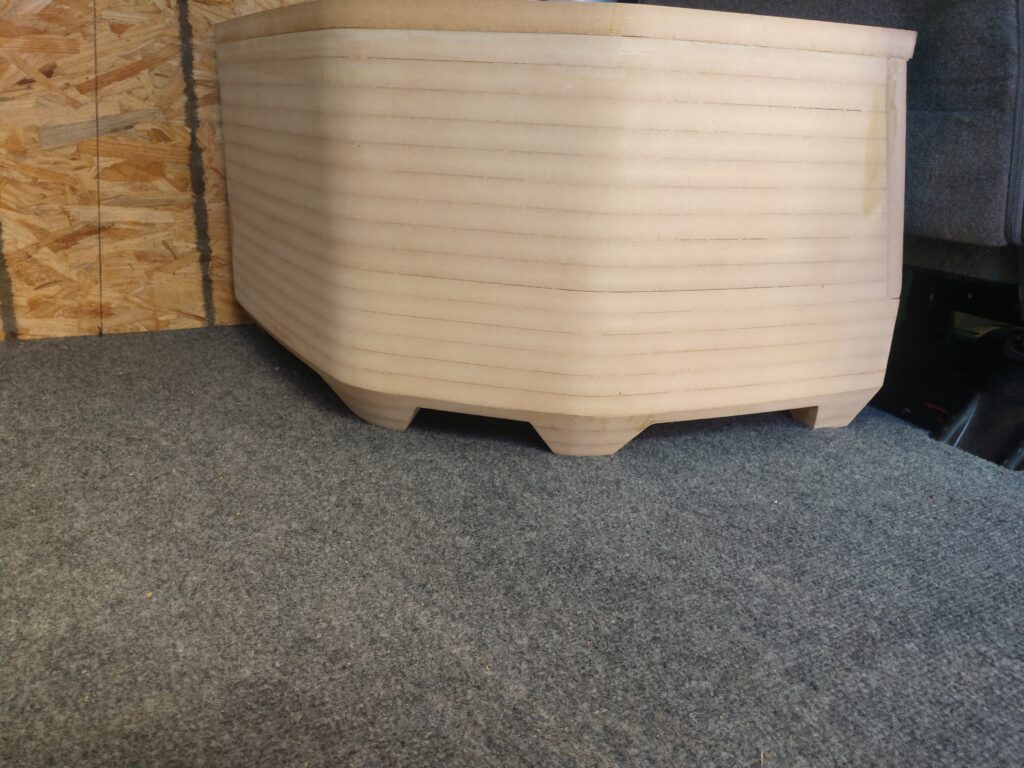
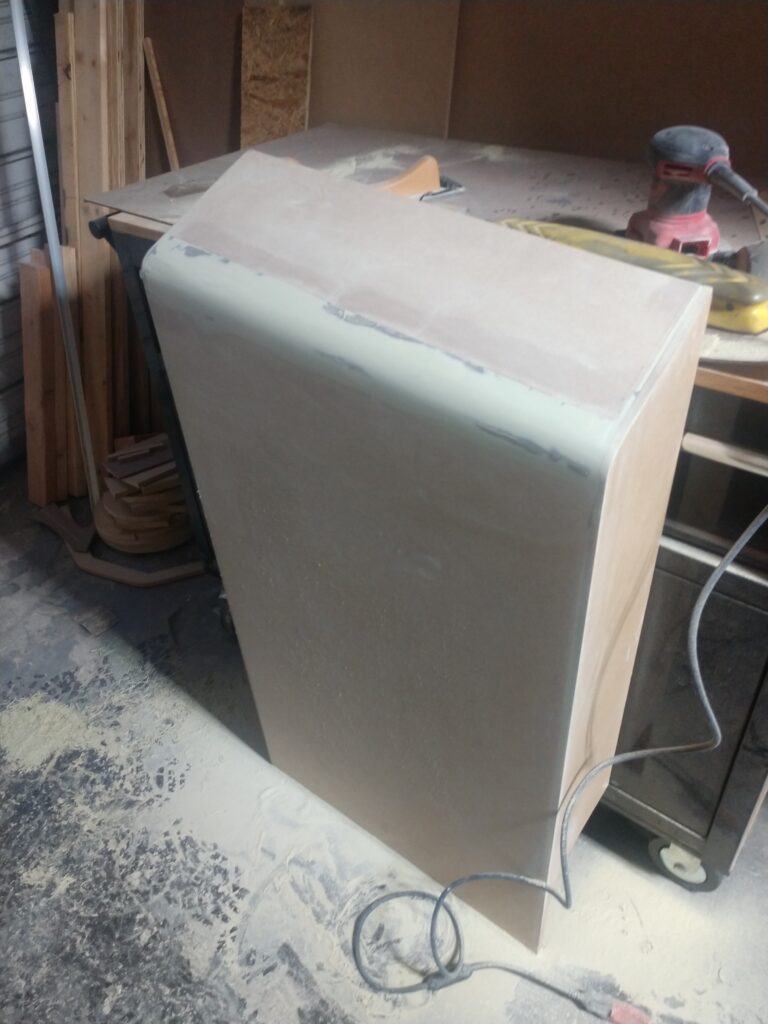
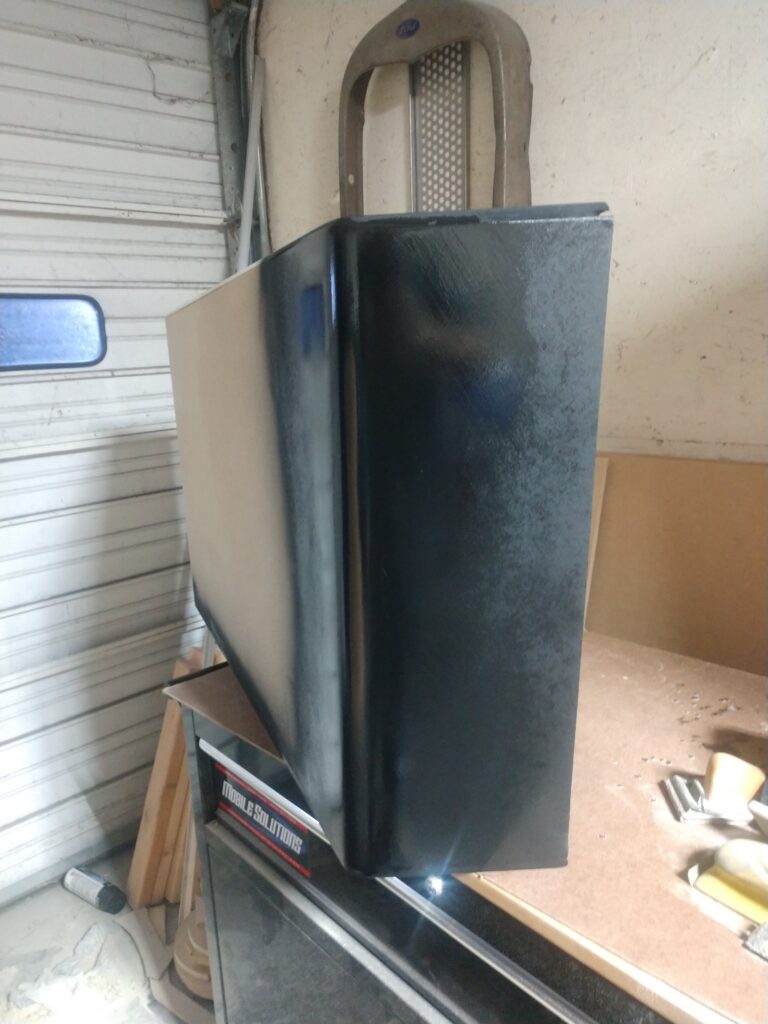
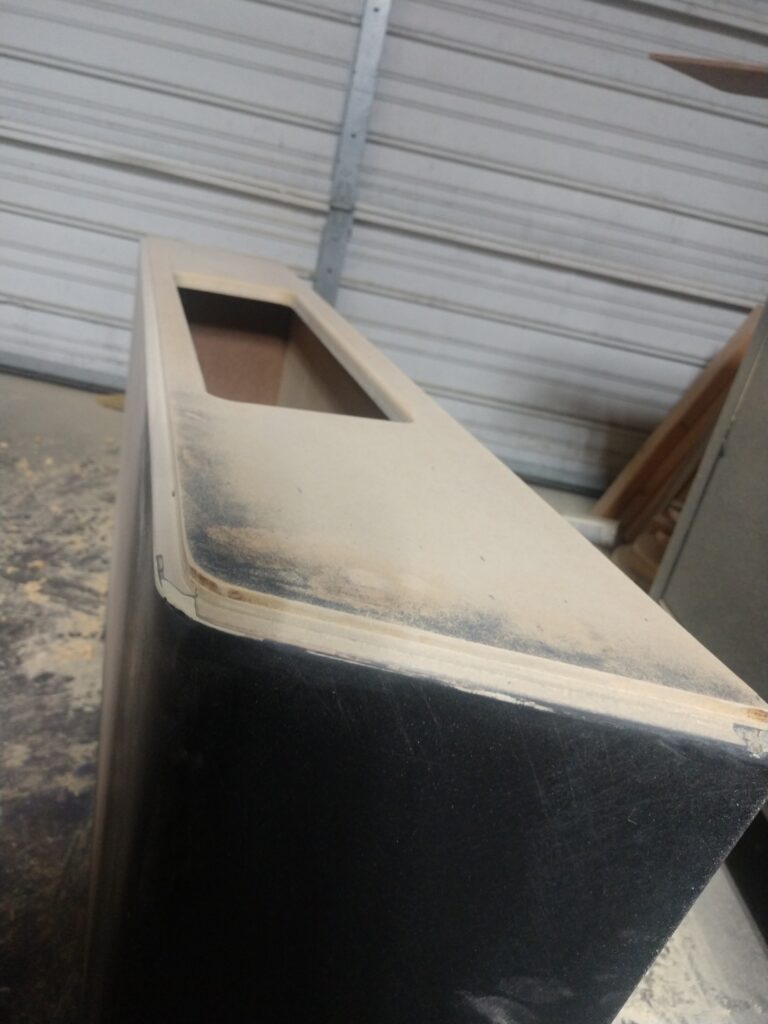
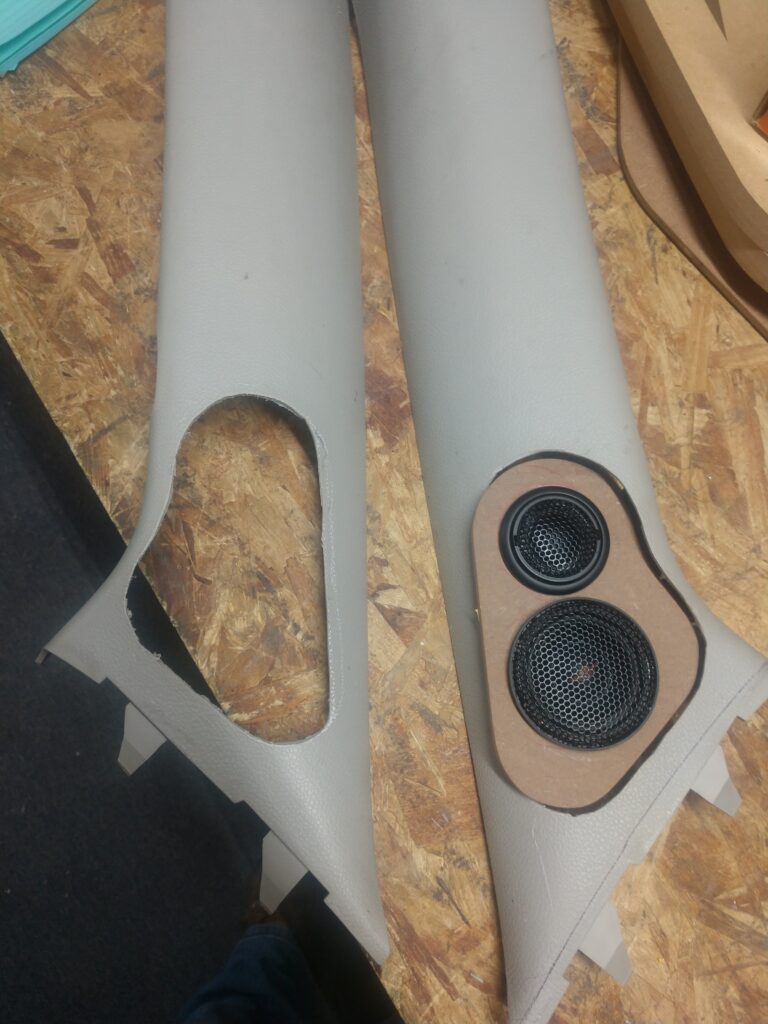
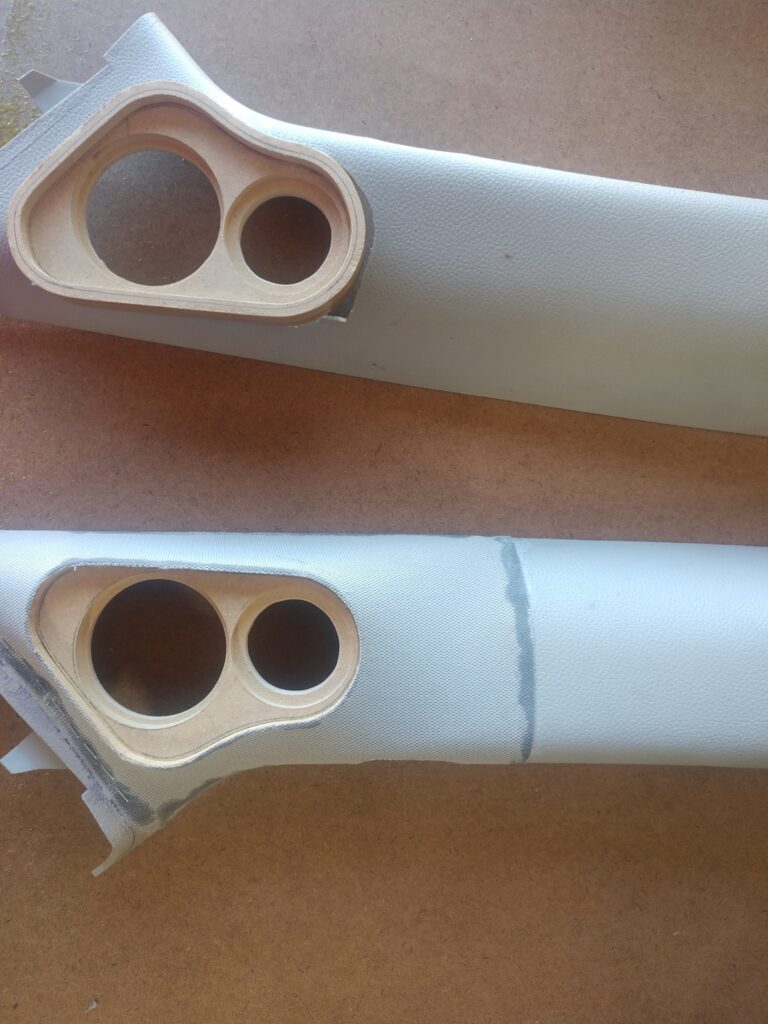
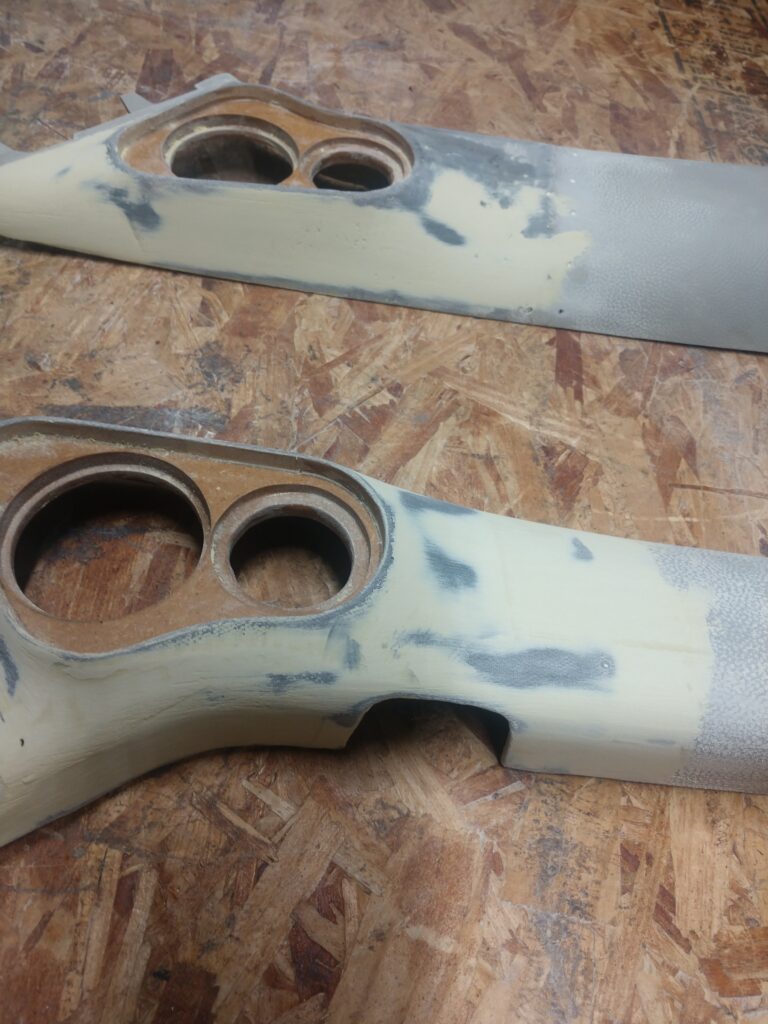
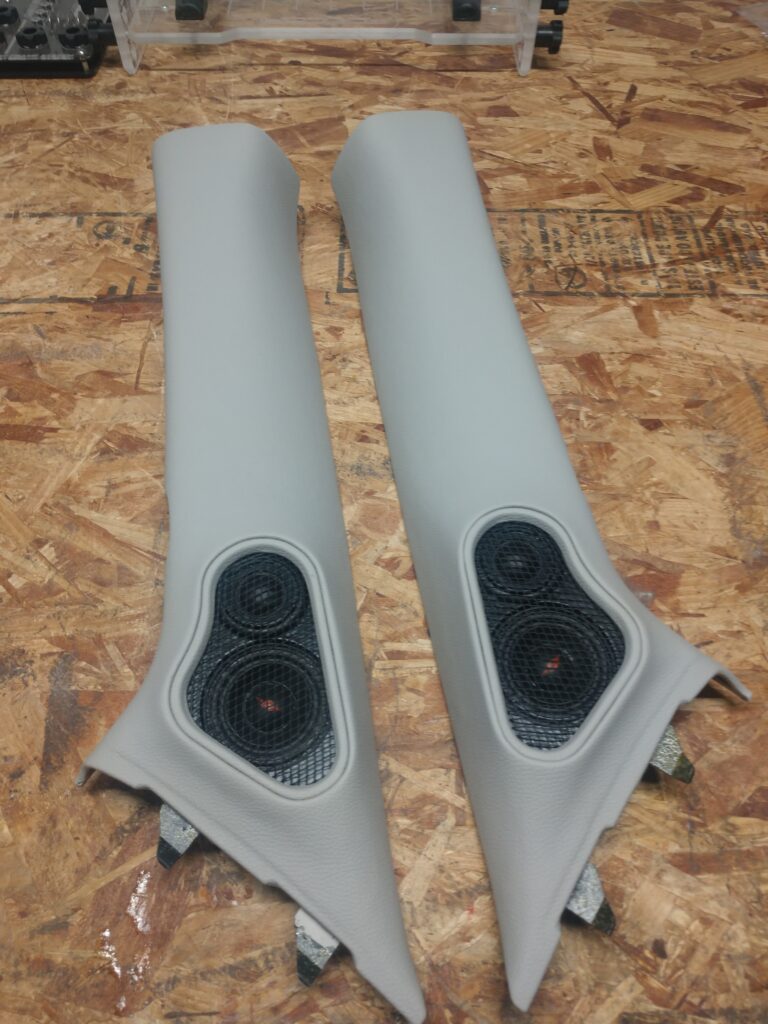
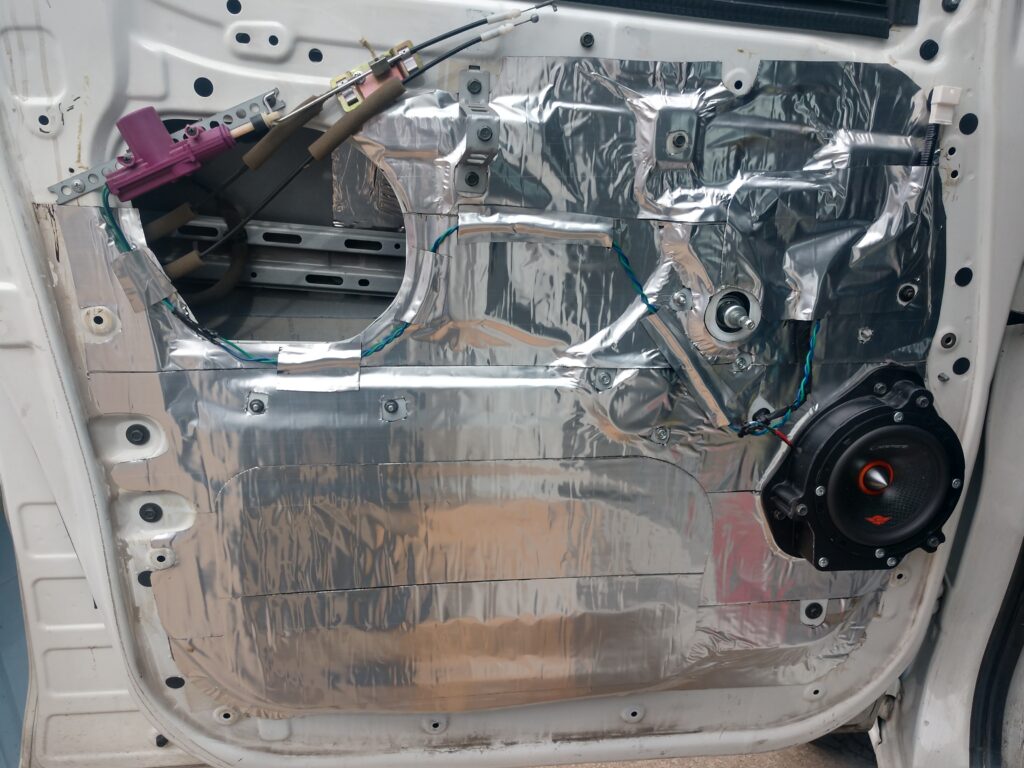
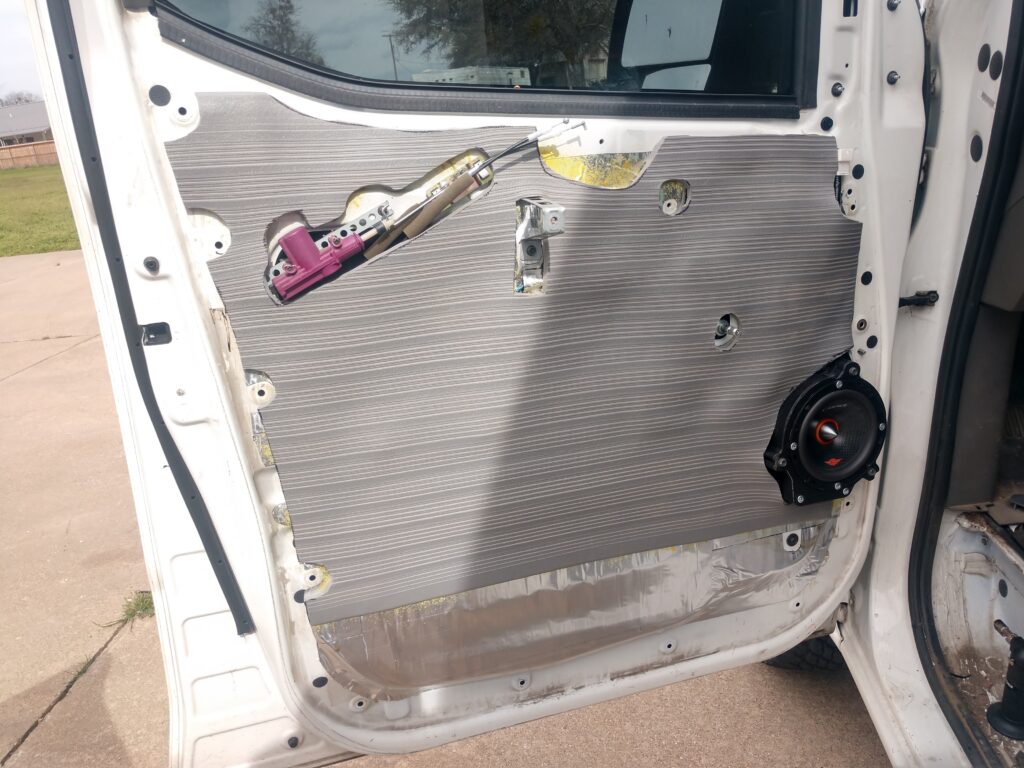
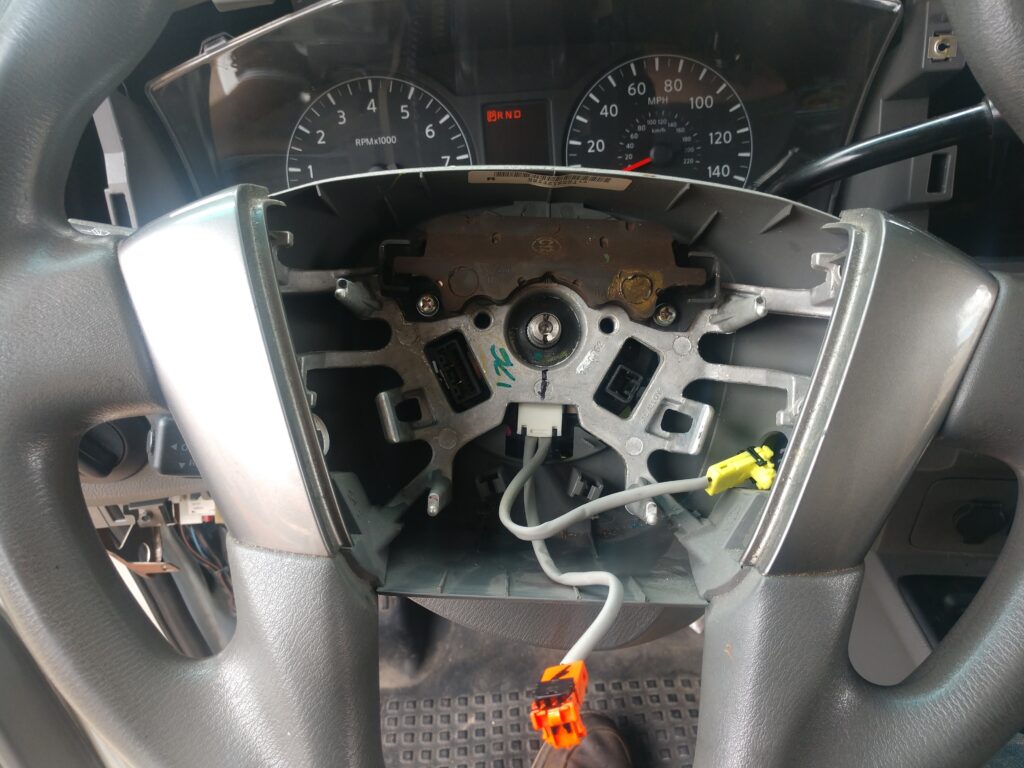
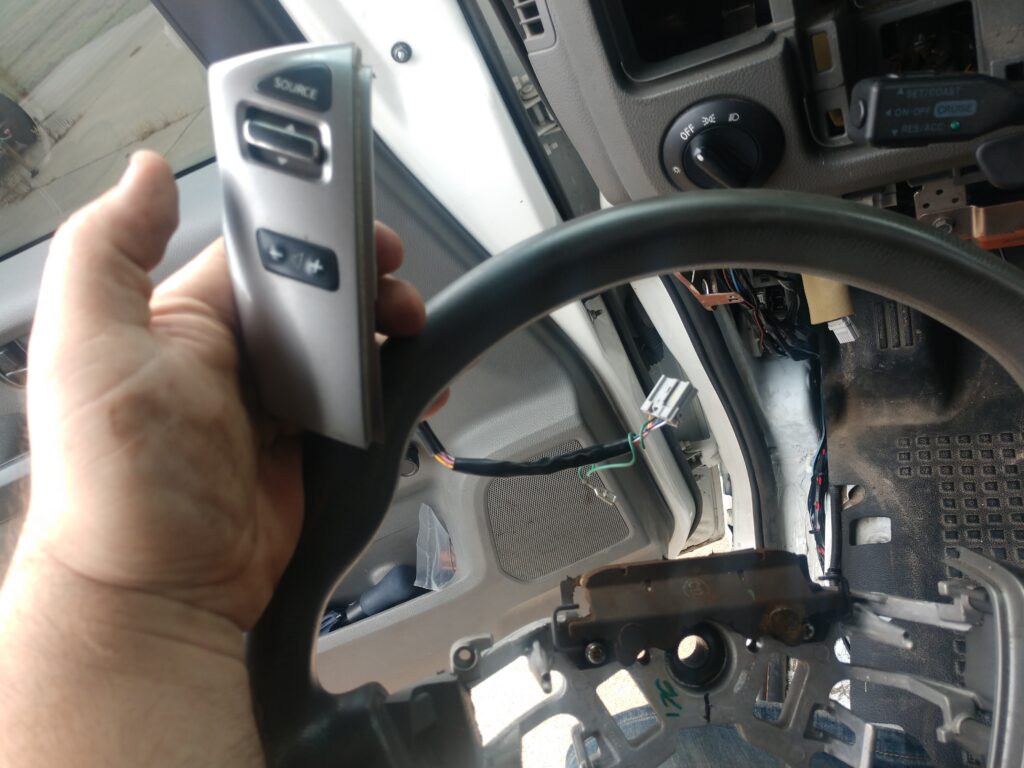
Never being the type to do just what’s needed, this led to a complete revamp of the audio/video system. Alpine Type R 12 in a custom box, 2 Rockford amps, speakers from Cadence (3-way components up front and coaxials in the rear), and an Android Auto-capable dash unit.

Deciding to Go All-Out on the NV1500 Campervan
Things start to snowball from here. The van that was once planned to be a quick, cheap build now had plans to be finished out into the perfect NV1500 Campervan.
- The water system that was never originally planned for: Yep, add that to the list.
- Additional batteries and charger: Of course.
- Solar panels: Well, might as well at this point.
- Matching spare: Gotta have it, but where?
- Spare tire carrier: Don’t have much choice now.
- Windows: The kids might want to see outside.
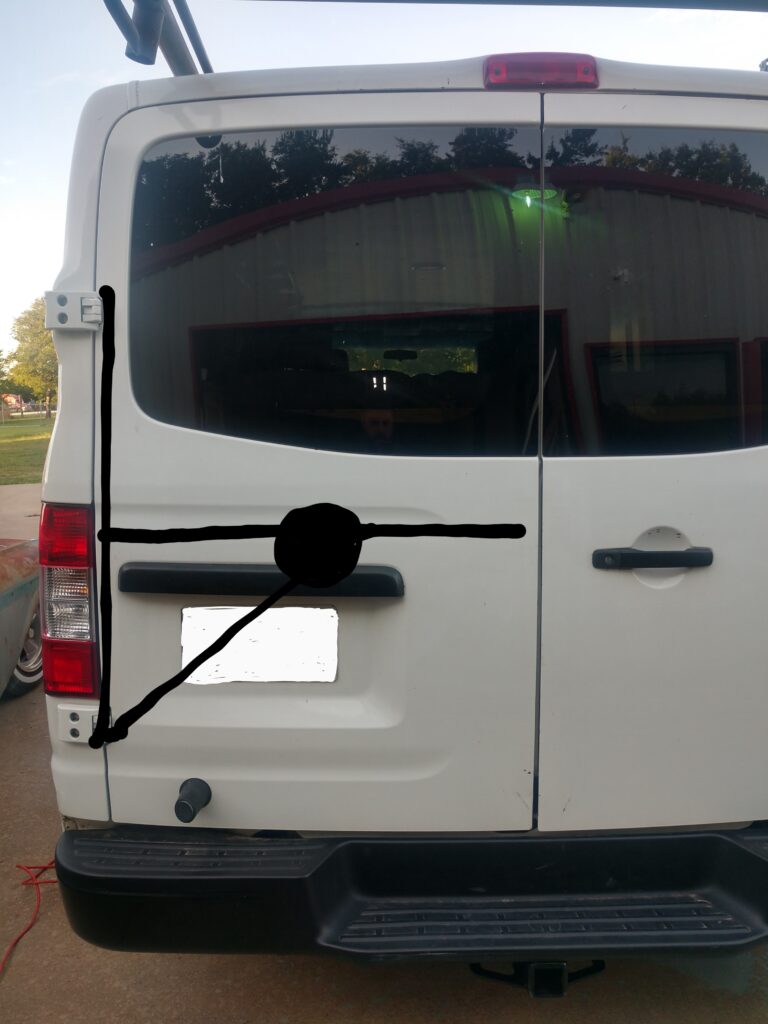
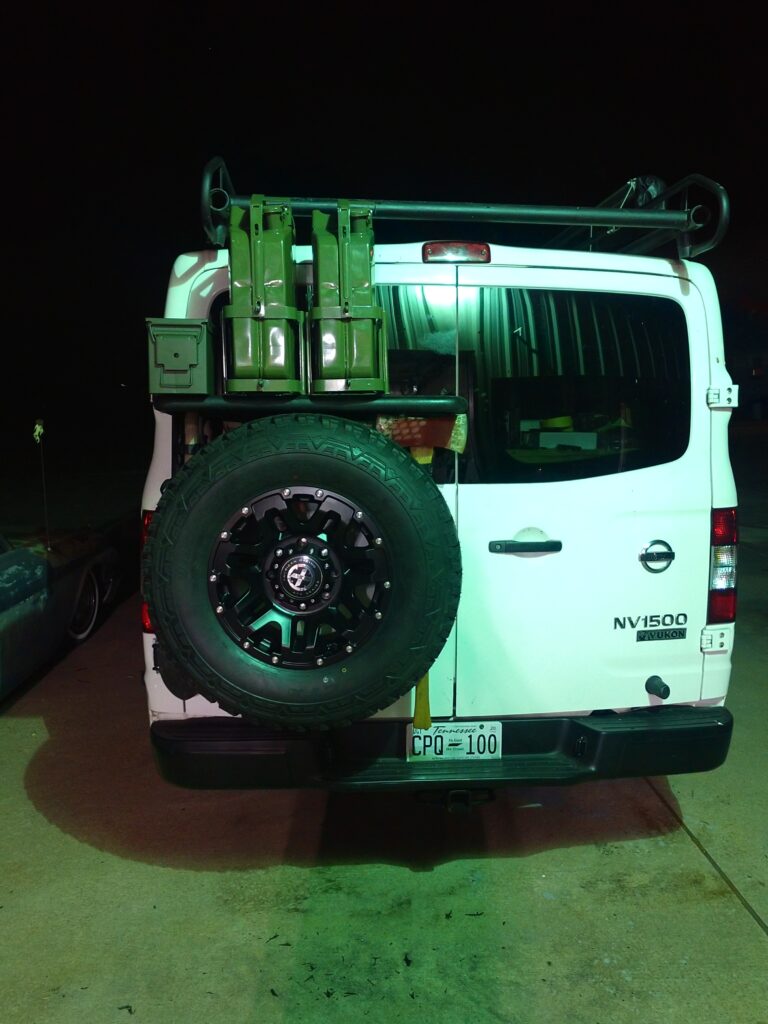
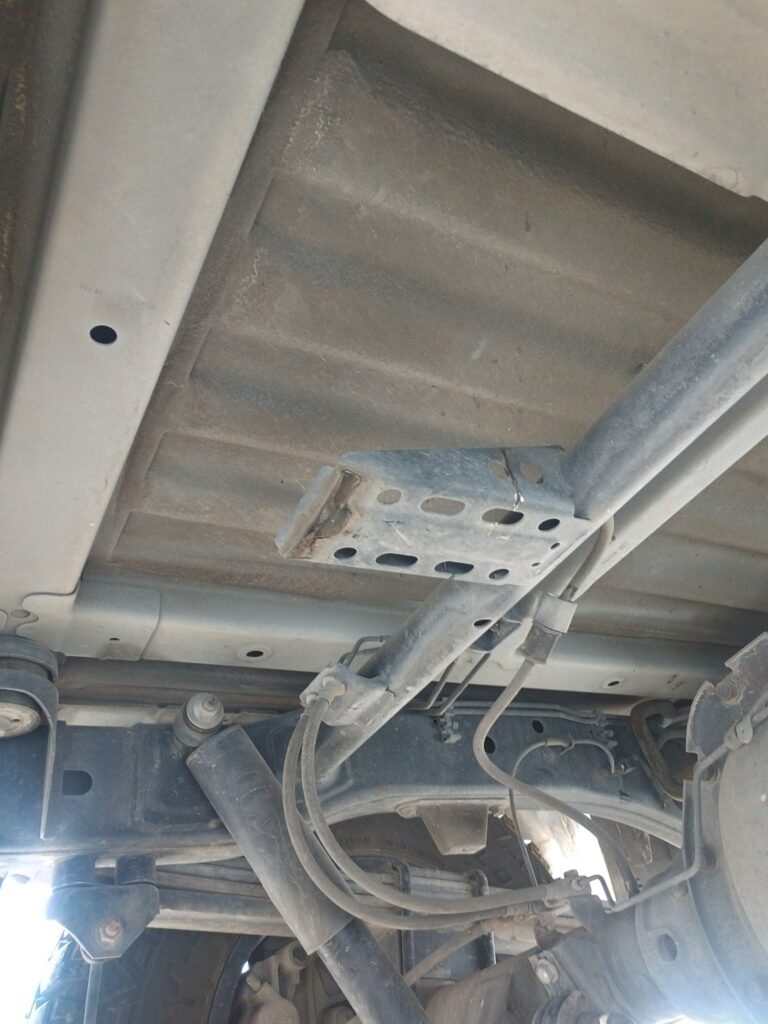
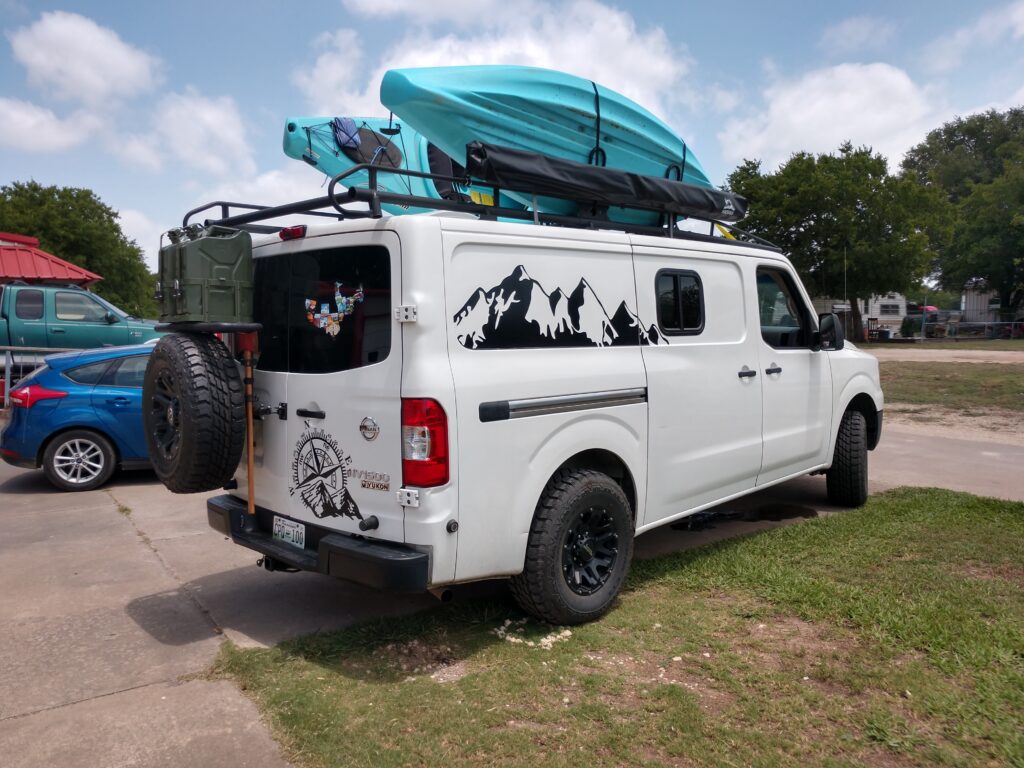
The first item to get checked off this list was the spare tire carrier. Off-the-shelf options for the Nissan NV are very limited. All that comes to mind is a rear bumper replacement that comes with a swing-out carrier, but it blocks the rear door from going past 90 degrees.
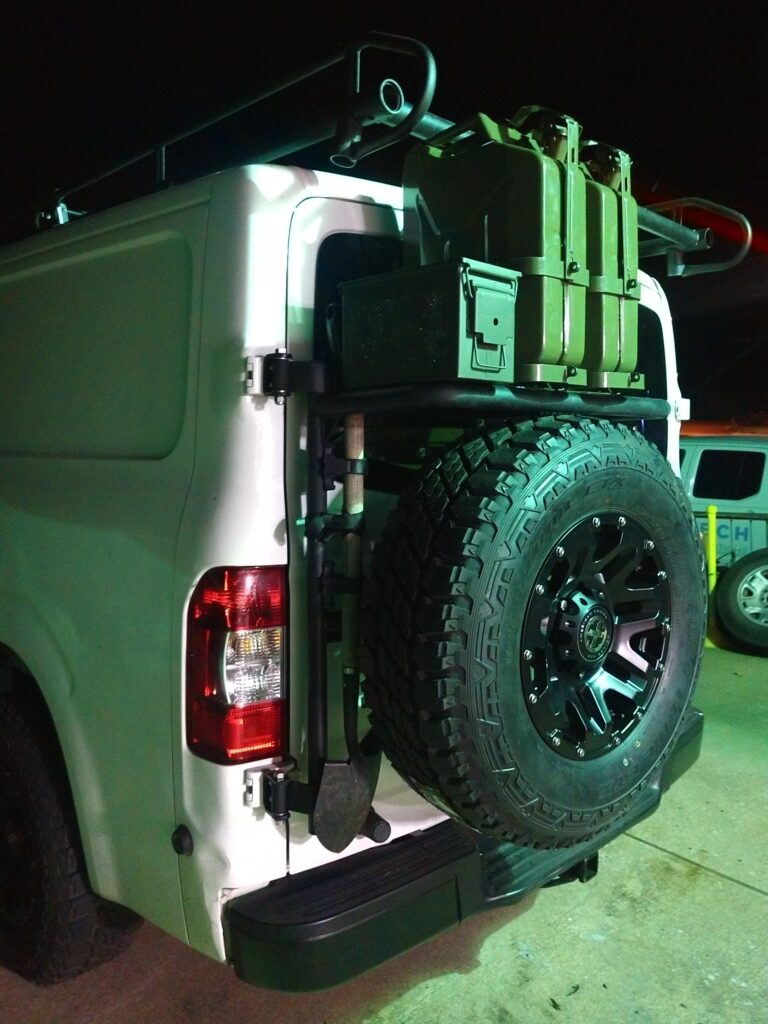
With the plans for our NV1500 Campervan to have an awning, kitchen, and outdoor shower, we couldn’t afford to lose much motion on the rear doors. I scoured the internet for a few weeks, examining the offerings in the Sprinter and Transit worlds, before finding a design I thought could be adapted to the NV. I picked up some tube steel and hinges and let the sparks fly.
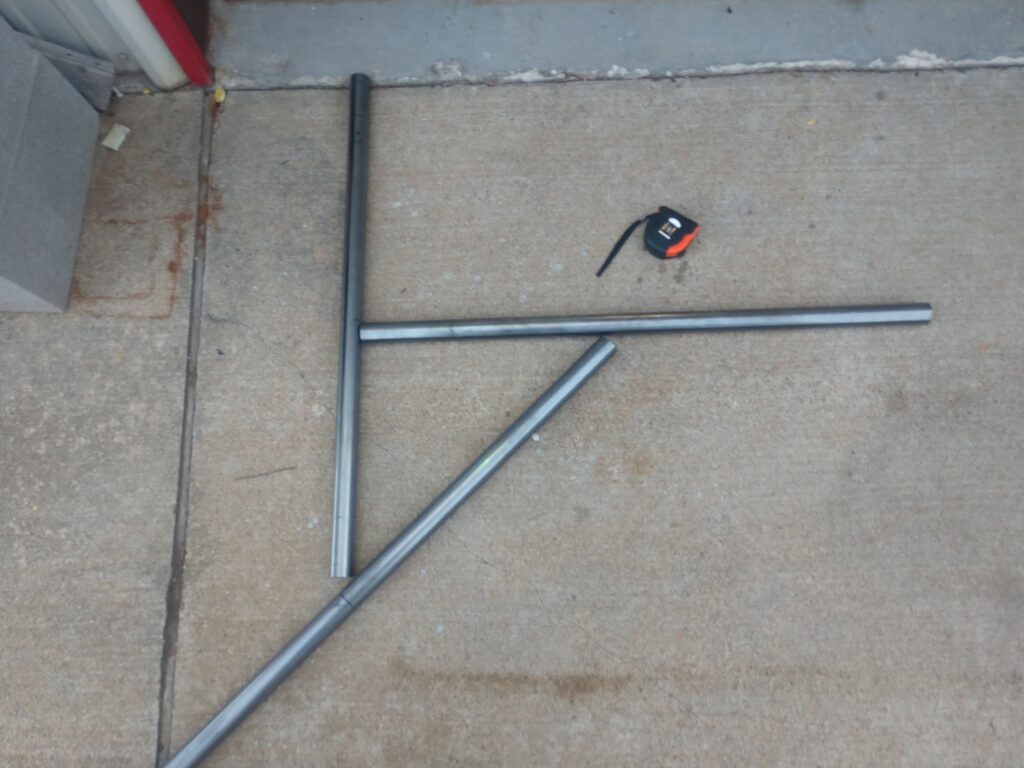
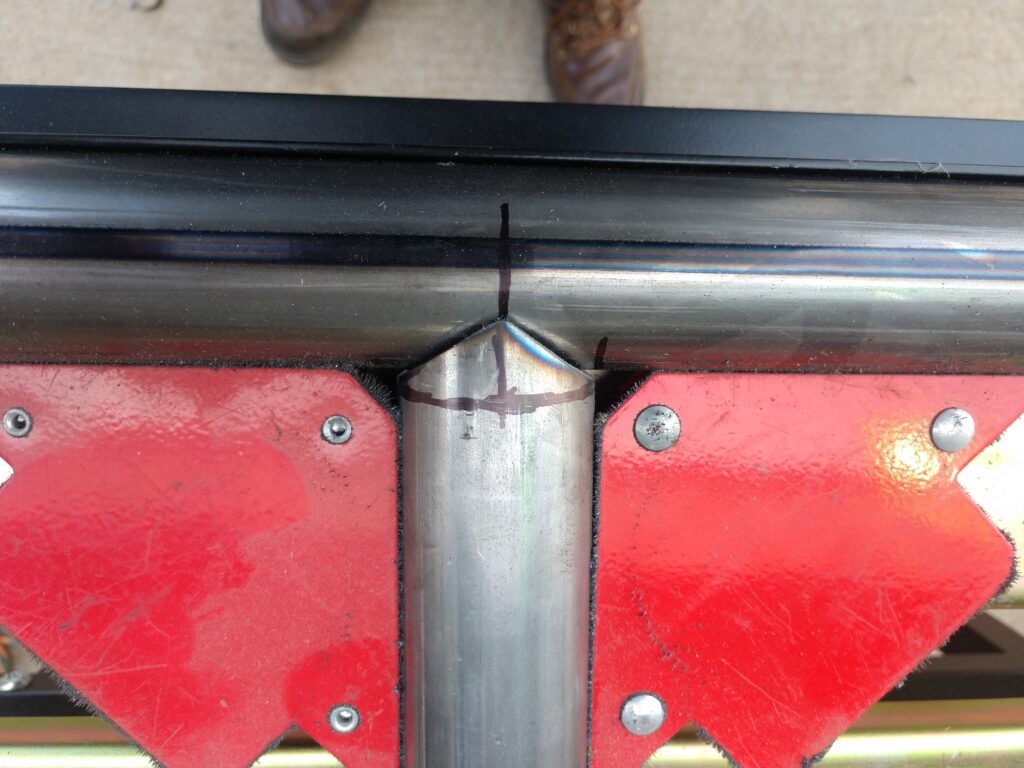
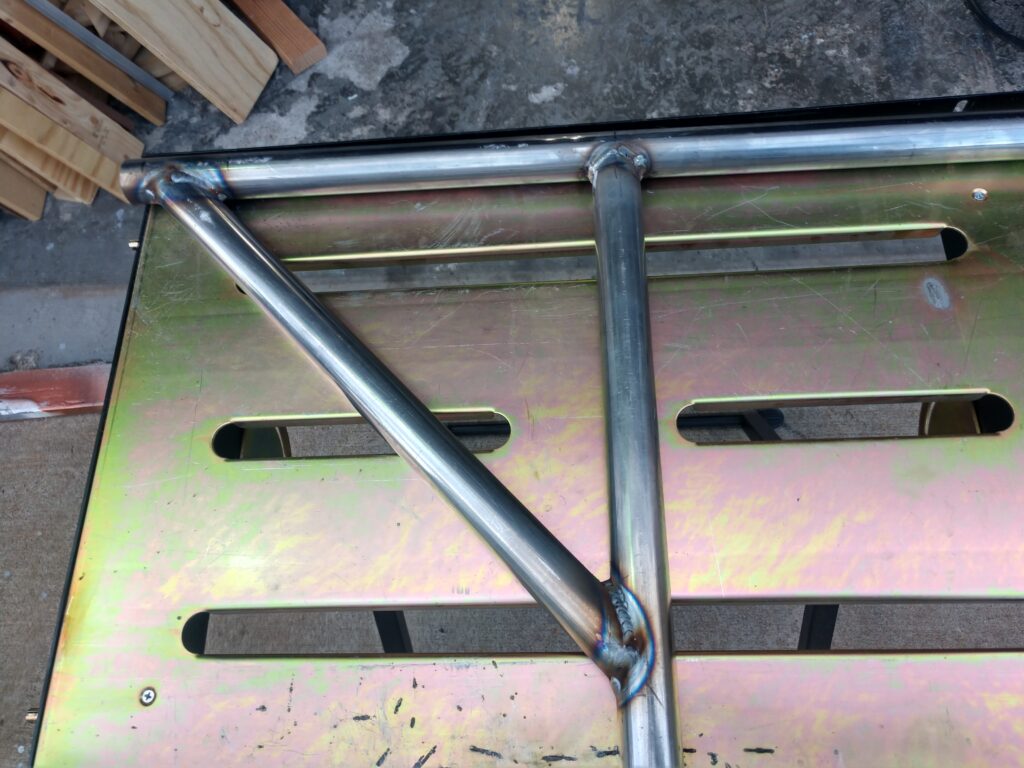
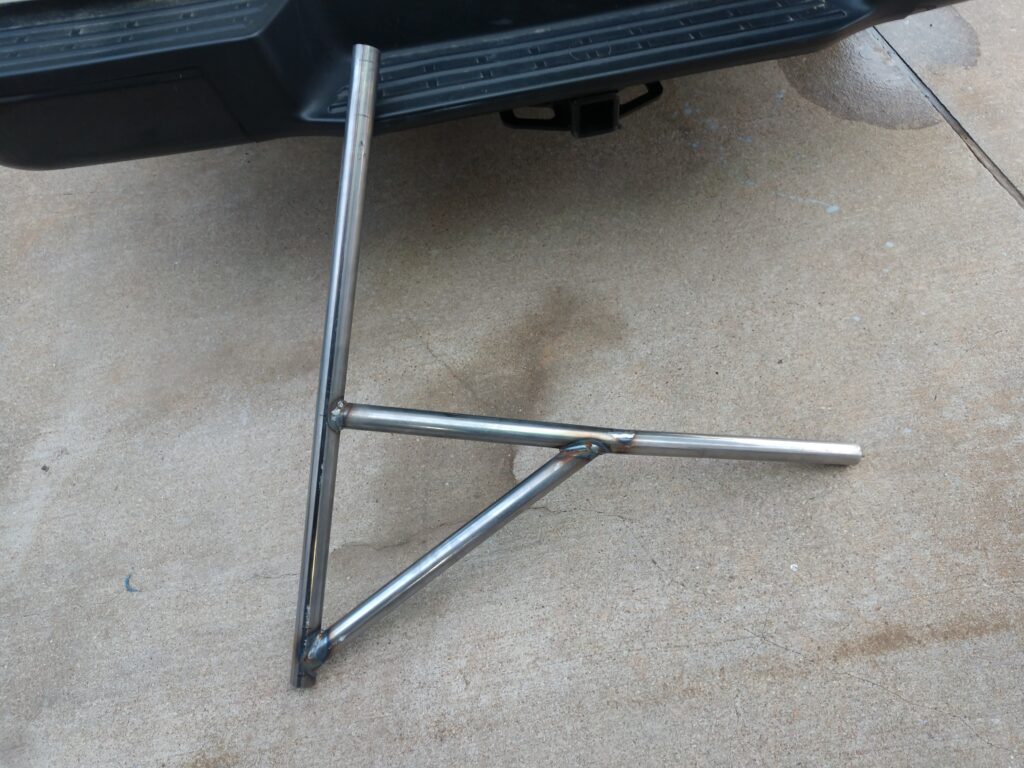
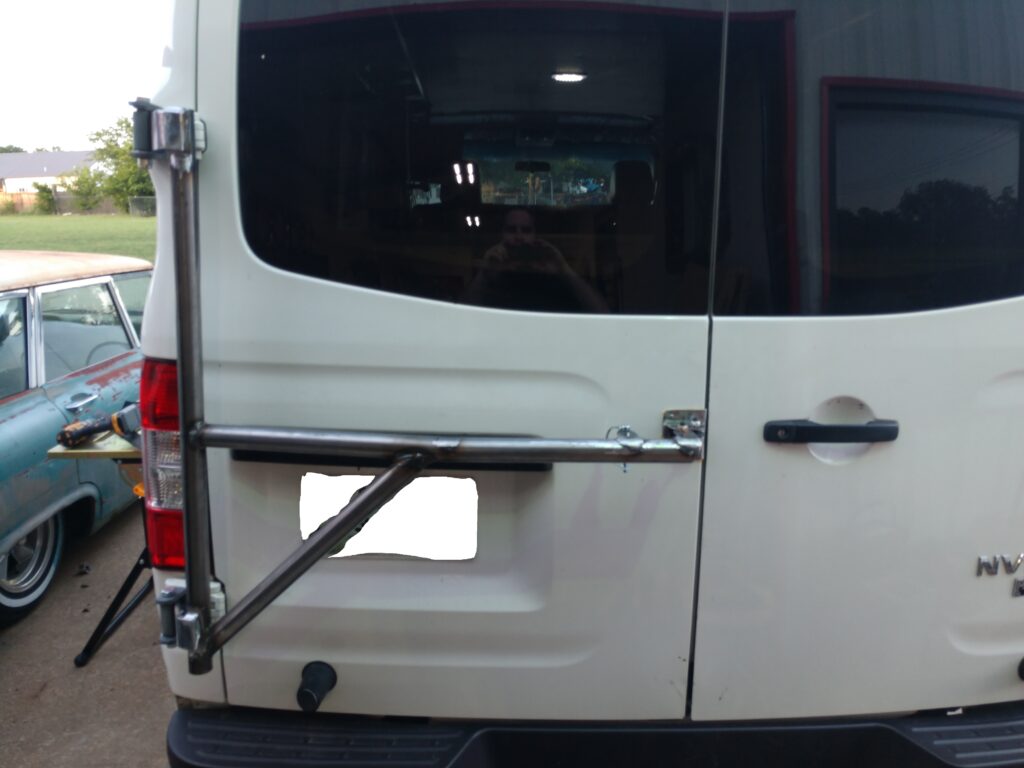
This design proved to be a win, even allowing for the addition of a rack to store 10 gallons of fuel and some basic tools. Building this took a whole week of nights after work to get dialed in and the following weekend to get painted and installed.
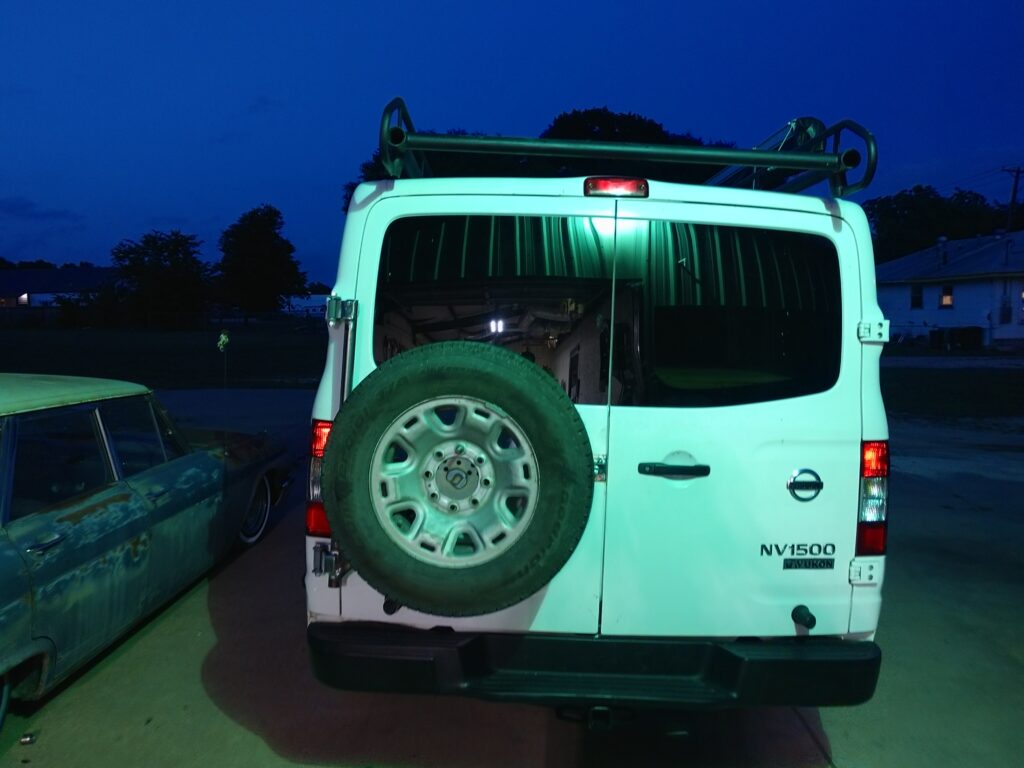
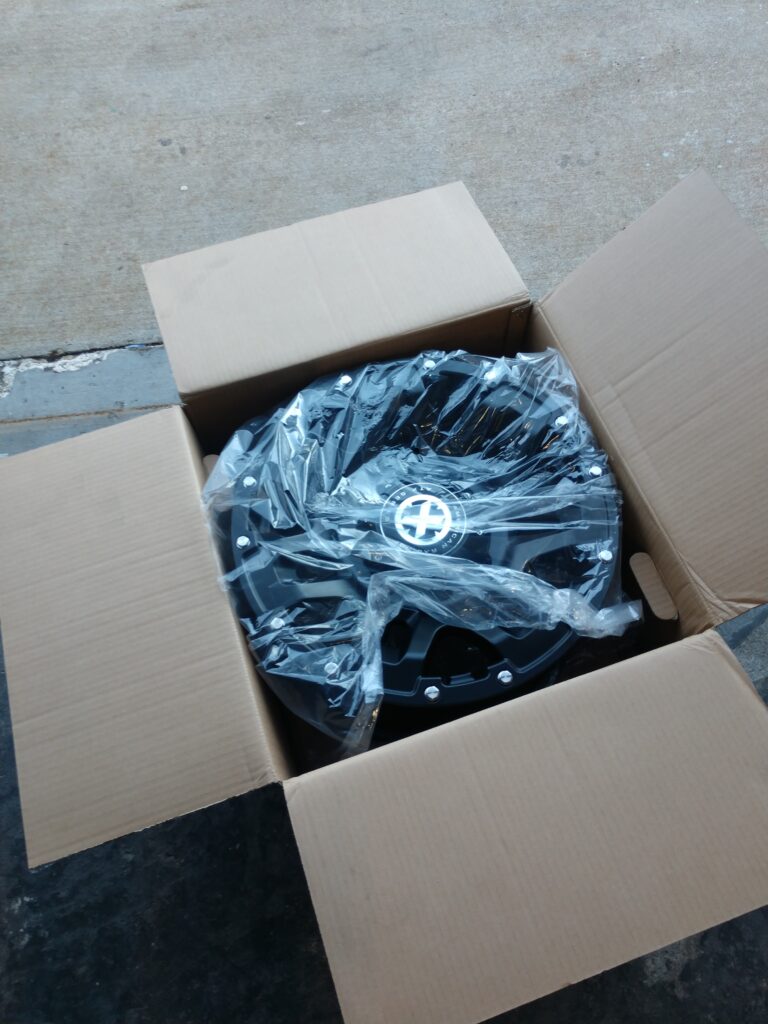
Enter COVID, and the LA County shut down. Between installing the wheels and tires on the van and deciding to order a matching spare, the manufacturer discontinued the wheels I used.
While ordering the spare, the rep at Discount Tire informed me there were only two left in the US… both sitting in a warehouse in LA. It took about five weeks for the wheel to arrive, so I wasn’t going to wait until I could take it to work and install the tire.
The night the wheel arrived, I went old-school and installed the tire on the ground using two pry bars and some starting fluid. The rack was finally done.

Water System for Our NV1500 Campervan
While we waited for the wheel to arrive, all the parts for the solar system, as well as those for the kitchen, water system, side windows, and roof vent, came in. Exciting times for our little NV1500 Campervan!
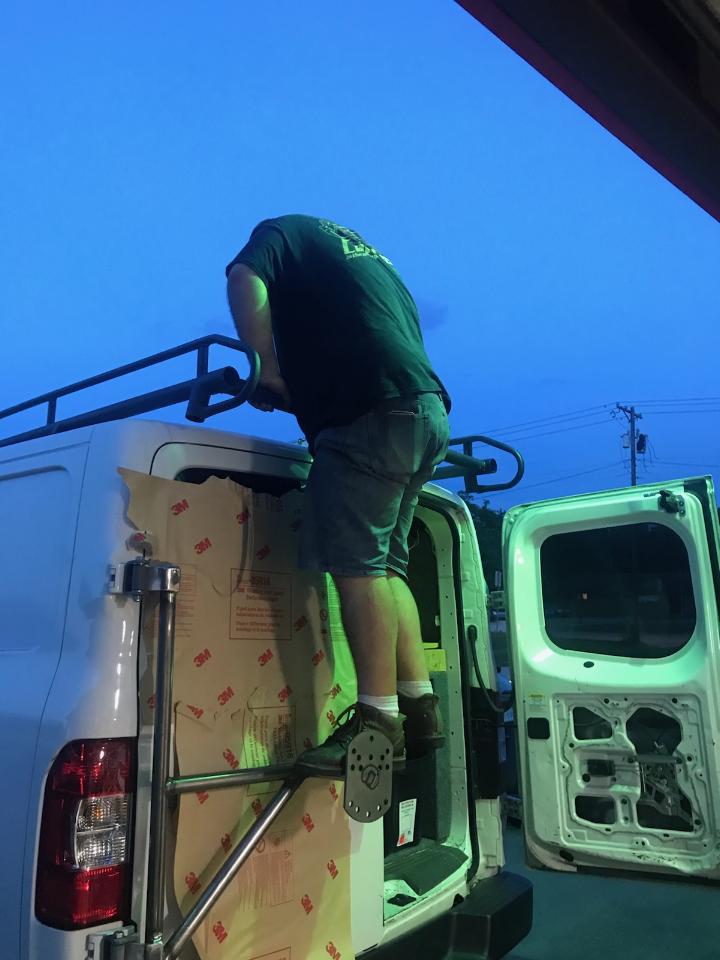
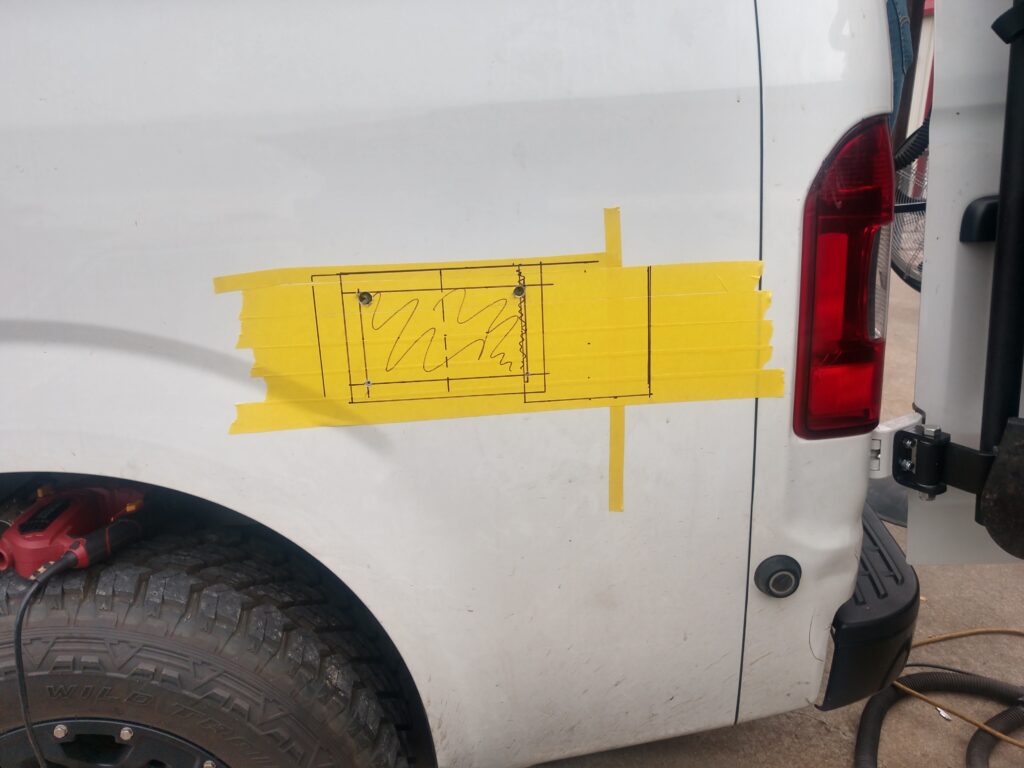
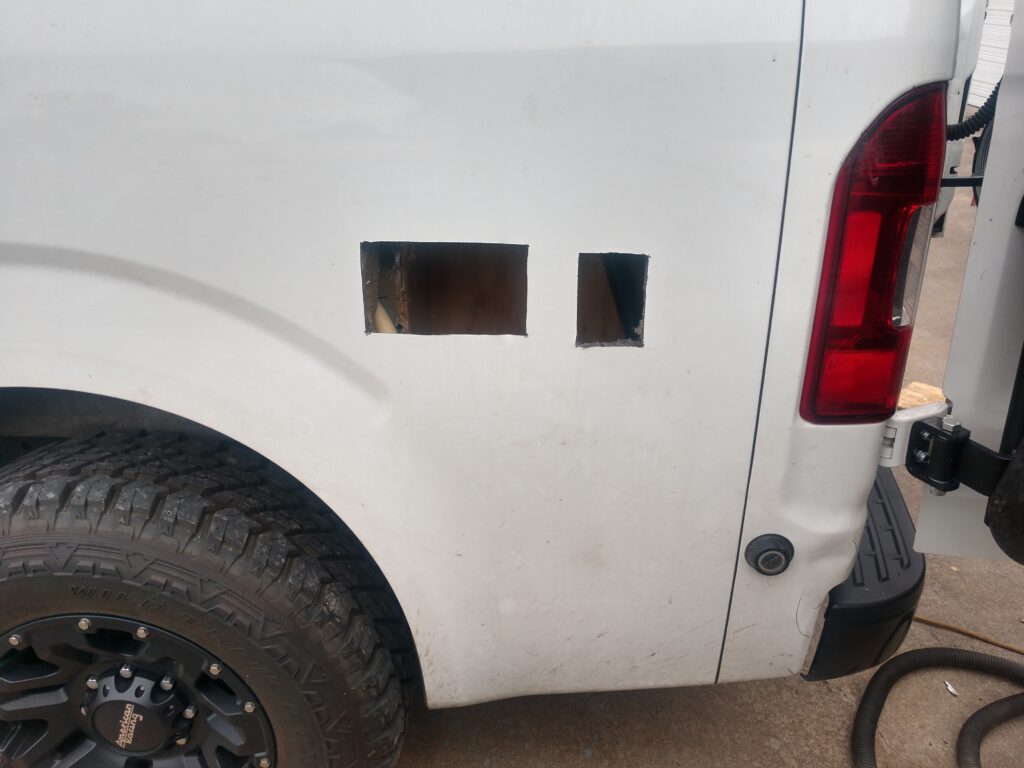
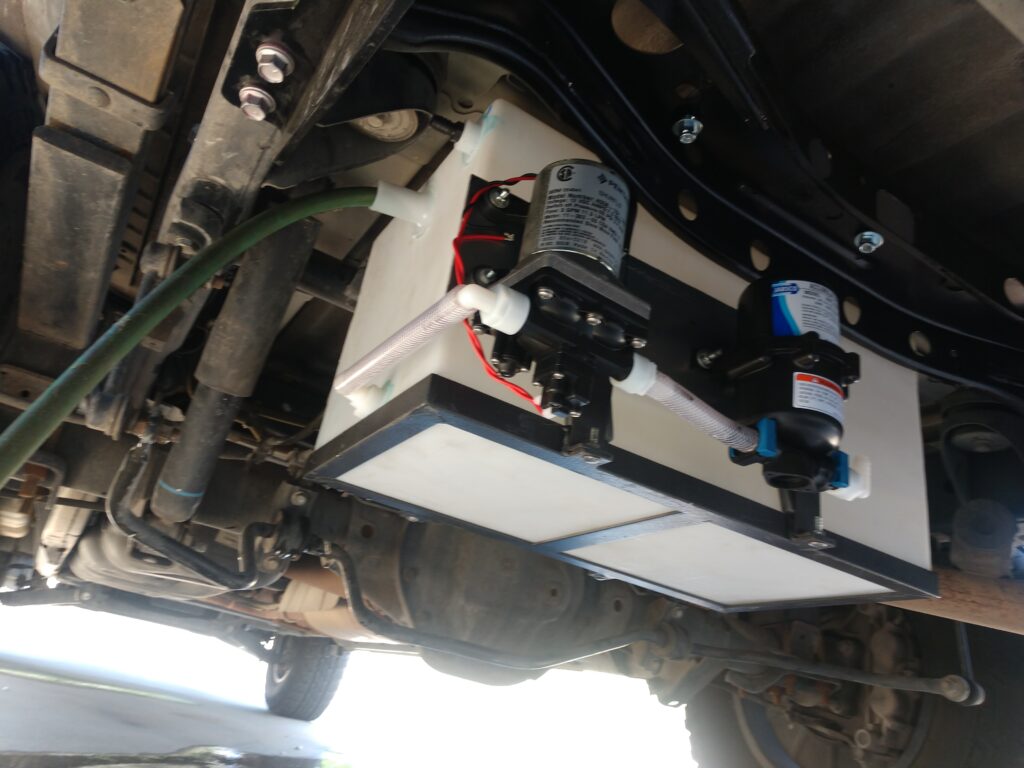
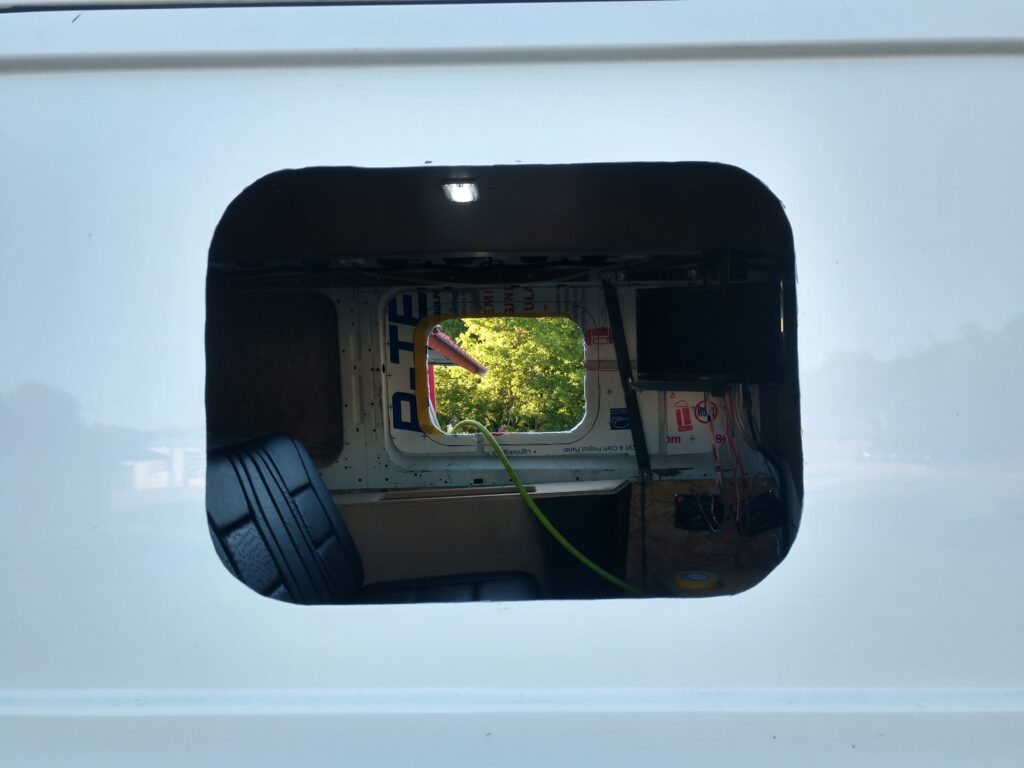
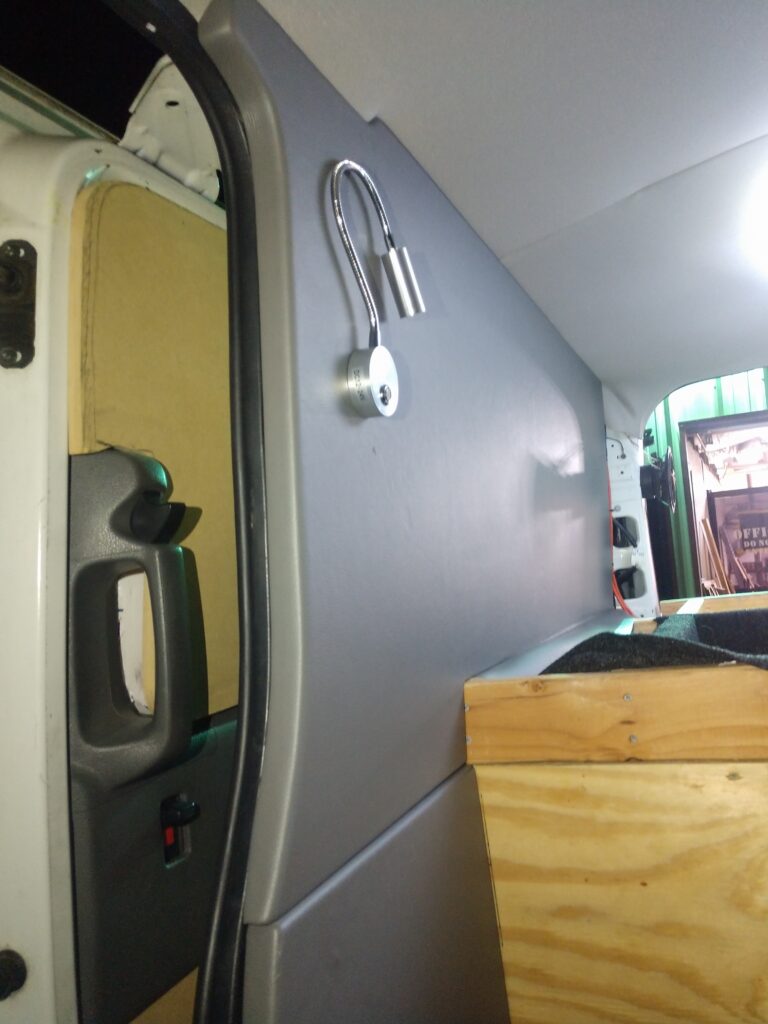
Knowing the interior would limit access to the areas needed to run wiring, the water and electrical systems were next on the list. We started by cutting holes in the side of the van for the water fill, sprayer outlet, and shore power connection.
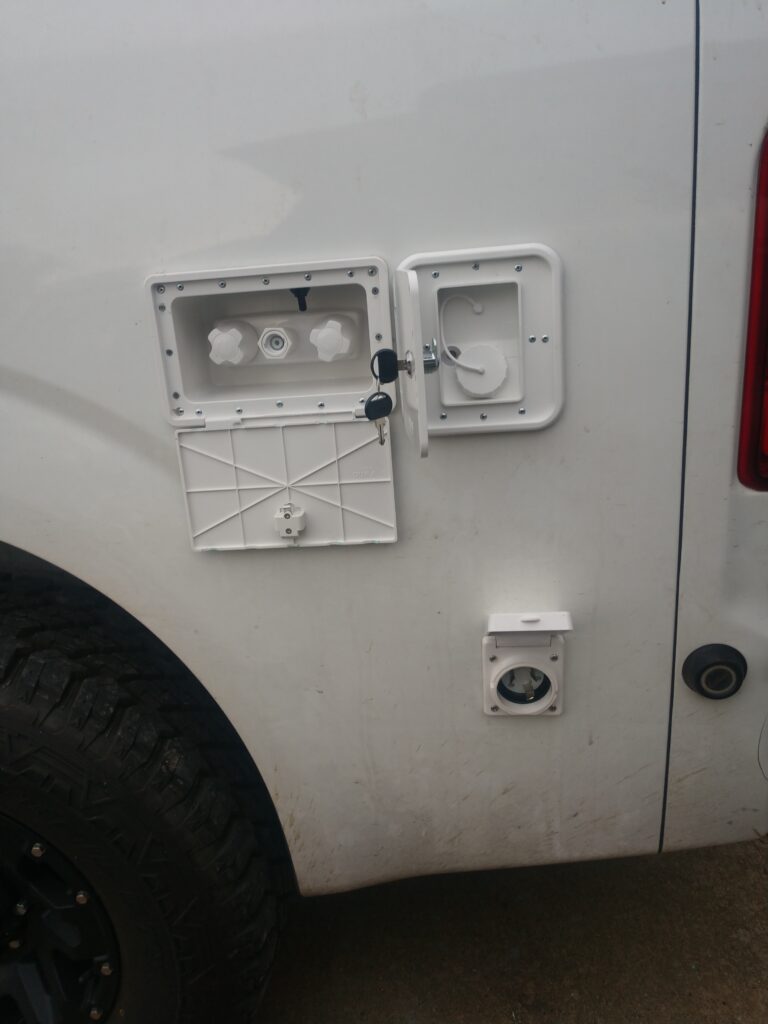
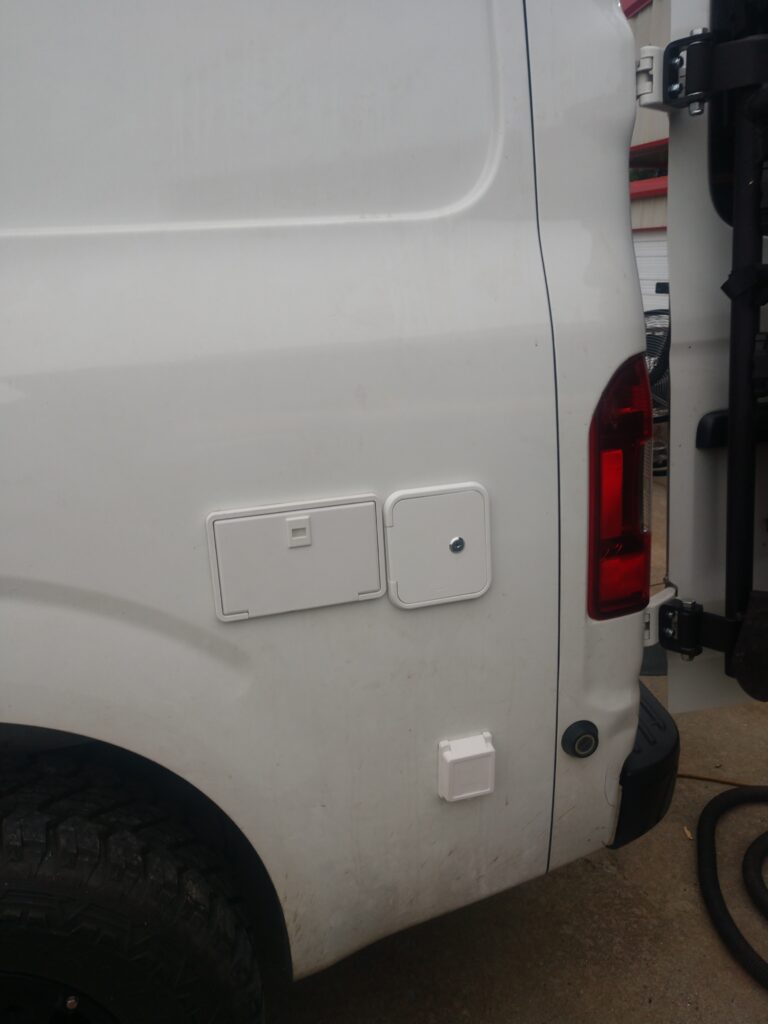
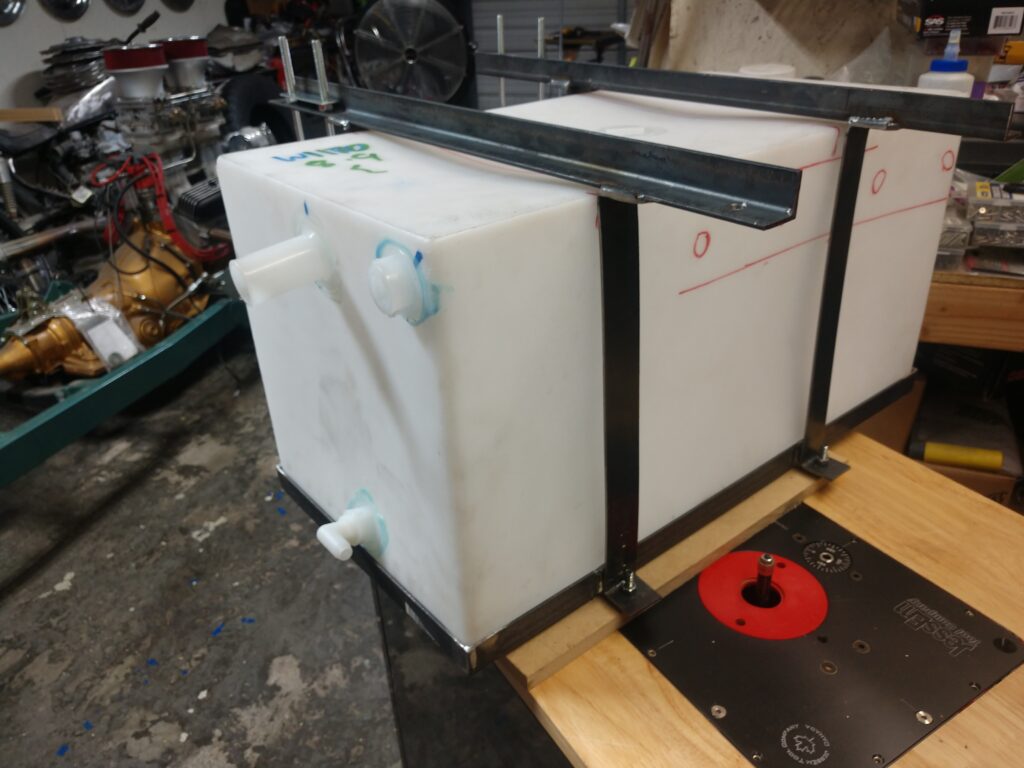
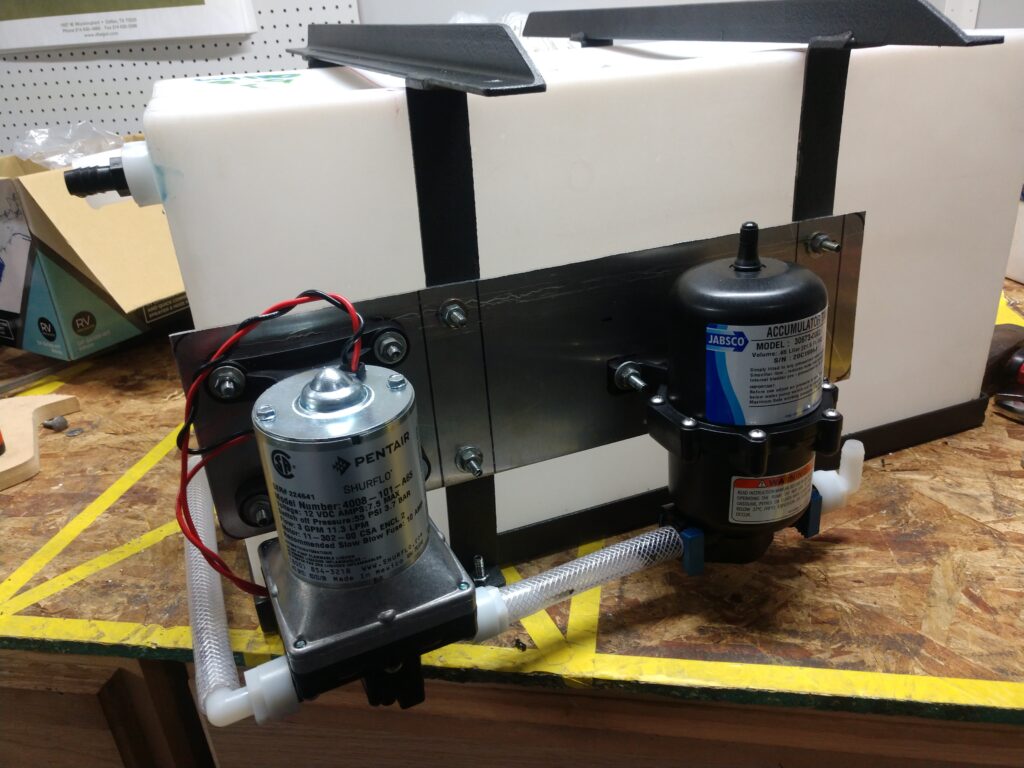
With the spare tire out of the way, the water system could be assembled and installed. A 15-gallon water tank, a Shurflow pump, and an accumulator all needed to be made to fit the available space. This was a fairly straightforward project involving angle iron and aluminum plate. Routing the hoses into the side of the van is not quite as easy.
Electrical Needs for Our NV1500 Campervan
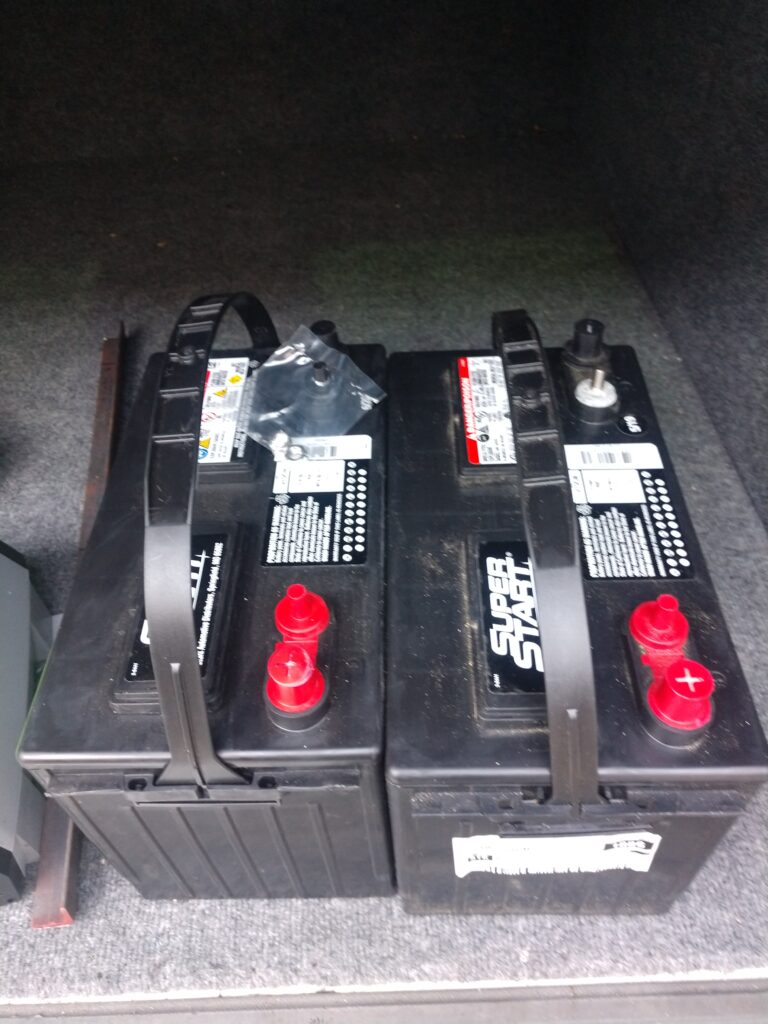
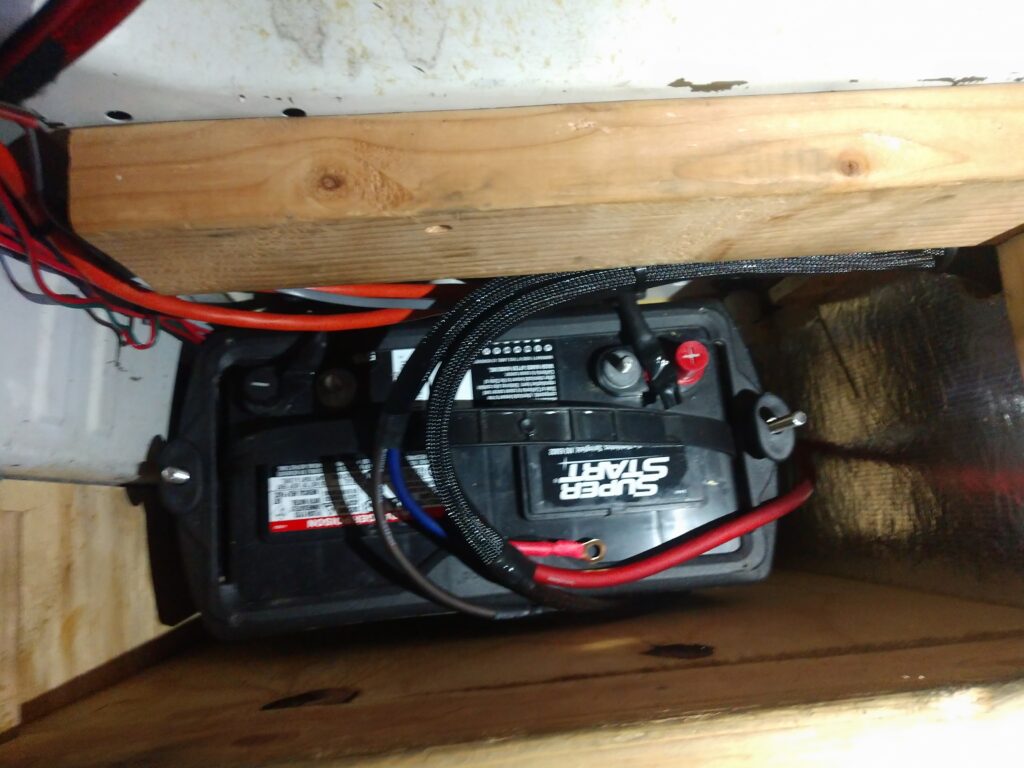
With the water system completed, the focus shifted quickly to the remaining electrical components needed in the NV1500 Campervan. A custom bracket was fabricated to hold two deep-cycle marine batteries stacked vertically in one of the side compartments.
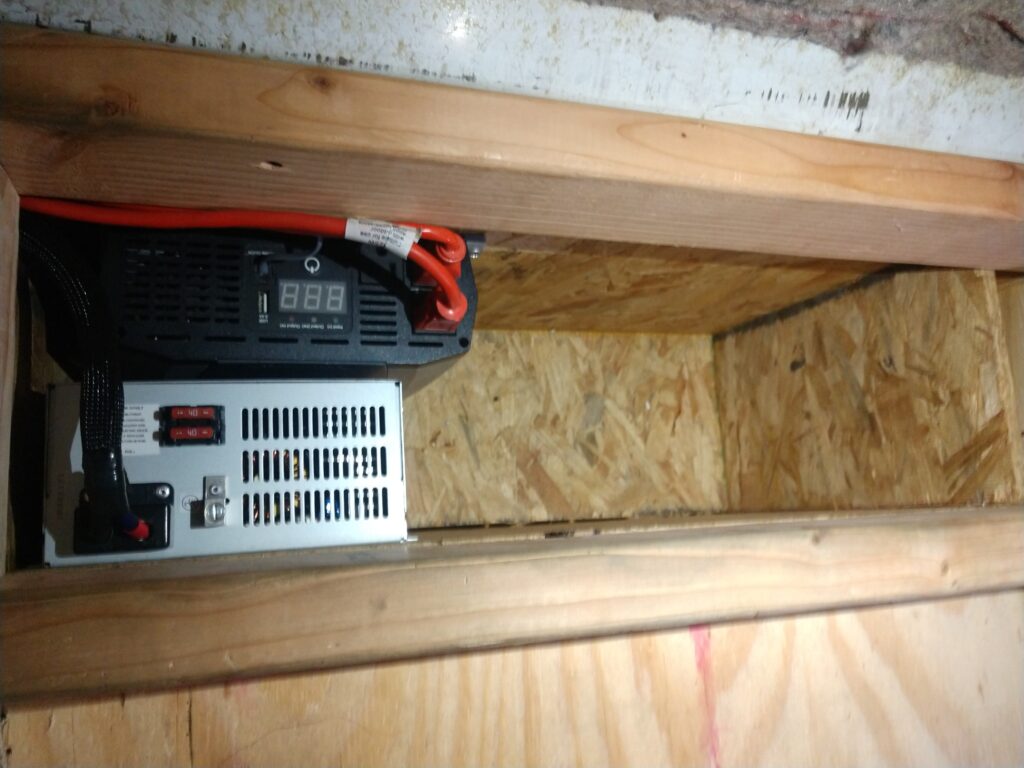
The 2000-watt inverter and 55-amp charger/power supply found their way into the compartment that was originally planned to be battery storage. This compartment proved to be too small for the batteries when the decision was made to upgrade to 200 Ah of power storage, rather than the original 90 Ah. With the additional space next to the charger and inverter, it presented the perfect storage location for extension cords, power adapters, and all the related electrical stuff one would carry on the road.
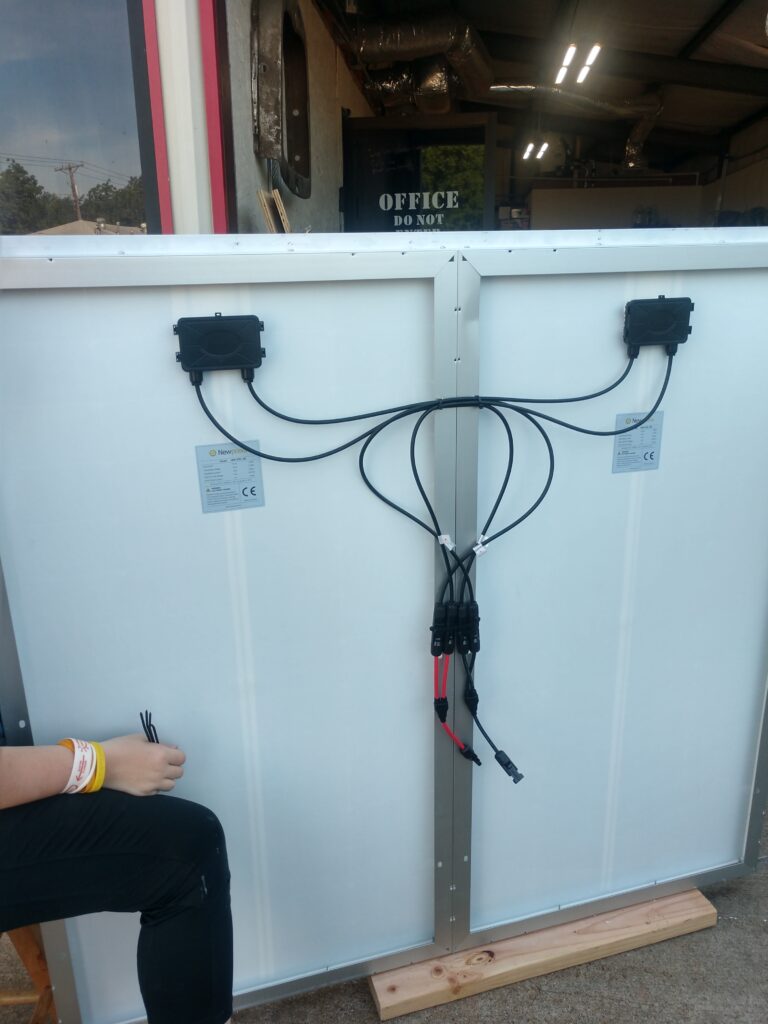
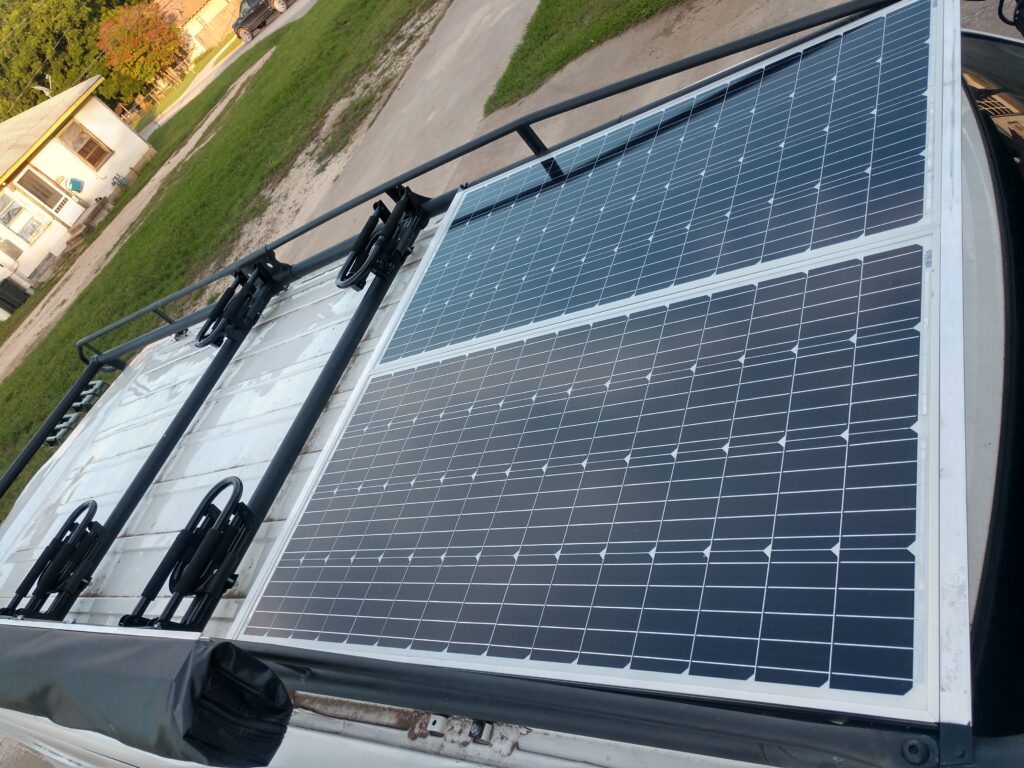
With the shore power and battery bank completed, logically, the solar system was next on the block. Two 150-watt panels measured out perfectly to fit side by side in the forward opening of the roof rack. The Renogy Adventurer 30 amp charge controller, equipped with a temperature probe and battery sensor, keeps the batteries topped off during sunny hours. A PAC-200 battery isolator relay was also installed to allow the batteries to be charged when the van is running.

NV1500 Campervan Kitchen
Now we’ve got power for the creature comforts and water to wash ourselves and our dishes with. Wait, dishes??? Oh, that’s right. We will need to eat at some point.
Campfires are fine if you have the time and aren’t in a restricted area, but what if you don’t always feel like wrestling with getting a fire started? And constantly topping off coolers with ice gets old, as does the soggy food that you get when the ice melts. Those problems don’t apply when you have a fridge and a stove.
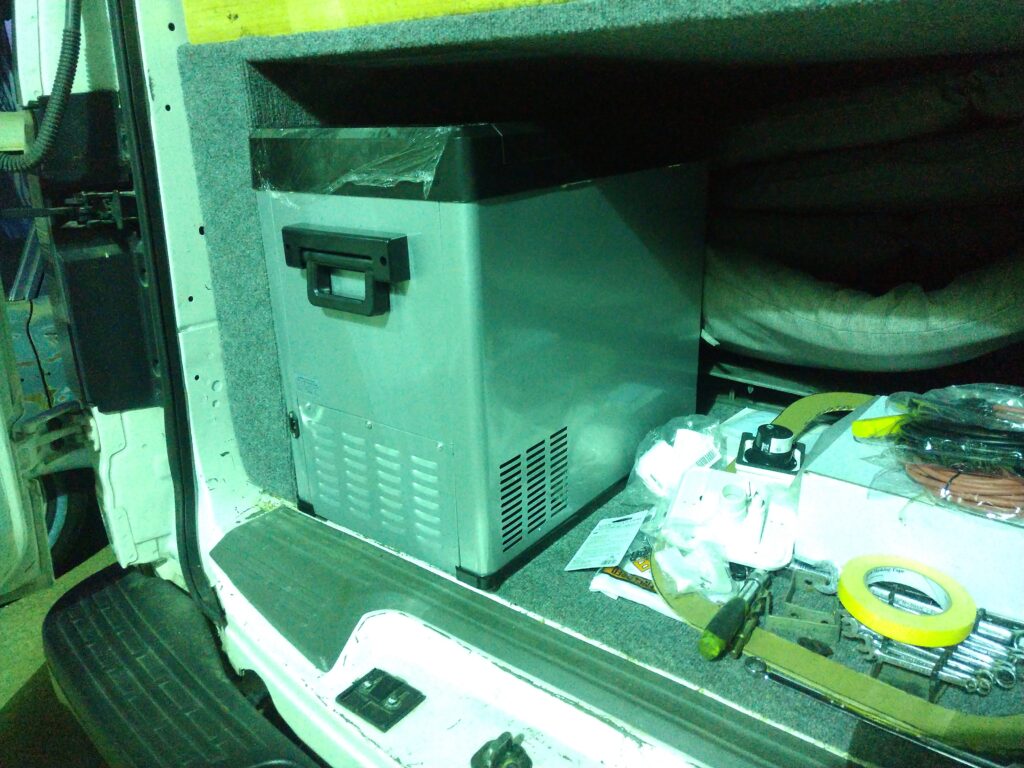
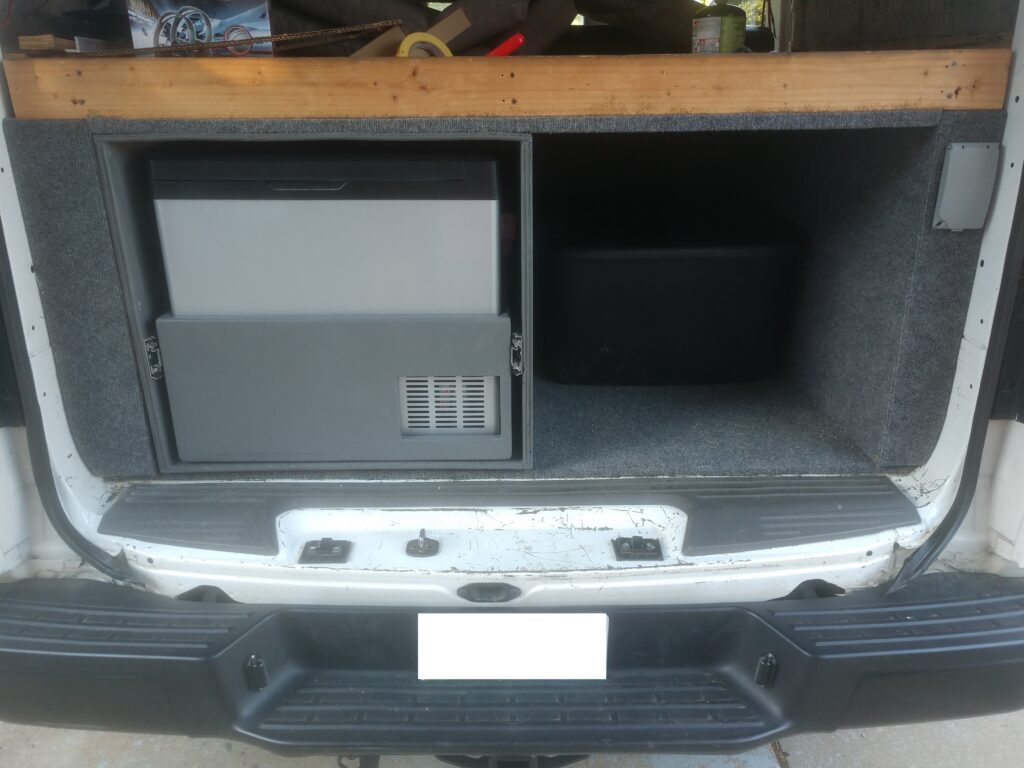
Absorption fridges (also known as electric coolers) consume a significant amount of power and provide limited cooling capabilities. The world of 12V compressor-driven refrigeration has come a long way. There are options out there for most budgets. Dometic makes some very nice units at a cost. Less expensive players have entered the marketplace, including companies like Costway.
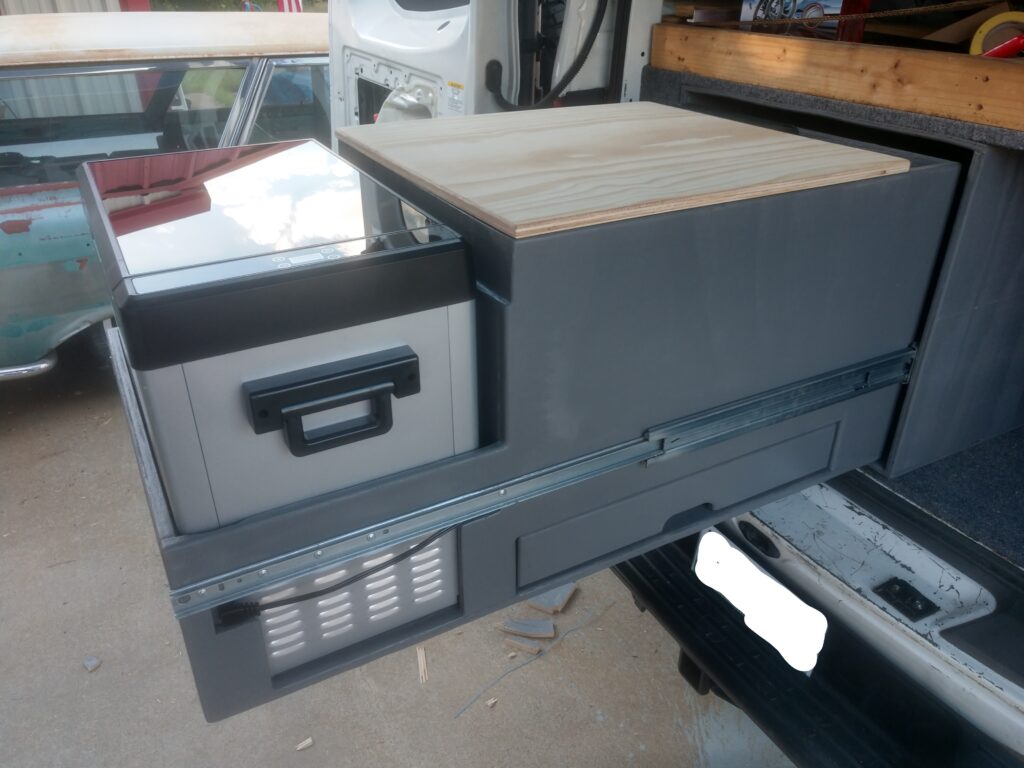
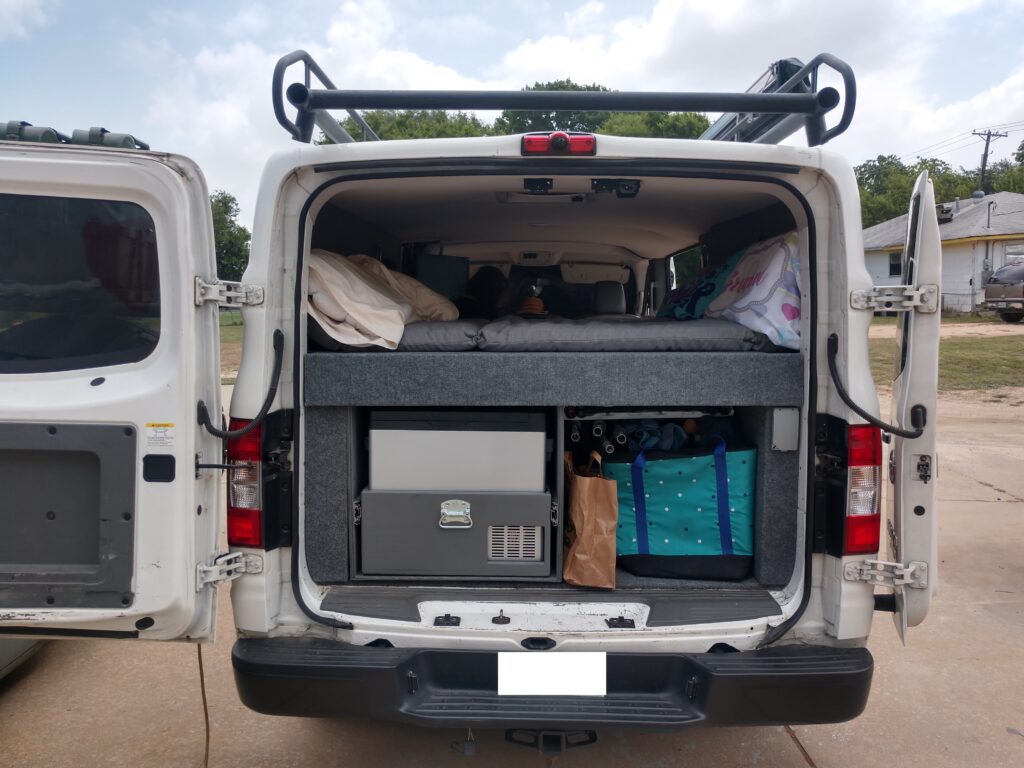
I was only willing to give up a certain amount of space for this item, and it wasn’t enough for a Dometic or Costway. I found a no-name company on Amazon selling a 50-quart model that fit my measurements and wasn’t too expensive either. A Coleman camp stove was the obvious choice for quick, reliable heat to cook on, and it was just big enough for my Lodge cast iron griddle.
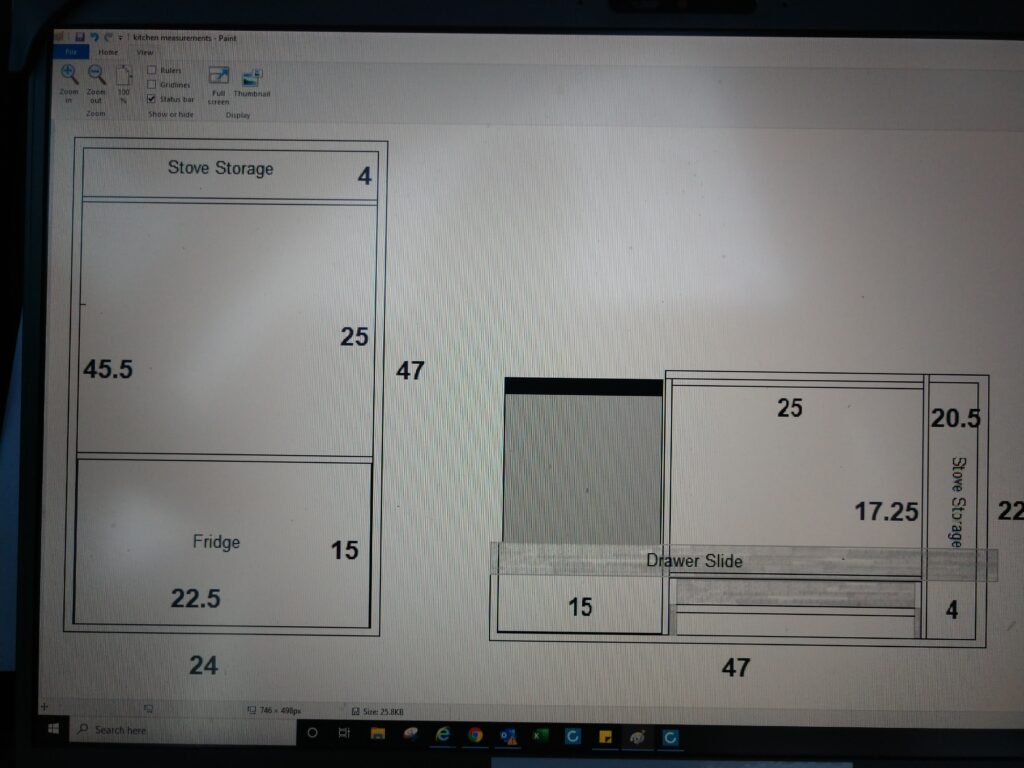
The kitchen needed to occupy minimal space while offering maximum space for preparing and cooking food. I took some measurements and spent a little time on the computer designing how I thought the kitchen would be the most efficient.
Note to anybody wanting to build a similar setup: 48" full extension drawer slides are not cheap. There are only a few players that offer any that size with a decent weight rating, and they are very proud of them. If you can shrink your kitchen to less than 40 inches, things become much more affordable. One easy way to do this on a NV1500 Campervan is to purchase a fridge from Costway or Dometic and install it between the front seats.
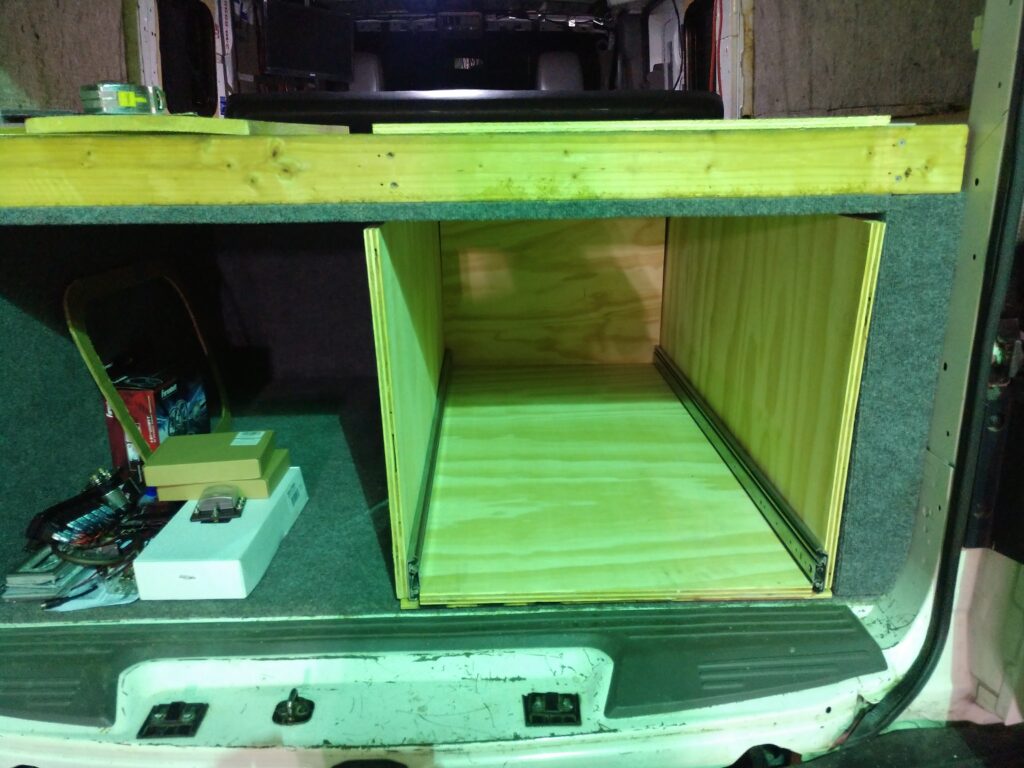
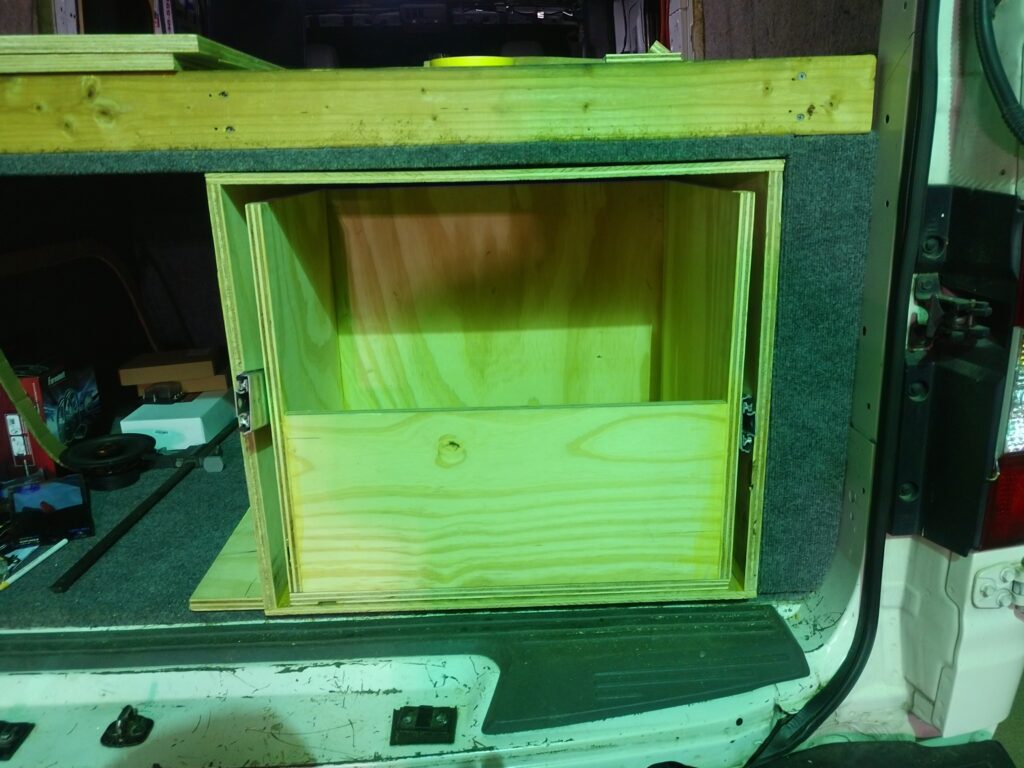
After the kitchen was built and painted, it was slid into place in the NV1500 Campervan. The desire to put it on the right side was quickly met with opposition from the door jamb. Interference with the stove slide-out would have made things difficult, and we would have had to open both doors any time we needed something out of the cargo area. Moved to the left side, these problems were no longer an issue.
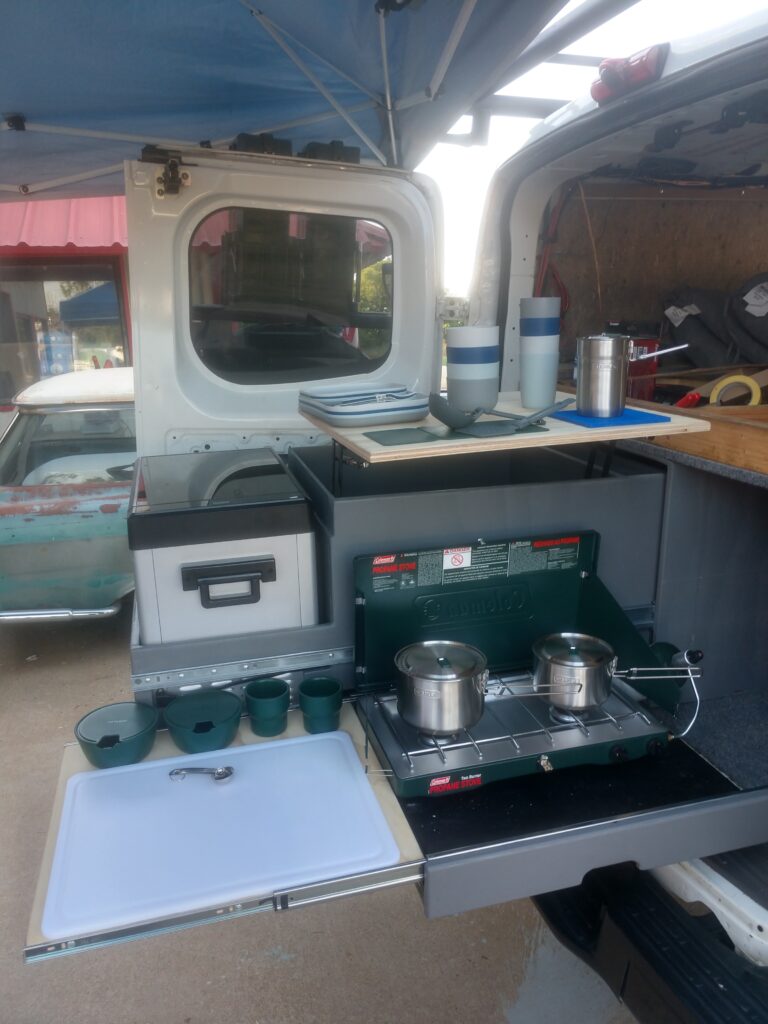
We found that there was more than ample storage in the kitchen for all our dishes. This is in part due to the Stanley cookware. The pots nest inside each other. Bowls nest inside the pots. Utensils nest inside the bowls. We even found out that the Rocket coffee maker nests perfectly inside the 2-cup cook set if you remove 1 cup. This compact, durable coffee-making solution was a requirement of one of the family’s female members. She knows who she is.
A collapsible dish drainer and wash basin also help keep space available for other things. We even lucked out and found a small, folding table that fits perfectly into the cargo area, collapsing to 24x48x2 inches when folded and as small as 24x25x4 inches when completely folded.
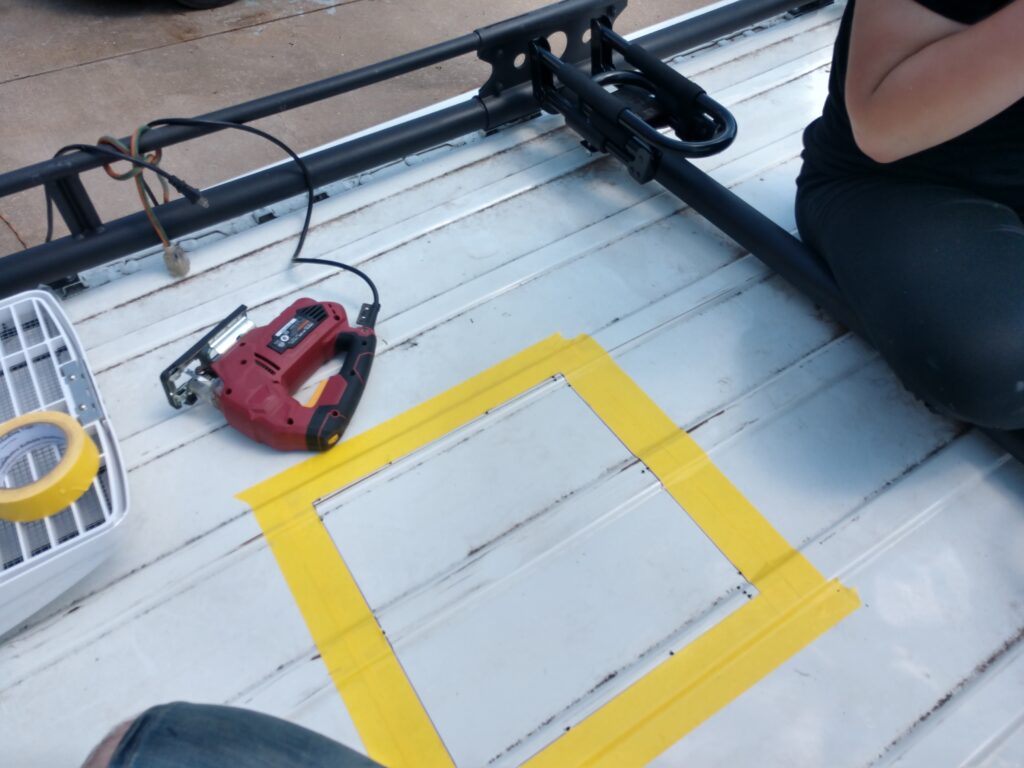
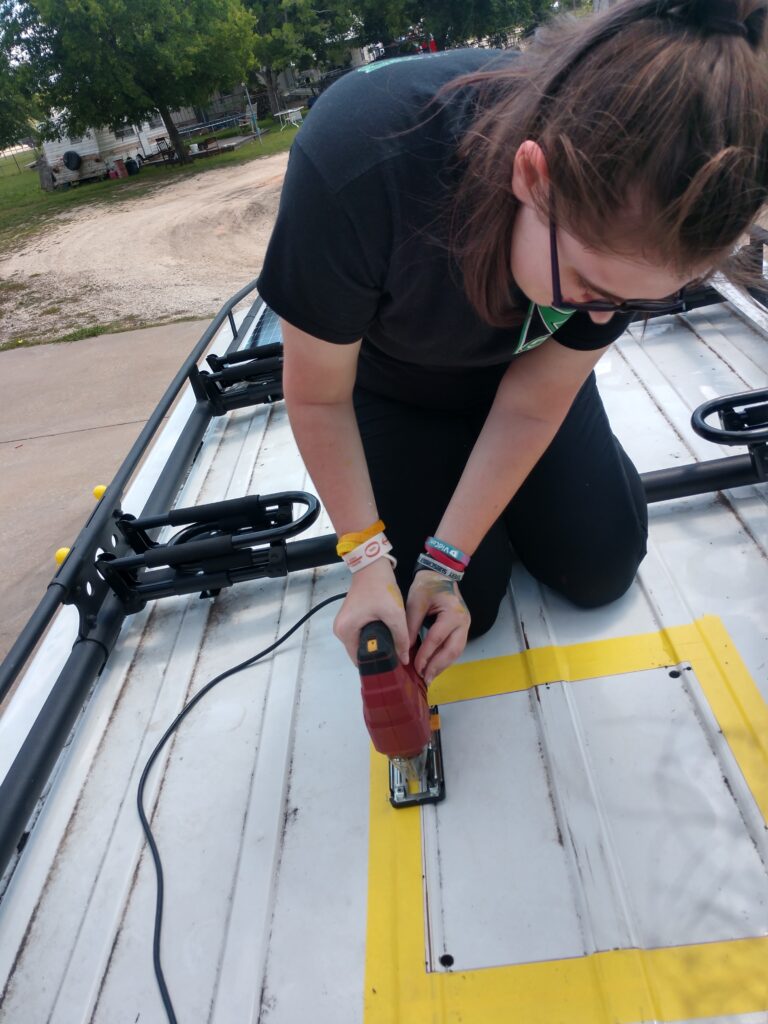
Roof Vent and Side Windows for the NV1500 Campervan
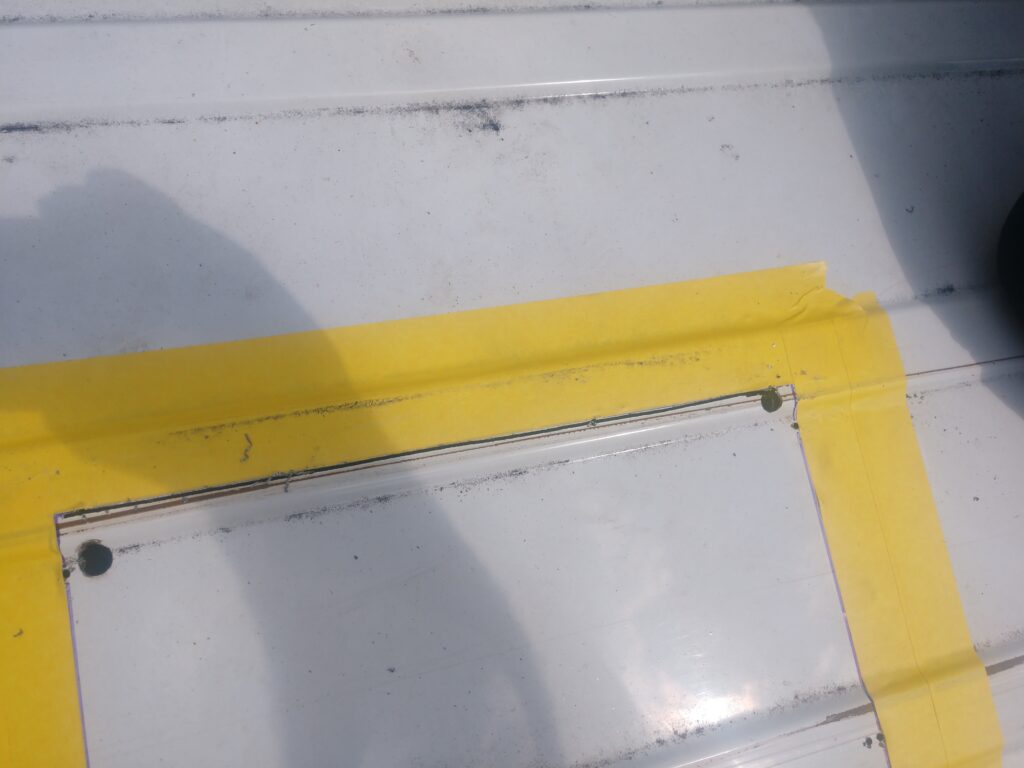
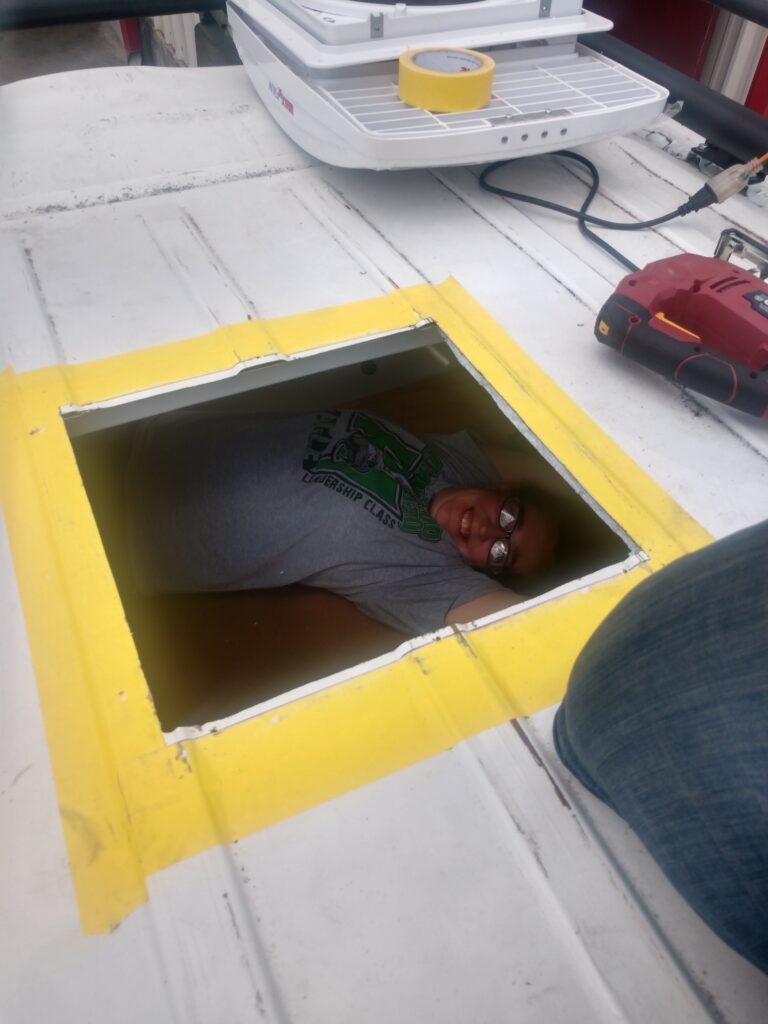
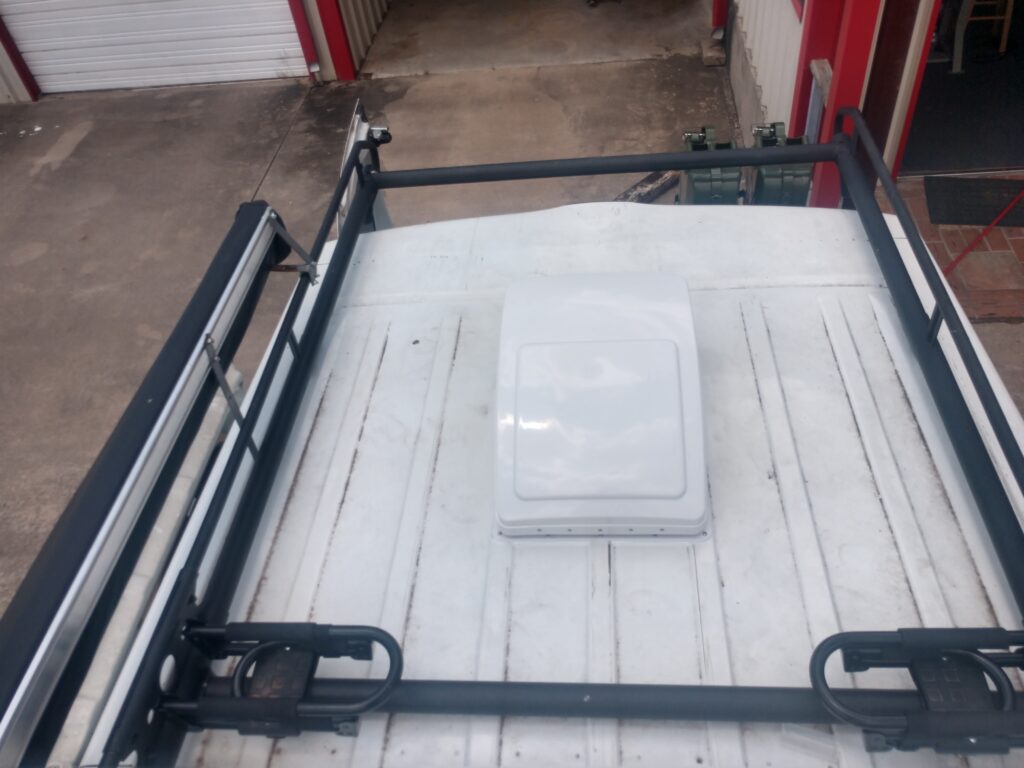
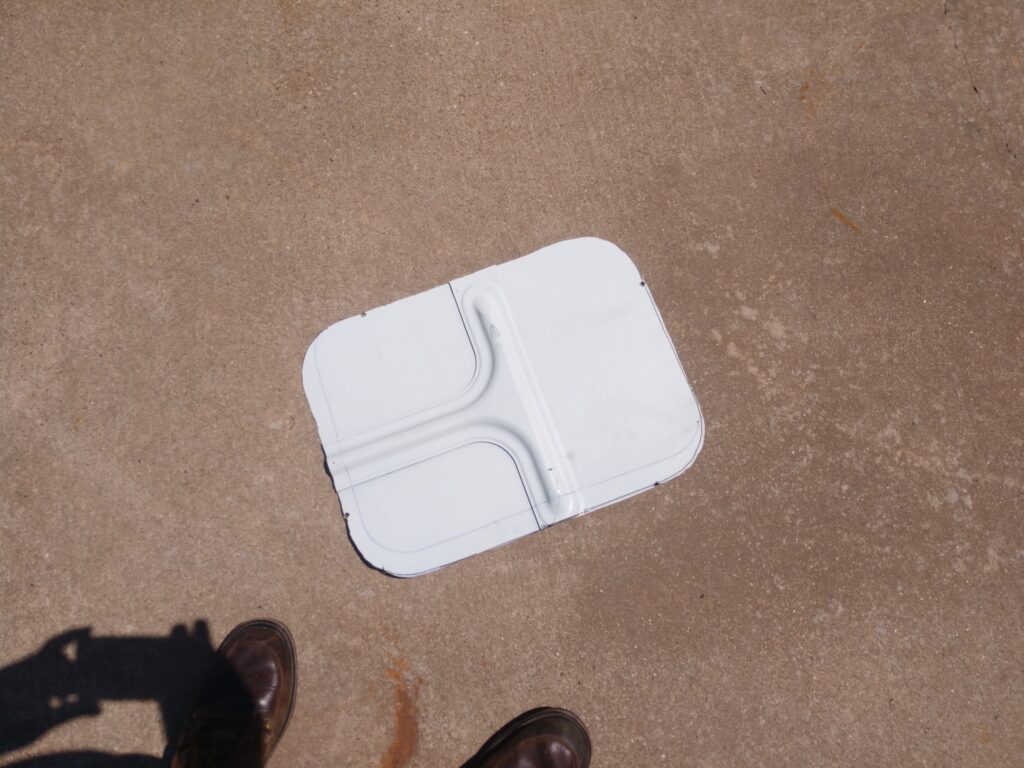
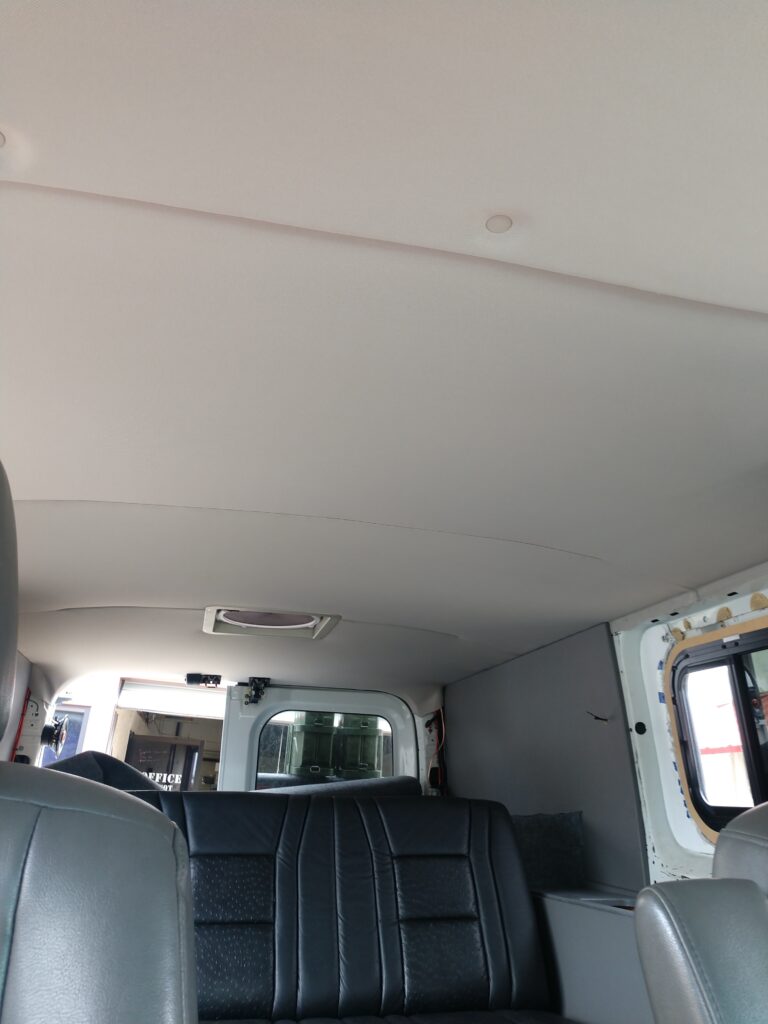
Have you ever seen Swiss cheese? That’s what the van looked like for the next stages. Installing the MaxxFan required cutting a nearly 14″x14″ hole in the roof. Since my helper was terrified to cut the roof, she got to make the first cut. The fan went in with no drama. Some butyl tape and caulk sealed things up nicely. But air can’t flow well with just one hole.
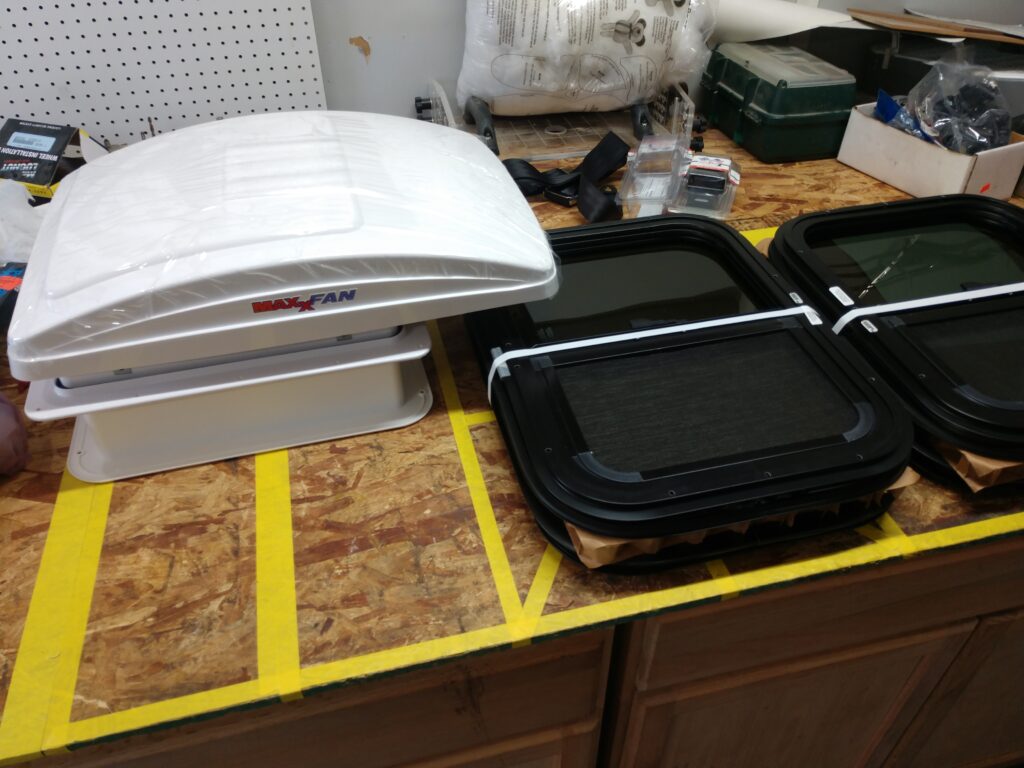
CR Laurence offers some nice side windows for the NV, but at over $600 per side (at the time of the build), I couldn’t justify the cost. I also didn’t want that much glass for multiple reasons. Glass is obviously the weak point when worrying about theft and vandalism, conducts temperature from outside in (hot or cold), and reduces privacy.
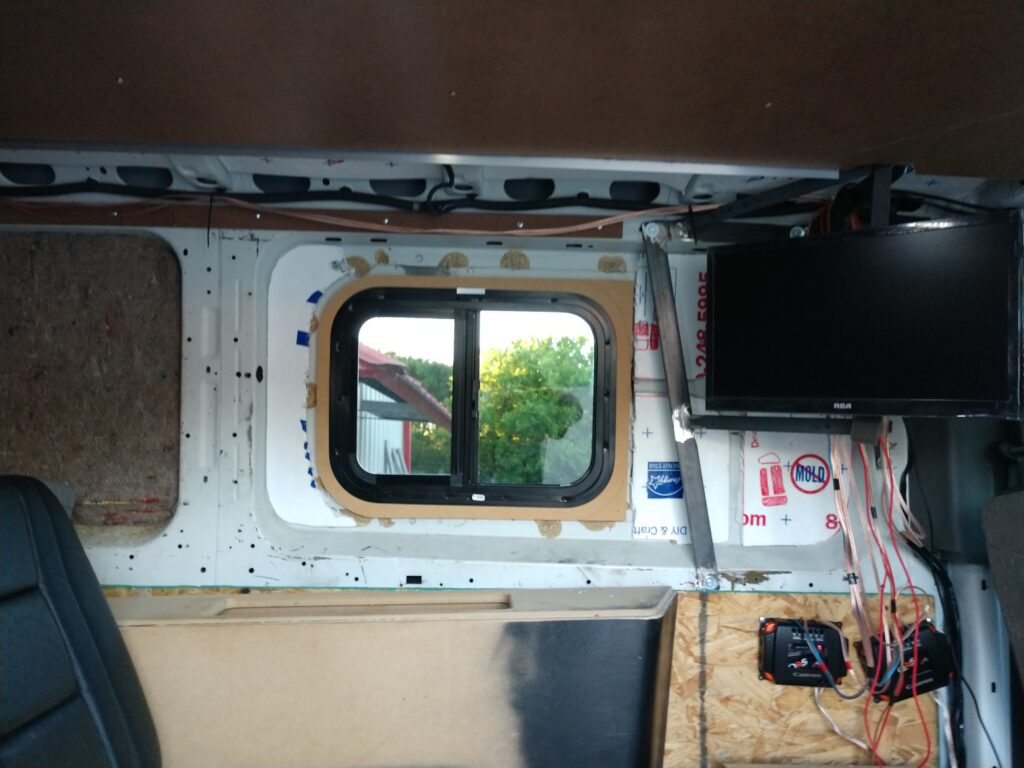
The 15×20 sliding RV windows were the largest we could fit without interfering with the TV mount and came with screens pre-installed. The complex shape of these windows and the tolerance of how tight the fit needed to be necessitated making a template on the router to help with measurements and installation. This template proved helpful in creating the inner spacers and interior panels.
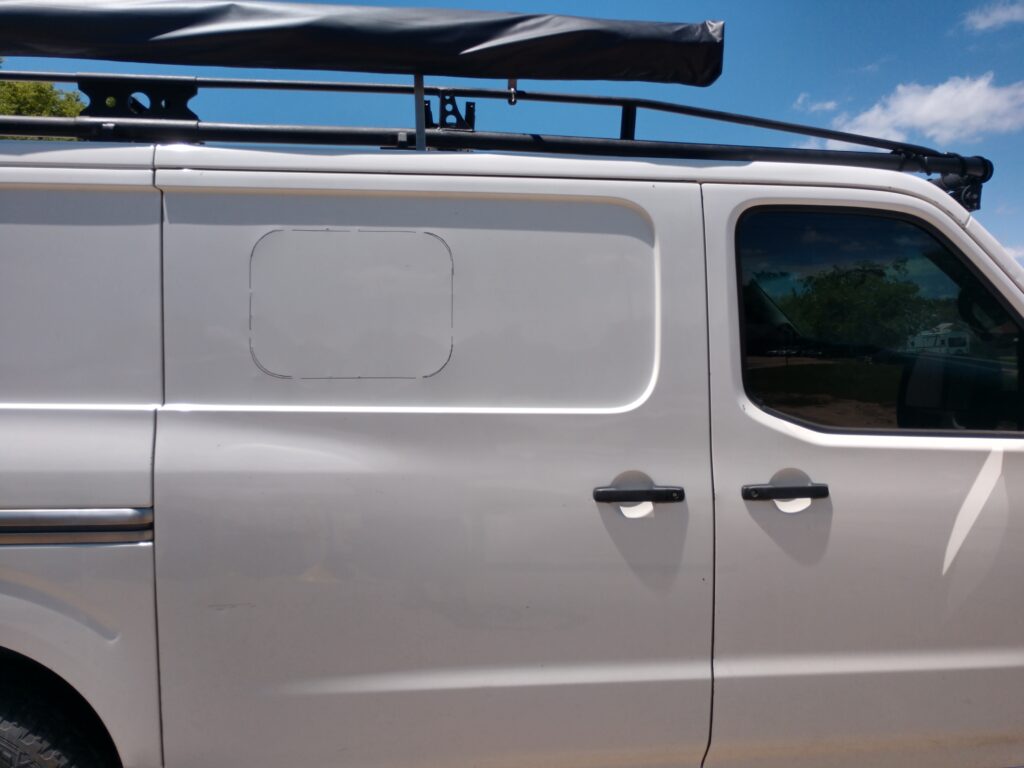
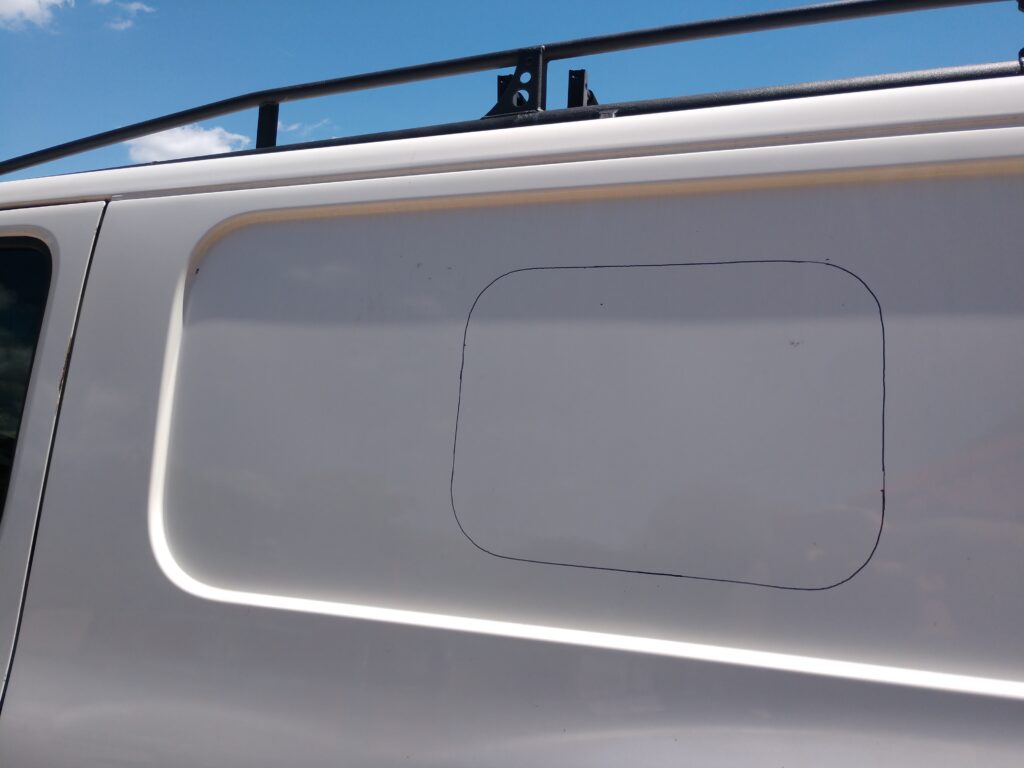
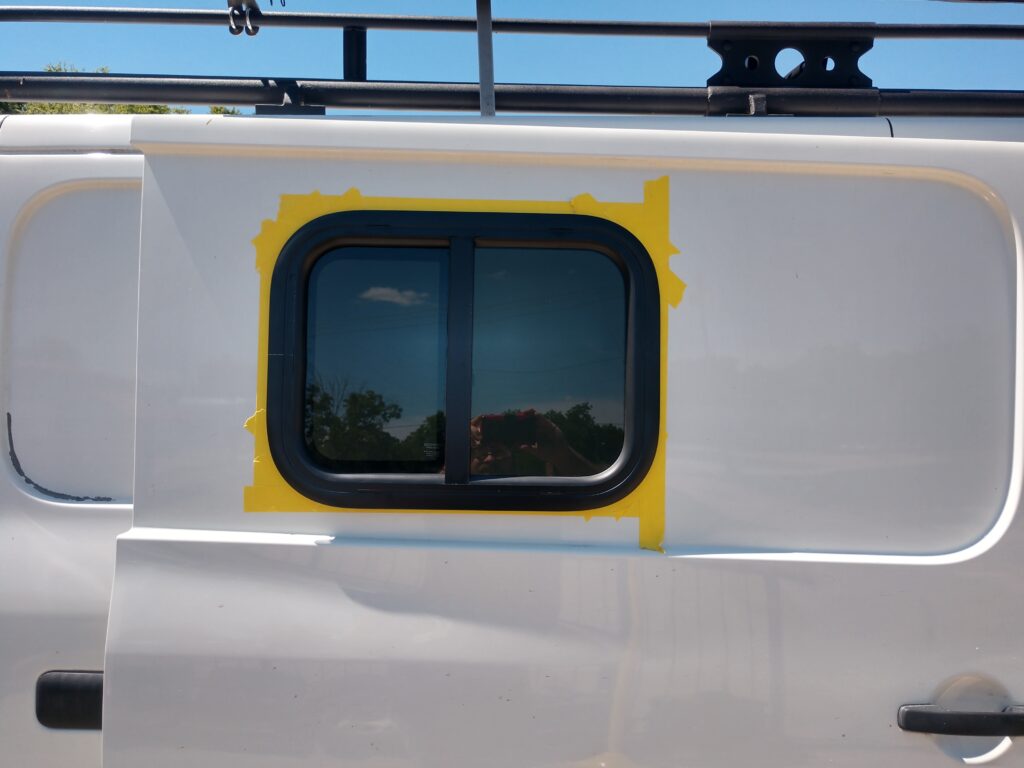
The large white side of the van looked a little strange with its proportionately small windows. We will need to address that later.
It’s in the Details
As with all projects, the devil is in the details for this NV1500 Campervan. This one was no different. The final weeks leading up to vacation were a mad dash to finish everything, then to finish everything we could, and finally to complete the tasks we had time for.
There were dozens of small tasks that needed to be completed, each one taking slightly longer than expected. Rear seat belts, headliner, interior panels, rear interior lighting, cargo area lighting, heavier rear suspension, and lower gearing, all the small gauge wiring for the additional electrical… You get the idea.

All these little details added up to make for some late hours and short tempers. We missed our deadline for completing everything before we left.
The last two nights before departure were spent with 4 am bedtimes, ensuring that everything not finished was safe, secure, and workable.
The morning we were supposed to leave was spent finalizing some temporary mounts for components that needed to be there but didn’t have a home yet, and loading. 8 am came and went, as did noon; however, we finally got on the road at about 1:30.

Time to Hit the Road in Our NV1500 Campervan
Throughout the process of building the NV1500 Campervan, we all experienced victory, defeat, success, failure, and a general sense of accomplishment – all at the same time. Every time something didn’t go as planned, it turned out to be a chance to try a better idea. The van is still not finished, but I’m sure you will see it here when it is.
Want to see some of the places we went? Be sure to check out our travel section!